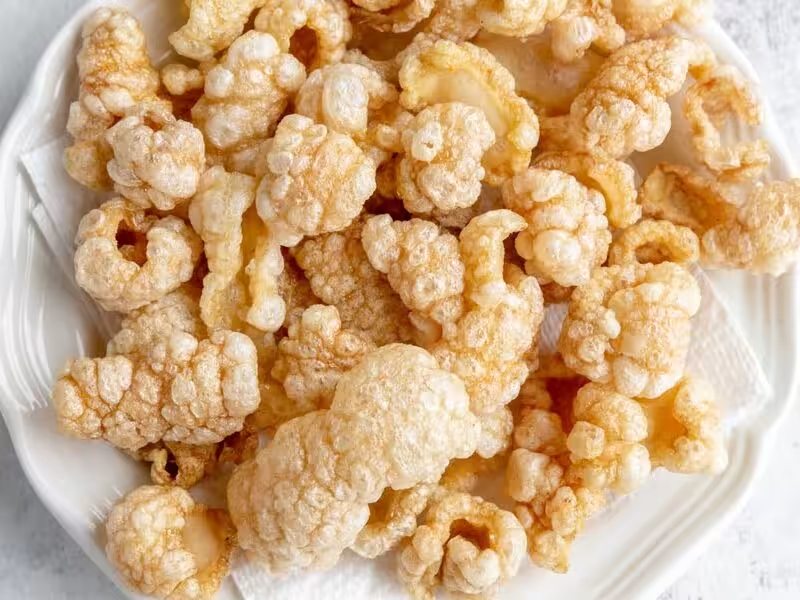
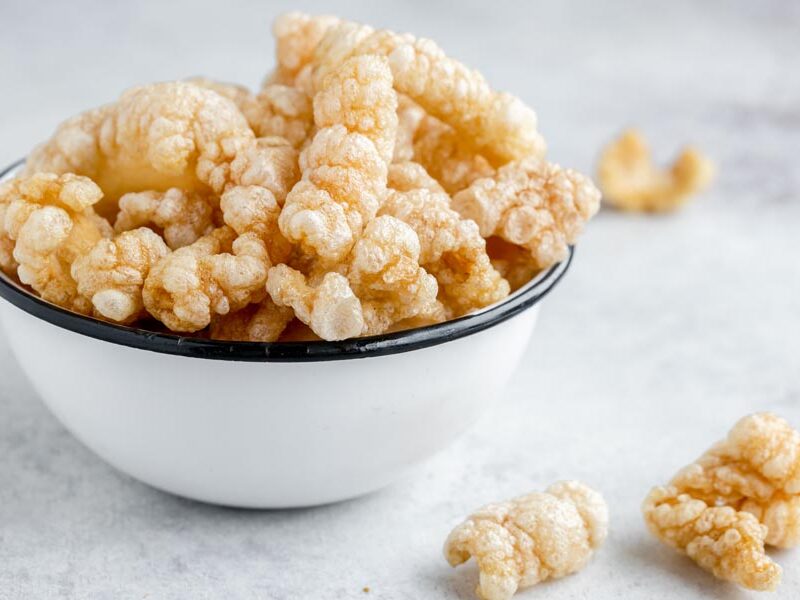
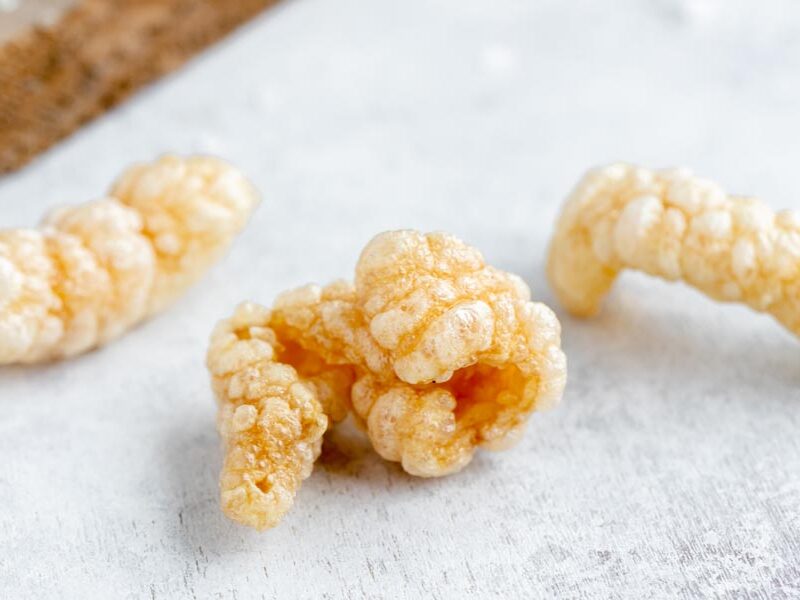
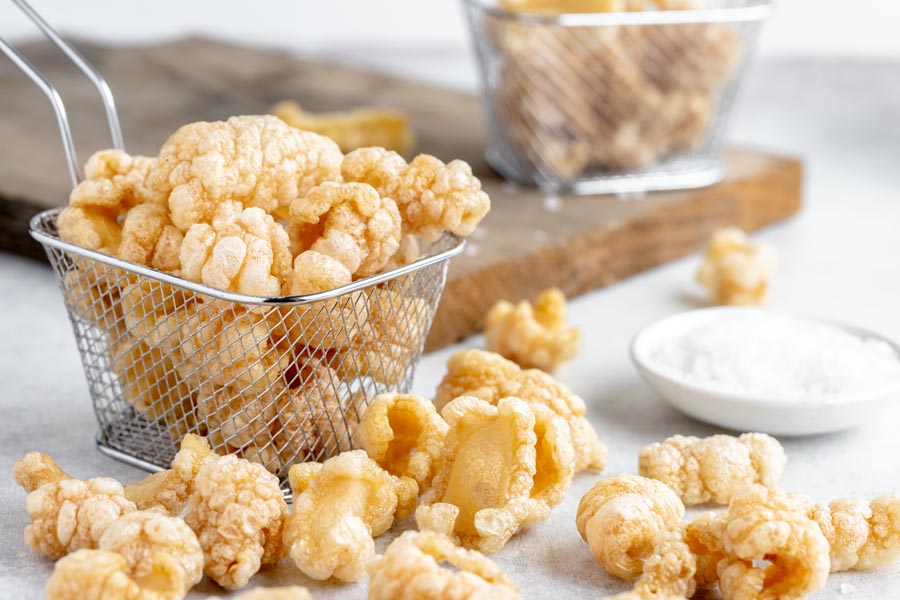
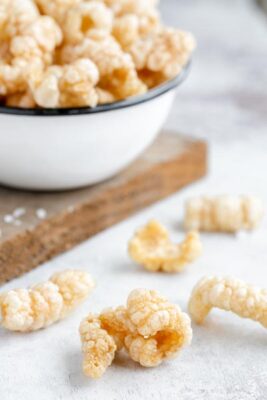
Light, airy pork rinds with a crunch that shatters, and 0g net carbs. The boil is what makes them puff: I simmer the skins for 30 minutes, dry them at 200°F for 4 hours, then I fry at 350°F, where they pop up like popcorn in seconds. 3 ingredients, 8g protein per serving.
Most homemade pork rind recipes skip the boiling step, and that is exactly why they turn out rock hard. Boiling the skins for 30 minutes softens the collagen and renders out enough fat so the skins puff up properly when they hit the hot oil. I learned this the hard way. My first batch without boiling came out like chewing on a leather belt. Now I never skip it.
After boiling, I scrape off the remaining fat layer with a spoon or butter knife. The skin should be translucent and flexible at this point. Once it dries in a 200 degree oven for about 4 hours, those thin pieces puff up like popcorn in about 15 seconds when dropped into 350 to 400 degree oil. I always fry a test piece first to make sure my oil is hot enough. If it sinks and sits there, the oil needs more time.
Three ingredients. That is it. Pork skin, oil (I use avocado oil or lard), and salt. Zero carbs, 8g of protein per serving, and a fraction of the cost of store-bought bags. I buy pork skin from Asian or Mexican grocery stores for around $2 per pound, which makes about 3 bags worth of chicharrones. For something this simple, the quality of the skin matters. I look for pieces that are evenly thick with minimal fat still attached.
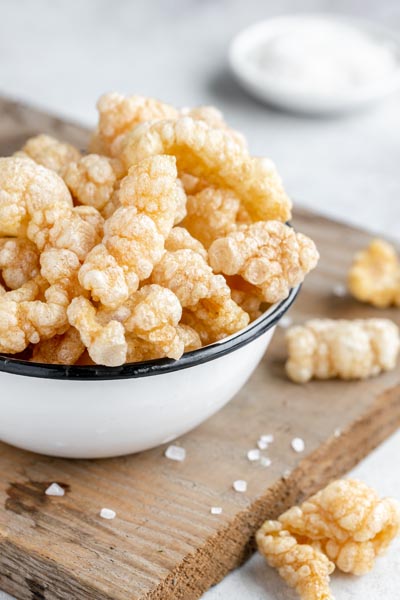
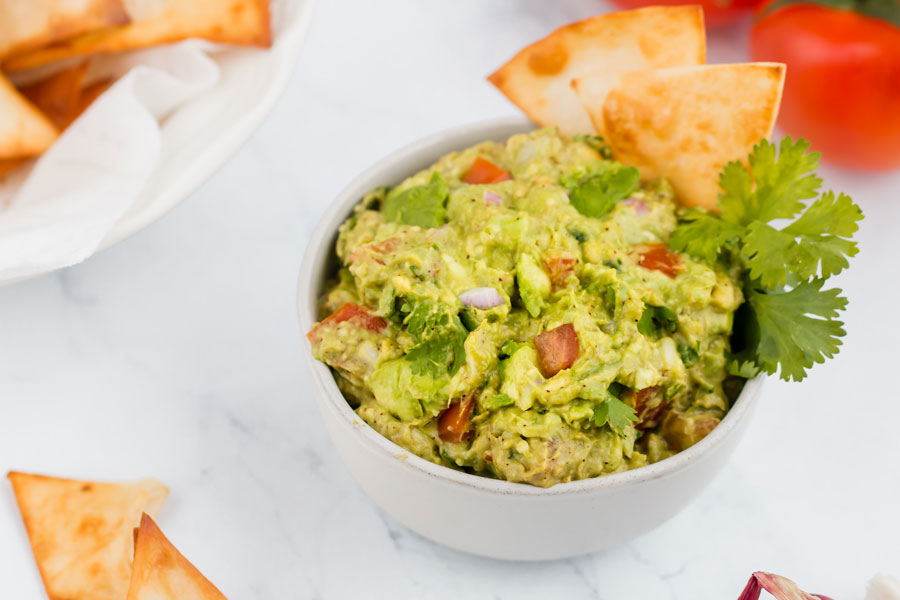
These fried skins work anywhere you would normally reach for chips. Eat them straight out of the bowl, scoop up dip, or pile them with toppings. I bring a big bowl to every football Sunday and they disappear before halftime. They hold up to heavy dips better than store-bought versions because the fresh texture has more structure. I keep them next to my keto tortilla chips and garlic parmesan wings for game day.
Leftovers (if you have any) turn into one of the most useful keto pantry staples. Crush them in a zip-lock bag and you have pork rind breadcrumbs for coating chicken katsu or bacon wrapped chicken tenders. The pork panko adds a savory depth that regular breadcrumbs cannot match, and I use it in at least two recipes a week.
One batch makes about 6 servings at 80 calories each. I usually double the recipe because the dried skins (before frying) store well in a zip-lock bag for up to 3 weeks at room temperature. That way I can fry a small handful whenever I want fresh homemade chicharrones without going through the whole process again. I keep a bag of dried skins in my pantry at all times.
Pork rinds vs chicharrones: what is the difference
Chicharrones can be made from any animal skin and often have a small amount of fat left on them, while pork rinds are only made from pork skin. In the US, most chicharrones are made from pork skin, which is why I use the two terms interchangeably in my kitchen.
Cracklins are the third member of this fried pork skin family, and the difference is simple. While pork rinds include just the skin with no fat attached, cracklins have a layer of fat left on the skin, so the texture is slightly chewier and meatier. I prefer the lighter crunch of a pure pork rind, but I have friends who swear by the richer bite of a cracklin.
Tips for frying perfect chicharrones at home
During the first step, cut as close to the skin as possible without cutting through it. A little bit of fat is fine since it comes off when boiled. If there is still fat attached after boiling, I scrape it off with a paring knife.
Boiling softens the collagen, making the fried pieces easier to bite. I tried skipping this step once and those chicharrones were hard enough to chip a tooth.
Slowly baking at low heat dries the skins and releases trapped fats and oils. Any remaining fat prevents proper puffing, so I do not rush this step. If you have a dehydrator, you can use it at 170 degrees for 6-8 hours instead of the oven. I stick with my oven, but readers have had good results with dehydrators.
Fry longer rather than shorter. Pulling the skins out right after they puff will cause them to deflate, and they will not be crunchy. I give mine 2-3 minutes and stir gently the whole time.
Fry a single test piece first. I always drop one piece in before committing a full batch. If it does not puff within a few seconds, the oil is not hot enough.
For keto snacking, I keep a stash of dried skins alongside my avocado chips so I always have something crunchy ready to fry or grab.
Where to buy pork skin for frying
Pork skin is easiest to find at your local Asian and Mexican markets. I pick mine up for about $2 per pound, which is a fraction of what you would pay for bagged versions. If you do not have access to those, you can also buy them online from Rancho Llano Seco, J&J Packing Co.
Another option is skin-on pork belly. I sometimes find it at my regular grocery store, but you can purchase online from Wild Fork Foods. The benefit is that you get the skins for frying and use the belly for another dish, like bacon wrapped pork chops or a pork loin roast.
Best oils to fry pig skins
To fry pork skins you need any oil with a high smoke point. I reach for avocado oil most often because it is neutral and handles the heat without breaking down.
When deep frying chicharrones, my oil sits around 350-400 degrees Fahrenheit.
Oils I have used to fry pork skins:
Avocado oil (my go-to for a clean, neutral fry)
Light olive oil
Peanut oil
Lard or rendered pork fat(if you are using the skin-on pork belly for your pork rinds, I render the fat to fry them in. It gives the best flavor.)
Seasoning ideas for fried pork skins
Salt is classic, but I rotate through a handful of other seasonings depending on what I am in the mood for. The key is to season immediately after frying while the skins are still glistening with oil. That is when the seasoning sticks.
My favorites beyond plain salt:
Chili powder (I use about 1 teaspoon per batch, sometimes with a pinch of cayenne)
Cajun seasoning (1/2 teaspoon per batch for a mild kick)
White cheddar (2 tablespoons per batch, toss while hot)
For a crunchy snack board, I season three small batches differently and serve them alongside keto cheez its. The variety keeps everyone reaching back for more.
Best store-bought pork rinds
This homemade pork rinds recipe is worth the effort, but when I do not have 5 hours to spare, there are a few store-bought options I keep stocked. These use clean ingredients without added sugars or questionable oils.
Once the fried pork rinds are cooked and cooled, I store them in a paper bag or an airtight container lined with paper towels at room temperature for up to 3 days. The paper towel absorbs any residual moisture, keeping them as crunchy as possible.
For the dried skins (before frying), I store them in a zip-lock bag at room temperature for up to 3 weeks. This is my favorite trick. I dry a big batch, stash the pieces, and fry a handful whenever I want a fresh snack. They puff up just as well after sitting for weeks as they do the day I dry them.
How to make homemade pork rinds
The process takes about 5 hours total, but most of that is hands-off drying time. I spend about 30 minutes of active work between the boiling, scraping, and frying.
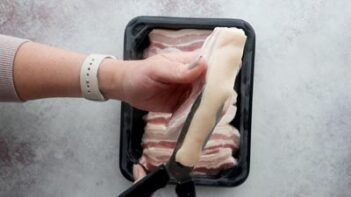
Remove the pork skin. If starting with skin-on pork belly, separate the skin from the fat layer using kitchen shears or a sharp knife. Cut as close to the skin as possible.
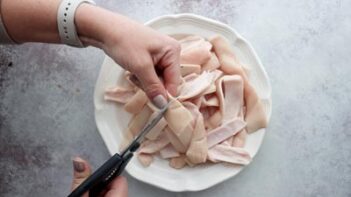
Cut into pieces using kitchen scissors. I aim for roughly 1 by 1 inch squares or 1 by 2 inch strips. They do not need to be uniform.
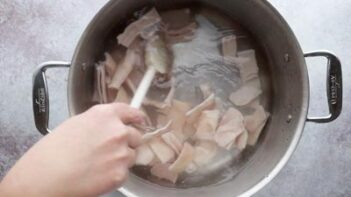
Boil the pork skins in salted water for 30 minutes to soften the collagen. Strain and discard the water.
Scrape away excess fat from each piece. After boiling, the fat slides off easily with a spoon or butter knife.
Dry the pieces on a parchment-lined baking sheet in a 200 degree oven for 4 hours. They should be hard and translucent when done.
Fry in batches in 350 to 400 degree oil (lard or avocado oil). They puff up almost immediately, but leave them in for 2-3 minutes so they stay crunchy instead of deflating.
Season with salt right after frying while still hot.
If starting with pork skin, you can skip this step. If starting with pork belly with the skin on, cut the pork belly into 1 inch strips. Using kitchen shears or a sharp knife, cut the skin away from the fat, cutting as close to the skin as possible without cutting through the skin.
2
Cut into bite sized pieces
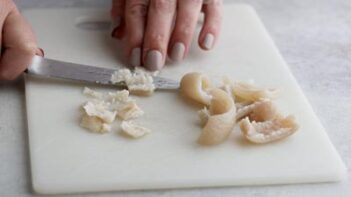
Using kitchen shears or a sharp knife, cut the pork skin strips into bite sized pieces, either 1 x 1 inch strips or 1 x 2 inch strips.
3
Boil pork skins to soften them
Fill a large pot halfway with water. Add 1-2 teaspoons of salt and pork skins to the water. Bring to a boil. Let boil for 30 minutes, stirring occasionally.
4
Strain water
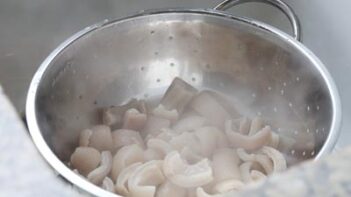
Remove from the heat and pour the water off of the pork skins by straining it through a colander.
5
Remove excess fat
Once the pork skins are cool enough to handle, trim away any excess fat from the skin. Take a paring knife and scrape or slice the fat off the skin of each piece. It’s okay if a little bit of the fat remains. These edges just might be a little softer and may not puff up as much.
6
Scatter on a baking tray
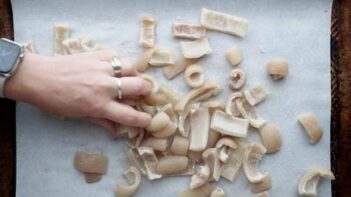
Scatter the pork skins on a large baking sheet lined with parchment paper or foil. Sprinkle with salt. Toss to evenly coat. Then evenly space the pork skins on the tray so they don’t touch each other. Place them skin side up.
7
Bake to dry out
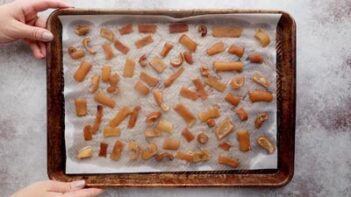
Bake at 200 degrees for 4 hours. Once done baking, remove from the oven. This is a stopping point where you can store your dried pork skins overnight in an airtight container.
8
Heat oil
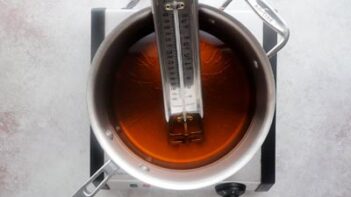
To fry, fill a large saucepan with 1-2 inches of avocado oil, lard or any other oil with a high smoke point. Heat oil to 350 degrees.
9
Fry pork skins
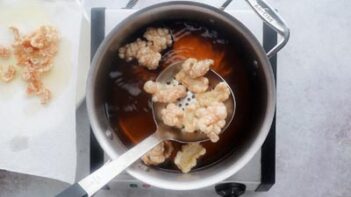
Once oil is hot enough, gently drop in a few pork skins by lowering them into the hot oil with a slotted spoon. Gently stir to help separate the pork skins to keep them from sticking to each other. After a few seconds the pork skins will start to pop like popcorn and puff up into a crispy pork rind. Let them cook for 2-3 minutes, gently stirring to ensure they are cooked through and will remain crispy. Pulling them right after they puff will cause them to deflate a bit and they won’t be as crunchy. Once they are done cooking, remove them with a slotted spoon and transfer to a paper towel lined plate. Season again if needed. Repeat with remaining pork skins.
Nutrition
Per serving: 1 ounce
Calories
80
Fat
5g
Protein
8g
Total carbs
0g
Net carbs
0g
Nutrition is an estimate calculated from the ingredients listed. Brands vary, so check labels if you track closely.
Frequently Asked Questions
Can I use a dehydrator instead of the oven to dry the skins?
I have not personally tested a dehydrator for this, but readers have told me it works well at 170 degrees for 6-8 hours. The goal is the same as my oven method: get the skins completely dry and hard so they puff when fried. I stick with my 200 degree oven for 4 hours because I like the results and do not own a dehydrator, but if you have one, it should work for making homemade chicharrones as long as the pieces come out translucent and snap-dry before they hit the oil.
Why did my pork rinds not puff up?
I have had this happen twice, and both times it came down to one of three things. First, skipping or shortening the boil. When I tried frying without boiling, the skins stayed flat and dense like leather. Second, not drying them long enough. If there is any moisture or trapped fat left, the skins will not puff. Mine need the full 4 hours at 200 degrees. Third, the oil was not hot enough. I always fry a test piece first. If it sinks and just sits there, I wait another few minutes before dropping in the batch.
Can I season the skins before drying instead of after frying?
I salt before drying, exactly like the recipe card says, and save everything else for after frying. Plain salt handles the 4 hour dry at 200 degrees with no trouble. Spice blends are what burn and turn bitter in the oven, so chili powder, cheese powders, and the rest go on right out of the fryer while the skins are still glistening with oil. Salt early, season late.
How many carbs are in pork rinds?
These have zero carbs, which is why I reach for them constantly on keto. The only time carbs sneak in is when sugar gets added during the flavoring process with store-bought brands. My homemade version is just pork skin, oil, and salt, so the carb count stays at zero.
Can I make pork rinds in an air fryer?
I have not had success making puffy fried skins in an air fryer. The puffing action requires the skins to be fully submerged in hot oil. In an air fryer, the heat is not surrounding the skin the same way, so I get flat, hard pieces instead of light, airy chicharrones. I stick with deep frying for this recipe.
Are pork rinds healthy?
I consider them one of my go-to low carb snacks. Each serving of my homemade version has zero carbs, 8g of protein, and about 80 calories. There is no sugar, no flour, no fillers. The fat content comes from the frying oil, and I use avocado oil or lard, both of which I am comfortable cooking with. Store-bought brands can add questionable ingredients, which is one of the reasons I started making my own.
What are pork rinds?
Pork rinds are pieces of pig skin that have been dried and then deep fried until they puff up into a light, crunchy snack. I make mine by boiling the raw skins first to soften the collagen, drying them in a low oven for 4 hours, and then frying them in hot oil where they puff up in about 15 seconds. The result is a zero carb, high protein snack with a hollow crunch that store-bought bags cannot match. In Latin cooking they are called chicharrones, and I use the terms interchangeably.
Can I make these from store-bought pork skin that is not fresh?
I buy my pork skin from Asian and Mexican grocery stores, and it is usually sold fresh or frozen. Frozen works fine. I thaw it overnight in the fridge, then follow the same boil, dry, fry process. I have not tried pre-cooked or pre-seasoned skins from a deli counter, and I would not recommend them since the texture after boiling would be unpredictable. Look for raw, unseasoned skin with minimal fat still attached.
How should I store leftover fried pork rinds?
I store my leftovers in a paper bag or an airtight container lined with paper towels at room temperature. They stay crunchy for about 3 days this way. I never refrigerate them because the moisture makes them go soggy. The paper towel trick absorbs any residual oil and keeps them crisp.
Are chicharrones healthier than potato chips?
I switched to these over chips years ago and the numbers are what keep me there. A one ounce serving of my homemade batch has zero carbs and 8g of protein, while the same amount of potato chips runs around 15g of carbs and only about 2g of protein. That is why I set a bowl of these out instead of a bag of chips whenever people are snacking at my house. They fry up in avocado oil or lard, so the fat is clean, and there is no sugar, flour, or filler hiding in the ingredient list the way there is in most chip bags.
What part of the pig is used to make pork rinds?
Pork rinds are made of skin and nothing else, and the skin can come from the back, belly, or shoulder of the pig. I usually start with skin-on pork belly because I can separate the skin for rinds and cook the belly as its own dish. Whatever the cut, the skin gets boiled, dried, and fried the same way. No meat or fat should be left attached, which is what separates a rind from a cracklin.
Trim the fat tighter than feels necessary before the oven dry. Rushed a few pieces on a double batch, barely puffed. The boil and fry move fast. Scraping is what takes time.
Never made pork rinds from scratch. Trying this week. One thing I’m unsure about: do the skins need to refrigerate overnight after boiling, or can I fry them the same day? Really don’t want to get all the way to the frying stage and have them not puff up.
Same day works if you do the full oven dry first (they need to feel bone dry before they go in). I get better puff with the overnight method though. The more moisture you pull out, the bigger they puff in the oil.
Pop after pop in the oil, I kept stealing them straight off the skimmer. Season while hot, not after. Salt won’t stick once the skin sets and you lose half the punch.
My husband’s family used to fry pork skin at cookouts, the old way, in a big pot outside. I’ve been trying to nail that for years. This gets close. The pop when they hit the oil, the way they puff up, there’s nothing from a bag that does that. Zero carbs was always the draw but the texture is what got me making these over and over.
8g protein for 80 calories, I was sold. Didn’t expect it to be this easy to prep ahead though. The boil-and-dry is where most of the time goes; once that’s done, frying a serving is maybe five minutes. I do a Sunday boil, dry overnight, and fry fresh mid-week when I need something crunchy. One warning: don’t rush the drying. I tried it once and there was no puff. This is the first fried food I’ve ever successfully batch prepped and I’m unreasonably excited about it.
Overnight dry pulls more moisture than the 4-hour oven run. I’ve been landing on longer dry times for exactly that reason. The mid-week fry is the right call.
Dear Annie,
I tried this recipe and it is nothing short of amazing!
Please could you explain what you mean by the overnight dry? Do you mean that you leave them in the oven drying all through the night?
Six or seven batches in and these are just part of the regular rotation now. The boil and dry before frying felt like extra steps at first, but that’s what gives you the hollow crunch instead of the dense bag stuff.
Six batches in and you nailed the part most people skip. The boil is what softens the collagen so it can separate when it hits the oil. Skip it and you’re just deep frying skin, which is a completely different (worse) thing.
Never deep fried anything before this. Was genuinely nervous about the oil temp but when those skins hit and just puffed up I couldn’t believe it worked. Way crunchier than anything from a bag, and zero carbs is still messing with my head. Already planning a batch for the pool this weekend.
Brought these to a pool day cookout last Saturday and set them out next to a bag of regular chips kind of as an experiment. The pork rinds were gone in about eight minutes. One of my buddies who isn’t doing keto picked up the empty bowl looking for more, then started asking what was in them like he expected a catch. Fried these in lard like the recipe suggests and I think that’s what made the crunch so different from anything out of a bag, cleaner and way more substantial. Bigger batch next time for sure.
Lard is what does it. I’ve fried in avocado oil plenty and the crunch is close, but lard has a different weight to it. Your buddy reaching for the empty bowl tells you everything.
I’ve fried enough things to know that homemade pork rinds seemed like one of those “just buy them at the store” projects. Had a pound of pork skin in the freezer from another recipe and finally committed last weekend. The moment they hit the oil and started puffing up I genuinely freaked out a little, because I did not expect that. So much crunchier than the bag stuff, which I didn’t think was possible. Knocked a star because mine came out a bit uneven, probably rushed the drying step, but I know what to fix next time.
Swapped avocado oil for lard and the puff was noticeably better. No idea if it’s the smoke point or just the fat, but worth trying if you want them crunchier.
Spent way too long wondering why mine weren’t puffing until I realized I wasn’t trimming the fat back far enough. Got more aggressive with that step and they puffed up way better. Worth the extra five minutes.
First time making these and the way they puffed up in the oil genuinely got me. Used lard instead of avocado oil because that’s what I had, and I’m not sure I can go back to the bag stuff after this. Any idea if cutting the drying time short affects the puff much?
I prefer lard for these actually – better flavor and it handles the high heat fine.
Short drying time will hurt the puff. The skins need to be completely hard before they hit the oil. When I’ve cut it short they come out smaller and denser instead of that hollow crunch you got on your first batch.
Brought these to a backyard cookout last weekend and my friend who is literally never without a bag of Takis kept reaching for these instead. Yeah, worth the effort.
Fourth or fifth batch now and I finally figured out the drying time matters more than I expected. The ones I rushed through after boiling were decent, but when I let them dry a full 24 hours before frying, they puffed up almost double and had this hollow, crackly texture that I don’t get from the bag stuff. Worth the patience. Still 4 stars because trimming the fat consistently takes a bit of focus, but I’ll keep making these.
Yeah, 24 hours is the difference. I’ve cut corners on the drying time and you can see it in the puff. Fat trimming gets faster once you know what you’re looking for.
Used lard instead of avocado oil and the puff was noticeably better. Way more lift, and the flavor went from nothing to actually tasting like a chicharrón. Didn’t think the fat would matter that much.
Brought these to a cookout last weekend and set them out next to a couple store-bought bags we had as backup. The store bags didn’t get opened. Four or five people picked up a handful and kind of paused, trying to figure out why the texture was so different from what they normally buy. I didn’t rush the drying step and I’m convinced that’s what made them puff up so light.