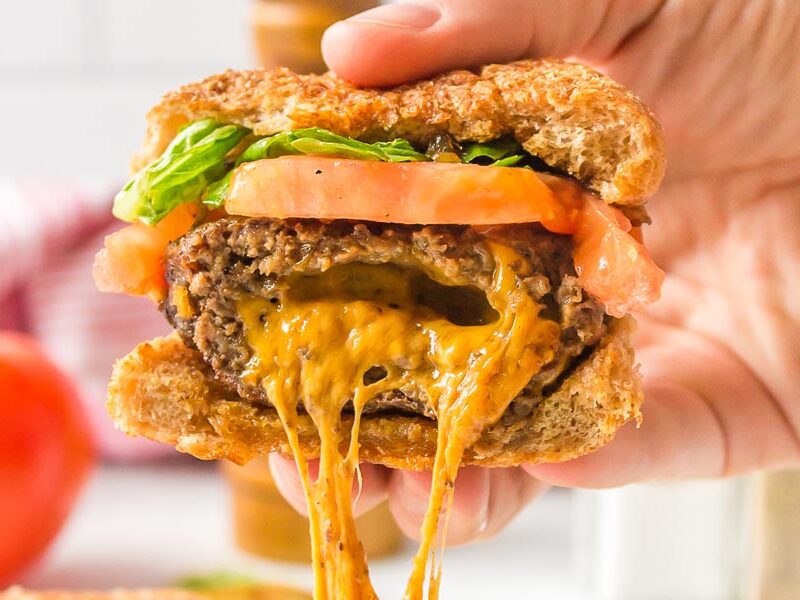
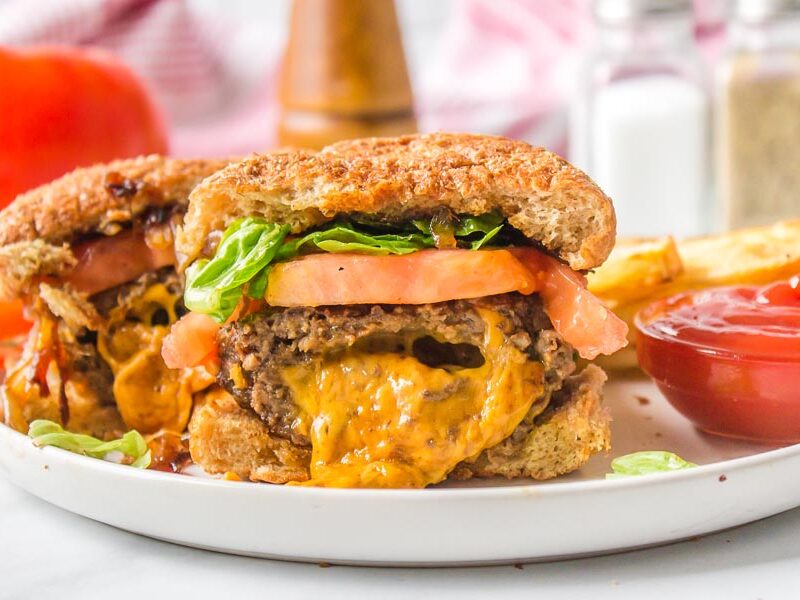
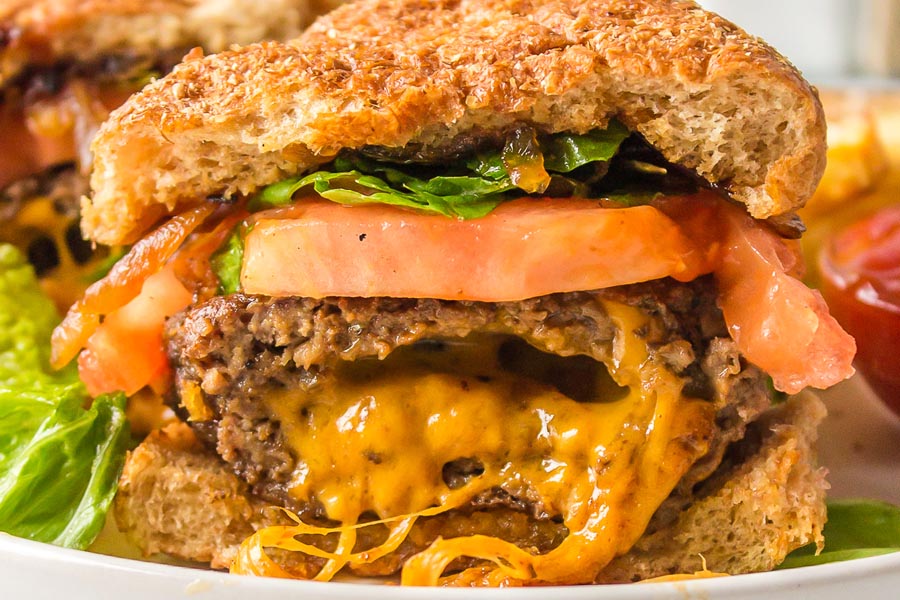
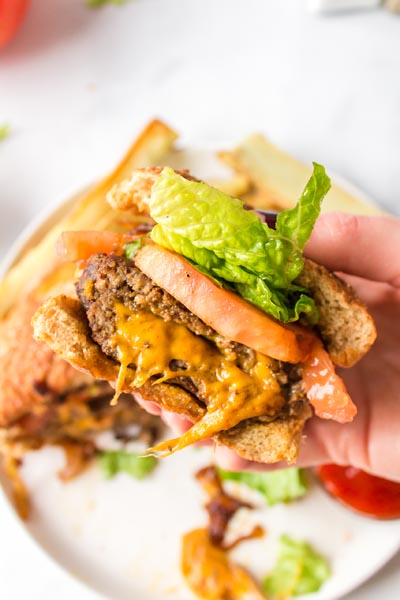
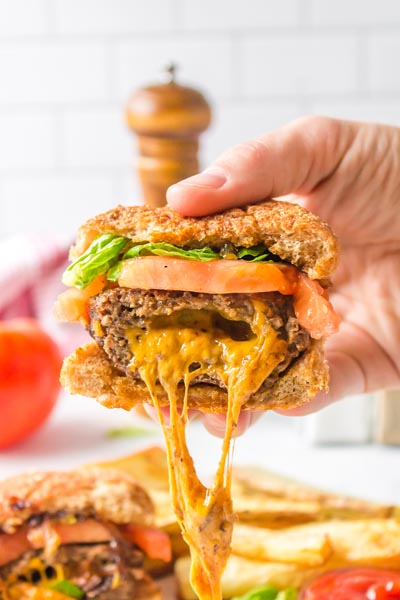
My Juicy Lucy burgers have molten cheddar sealed inside every patty, so each bite gives you that gooey cheese pull. If you have ever chased a genuinely juicy burger, sealing the cheese inside is the trick, because the patty bastes itself in melted cheddar as it cooks. Served bunless or on a keto bun, one burger runs 2.1g net carbs. This stays a weekly keto dinner at my house because they are fast and my family requests them by name.
If you've never bitten into a cheese stuffed burger where the cheddar is actually molten inside the patty, you're about to have a moment. I had my first one in Minneapolis years ago, where two bars have been fighting over who invented it since the 1950s, and it changed how I think about burgers permanently. I came home and started testing my own version that same week, and these have become the thing my family requests most on burger night. Not because I told them it's keto (they genuinely do not care about that), but because that first bite where hot cheese flows out of the center is something a regular cheeseburger just can't match.
I've cooked these on a skillet, a flat-top griddle, and a cast iron pan. The flat-top is my favorite because if the cheese leaks, it sizzles right on the surface instead of falling through grill grates. Cast iron gives the best crust, but you have to be more careful with the heat or the outside chars before the cheese fully melts. A regular skillet works fine too. The real key with any cooking surface is medium-high heat, not moving the patties around once they're down, and pulling them at 160°F internal temperature. That temp matters more with stuffed burgers because the cheese cavity creates steam that makes the outside look done before the center actually is.
The molten cheese center
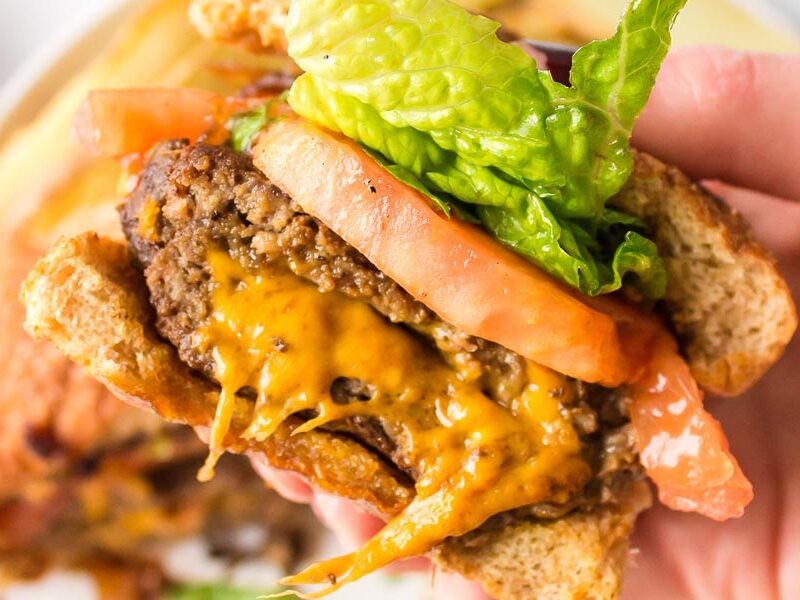
Readers keep landing on the same word for these: molten. Reader Sarah described hers as browned crust with molten cheddar pooling inside, and reader Maria’s advice after making them was to give it 90 seconds or the molten cheddar will wreck you. She’s right. A slice of cheese melted on top of a patty firms up by the time it hits the table. Cheese sealed inside stays liquid, because the meat insulates it, and that melting cheese bastes the beef from the inside while it cooks. It’s why a Juicy Lucy stays juicier than a regular cheeseburger made from the same beef. The melted pocket also holds heat well past 160°F, so that minute of rest is not optional.
I love spreading a smoky sauce on my hamburger buns before I stack everything on top. The richness pairs so well with the melted cheese inside. And if you love the idea of hiding cheese inside meat, try my Stuffed Italian Sausage next. Same stuffing technique, completely different flavor profile.
How I serve a bunless burger
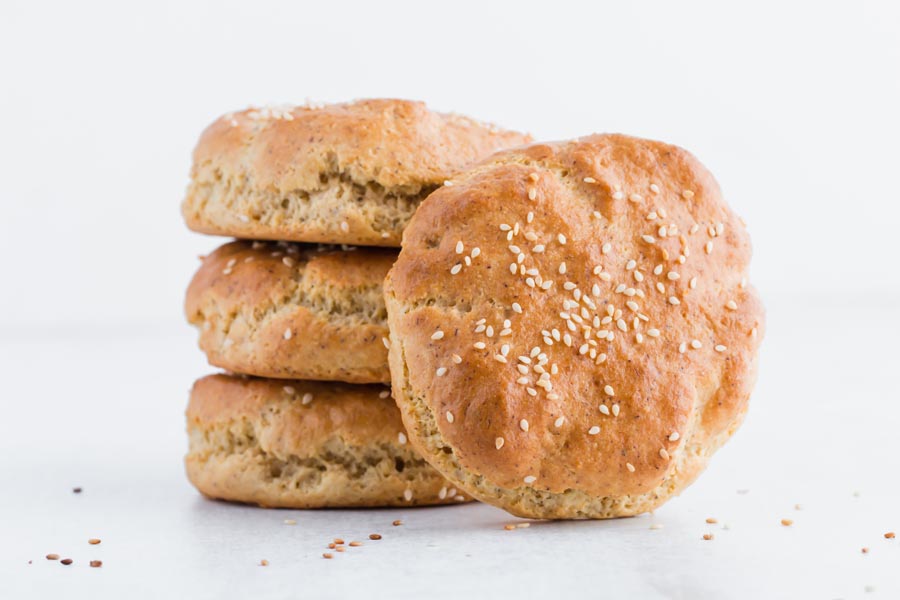
Half the time I skip the bun completely. A bunless burger this rich does not feel like a compromise, because the molten cheese does the job a condiment usually does. My three favorite ways to serve it: wrapped in crisp iceberg or butter lettuce, over grilled onions and pickles with a fork and knife, or on a toasted keto hamburger bun when I want the classic look. Without the bun, one stuffed patty is 2.1g net carbs. My keto bun adds 3.4g net carbs, so the full build stays under 6g. A standard burger bun adds about 25g, and that one swap is the difference. Reader Tamara said most keto burger recipes end up just being burgers on lettuce. The cheese sealed inside is what makes this one feel like the real thing without the bun. If you like thin and crispy over thick and stuffed, my low carb smash burgers are the other burger in my rotation.
A few things I've learned the hard way. Keep your meat cold before you form the patties. If the beef starts warming up in your hands, the fat renders while you're shaping and the cheese won't stay sealed inside. I season the ground beef gently (salt, pepper, garlic powder, onion powder) and barely mix it. Overworking it is the fastest way to end up with a dry, tough burger that no amount of molten cheese can save.
The other thing most recipes skip is resting the burgers for a full minute or two after they come off heat. I know it's tempting to cut in right away, but that short rest lets the cheese set just enough that it doesn't all pour out when you take your first bite. You still get the ooze, just controlled. I wish I'd figured this out sooner because my first dozen attempts had cheese everywhere except inside the burger.
The beauty of this recipe is how simple the ingredient list is. Ground beef, cheese, basic seasonings, and whatever toppings you want. No fillers, no breadcrumbs, no egg binders. Just beef and cheese. I've made these on a Tuesday with nothing planned and on Saturdays when I wanted to go all out with toasted buns and grilled toppings.
I’ve made hundreds of these, and these are the things that actually make a difference.
Use 80/20 ground chuck and keep it cold. I pull the beef straight from the fridge and work fast. Warm beef means soft patties that won’t hold their seal.
Don’t overmix the ground beef. I combine the seasoning with my fingers and stop the second everything is incorporated. The texture should still look a little rough.
Cook on medium-high heat and resist the urge to press down on the patties. That pressure squeezes out juice and can break the cheese seal.
Pull at 160°F internal temperature. Stuffed burgers are tricky because the cheese cavity creates steam that cooks the outside faster than the center. I learned this after cutting into one that looked perfect on the outside but was still pink in the middle.
Use a flat-top griddle if you have one. I’ve had cheese escape on a grill and fall right through the grates. A flat surface catches any leaks and lets you reclaim that crispy cheese.
Grate the cheese or cut it into small pieces so it melts evenly and fills the cavity without leaving a big air pocket.
Toast your buns. I brush the cut side with a little avocado oil and press them face-down on the hot surface until golden. A toasted bun holds up to the juice and melted cheese without getting soggy.
Let the burgers rest for 1-2 minutes after cooking. This is the step I see most people skip. That short rest lets the cheese thicken slightly so it doesn’t all rush out in the first bite.
Best cheeses for a stuffed burger
I’ve tested a lot of cheeses inside these burgers, and the melt really matters. You want something that goes fully liquid at cooking temperature without turning oily or grainy.
American cheese is the classic for a reason. It melts into a smooth, creamy pocket every single time. This is what the original Minneapolis restaurants use.
Sharp cheddar is my personal favorite. It has more flavor than American and still melts well, especially if you grate it instead of using slices.
Pepper jack adds heat without needing hot sauce. I use this when I want a spicy burger without extra toppings.
Blue cheese (called a “Blucy” in Minneapolis) is intense but incredible if you’re into bold flavors. Crumble it into the center rather than slicing.
Swiss and provolone both melt beautifully, though they’re milder. Good options if you want the cheese to complement the beef without competing.
I’ve also started combining cheeses inside a single patty. A layer of American on the bottom for smooth melt, sharp cheddar on top for flavor. Some people add mozzarella for that long cheese pull, but I find it gets a little rubbery once it cools down. American plus cheddar is my sweet spot.
If you’re a cheese lover, my cheese taco shells use the same idea of making cheese the star ingredient.
Best toppings for stuffed burgers
I keep my toppings fairly classic, but you can go in any direction. The cheese inside already carries the flavor, so I like toppings that add crunch, acid, or a little heat to contrast.
For a bunless version, I wrap mine in butter lettuce and it holds together better than you’d think. The crunch of the lettuce against the hot cheese is a great contrast.
Making these at home is straightforward, and I'm going to walk you through exactly how I do it.
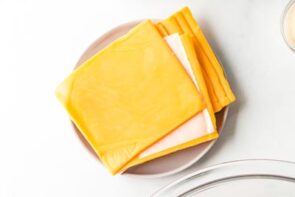
Prepare the cheese and divide each slice of cheddar or American cheese into four squares.
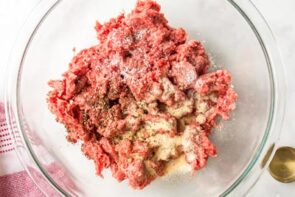
Season the beef. Combine the ground beef, salt, pepper, garlic powder, and onion powder. Mix gently with your fingers. Don't overwork it.
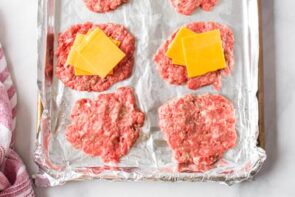
Form and stuff. Divide the meat into 8 thin patties. Press a small well into four of them, add the cheese squares, then top with the remaining patties. Seal the edges with your fingers until you have one solid patty.
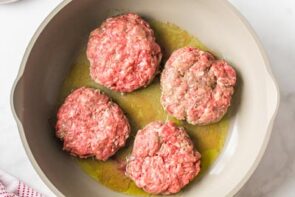
Cook or grill the stuffed burgers on medium-high heat until a crust forms (about 4-5 minutes), then flip once and cook another 3-4 minutes.
While the burgers cook, toast the buns and prep your toppings.
Rest and serve. Let them sit for about a minute off heat, then place on a bun or serve bunless with your favorite sauce and toppings.
What is a Juicy Lucy?
It's a stuffed burger that originated in Minneapolis, Minnesota, where Matt's Bar and the 5-8 Club have been arguing over who invented it since the 1950s. Matt's actually spells it "Jucy Lucy" without the 'i' to stake their claim as the original. Instead of melting cheese on top of the patty, a slice of cheese goes between two thin patties and gets sealed inside. When you cook it, the cheese melts into a molten pocket that oozes out when you bite through. I first had one in Minneapolis years ago and knew immediately I needed to figure out how to make it at home.
Here's what goes into my version:
Ground beef: I use 80/20 ground chuck. The fat content matters because leaner beef dries out fast, especially with cheese sealed inside creating steam.
Cheese: American and sharp cheddar are my go-to picks. Both melt smoothly and stay gooey without turning oily. I've tested fancier cheeses, but these two give the most reliable clean melt.
Kosher salt: I season generously because the cheese inside needs a well-seasoned patty surrounding it.
Black pepper: Freshly cracked if you have it. Pre-ground works too.
Garlic powder and onion powder: Just a little of each. I don't want the seasoning competing with the cheese.
Avocado oil: High smoke point, which matters when you're searing at medium-high heat. Olive oil works in a pinch but it can smoke on you.
Divide each slice of cheese into 4 squares each. Set aside.
For this step
4 slices cheddar or American cheese
2
Form burger patties
To a large bowl, add ground beef, salt, pepper, garlic powder, and onion powder. Combine, but DO NOT OVERMIX! Divide mixture into fourths and those fourths into halves.
For this step
1 lb ground beef
½ tablespoon salt
½ tablespoon pepper
½ tablespoon garlic powder
1 teaspoon onion powder
3
Stuff with cheese
Using a small spoon, make a dip or divot into four of the burger patties. Add 4 small squares (1 slice cheese) into the cavity of these patties. Top with the other patty and seal the sides with your fingers and form one large patty. Do this until you have 4 hamburger patties.
4
Cook the Juicy Lucys
Preheat a large skillet, griddle or a grill to medium high heat. Add oil to the skillet or gently spray the grill with cooking spray. Cook the stuffed cheeseburgers on one side until a crust forms (about 4-5 minutes). Then flip and cook the other side for about 3-4 minutes. Remove, add to a bun, add burger toppings and serve!
For this step
3 tablespoons cooking oil
Nutrition
Per serving: 1 burger (without bun & toppings)
Calories
509
Fat
43.5g
Protein
26.3g
Total carbs
2.3g
Net carbs
2.1g
Nutrition is an estimate calculated from the ingredients listed. Brands vary, so check labels if you track closely.
Frequently Asked Questions
How long should I let juicy lucy burgers rest after cooking?
I rest mine for at least a minute, sometimes two. I know that sounds like nothing, but it makes a real difference. When I used to skip this step, the cheese would gush out immediately and most of it ended up on the plate instead of in my mouth. That short rest lets the cheese thicken just enough to stay inside until you bite through.
Why does the cheese leak out while cooking?
This usually comes down to the seal. When I first started making these, I'd get lazy with pressing the edges together and the cheese would escape every time. Now I take an extra 30 seconds per patty to really pinch the seam shut all the way around. Cold meat also seals better than room-temperature meat, so I work straight from the fridge.
Can I make these with blue cheese (Blucy)?
I've done this and it's incredible if you like bold flavors. In Minneapolis they call it a Blucy. I crumble the blue cheese into the center instead of using slices because it distributes more evenly that way. Fair warning: blue cheese is stronger when it's hot, so I start with less than I think I need.
Can I freeze stuffed burgers ahead of time?
I freeze these all the time. I form the patties, stuff them with cheese, seal them up, and freeze on a sheet pan before transferring to a freezer bag. They keep for about 2-3 months. When I'm ready to cook, I go straight from frozen to the hot pan and add about 2 extra minutes per side. The cheese seal actually holds better from frozen.
What's the best ground beef ratio for stuffed burgers?
I use 80/20 every time. I tried 90/10 once and the patties were noticeably drier and harder to seal. The 20% fat keeps the meat pliable when you're forming the patties and adds juice as it cooks. You need that fat working for you when there's cheese sealed inside creating extra steam.
Can I use ground turkey instead of beef?
I've made these with ground turkey and they work, but the texture and flavor are different. Turkey is leaner, so I add a tablespoon of olive oil to the meat mixture to help with moisture. The seal holds well with turkey. I'd recommend sharp cheddar inside since the stronger cheese flavor compensates for the milder meat.
What temperature should a stuffed burger be cooked to?
I pull mine at 160°F, and I'm strict about this. Stuffed burgers are different from regular patties because the cheese cavity inside creates steam that cooks the exterior faster than the center. I've cut into burgers that looked perfectly done on the outside and found pink in the middle. An instant-read thermometer is the only way I trust the result now. Insert it from the side into the meat, not the cheese pocket, and give it a few seconds to register.
Can I stuff the burger with cream cheese and bacon instead?
I've done a cream cheese, crumbled bacon, and diced jalapeno stuffing inside these and it's a completely different burger. The cream cheese melts into this rich, tangy center that's almost like a sauce. I use about a tablespoon of the mixture per patty and make sure the bacon is fully cooked before stuffing (raw bacon won't crisp inside the burger). The seal holds the same way. My only tip is to go easy on the jalapeno if you're heat-sensitive, because it intensifies when it's trapped in there with the steam.
What makes a burger juicy?
For me it comes down to a few things. I use 80/20 ground chuck because that fat is what keeps a juicy burger from drying out on the heat. I barely mix the meat, and I never press down on the patty while it cooks, since that squeezes the juice straight into the pan. Sealing the cheese inside these stuffed patties buys me extra insurance too, because the melted center steams the meat from the inside and keeps it moist all the way through.
What is the difference between a Juicy Lucy and a regular burger?
A regular cheeseburger has the cheese melted on top of the patty. A Juicy Lucy hides it inside. You make two thin patties, seal a slice of cheese between them, and cook them as one thick patty. The cheese turns into a molten pocket in the middle, so the burger stays juicier and the first bite gives you flowing cheese instead of a firm slice. It also cooks differently. The cheese cavity creates steam, so I verify 160°F with a thermometer instead of trusting how the outside looks.
How many carbs are in a Juicy Lucy burger?
Mine comes out to 2.1g net carbs per burger without a bun, since it is just beef, cheese, and seasonings. The bun is where the carbs hide. A standard burger bun adds around 25g, while one of my keto hamburger buns adds 3.4g net carbs, so the full build stays under 6g. That swap is the whole difference between a keto dinner and a carb-heavy one.
These burgers are the thing I make on repeat now, sixth or seventh round since spring I think. You mix the seasoning right into the beef but I started patting it on the outside of the patties instead and the crust came out way better, meat stayed looser too. Not messing with anything else though, your amounts are right.
Really good. My dad salts everything at the table and he never reached for the shaker once. Makes sense with the half tablespoon of pepper I dumped in with a pound of beef.
I stirred a tablespoon of softened cream cheese into the sharp cheddar before stuffing and the melt is completely different. Way smoother, holds better under heat, and you lose less to the pan. Annie, I keep coming back and this one’s another good one. One note: the garlic powder runs heavy for my taste. Dropped it by half the last two batches and the beef comes through cleaner. The cream cheese also patches an imperfect seal pretty well, which I only figured out after making a mess.
Mixing cream cheese into the cheddar instead of straight, never tried it, but now I have to. The seal-patch side effect makes total sense when you’re still figuring out the pinch.
Vanessa, if you pressed them firmly, I’d look at the rest too. I give mine at least a minute before I cut in. Skipped it once and the cheese went straight to the pan. Sixty seconds of patience, trust me.
Made these on the grill last weekend and lost the cheese out of two patties. Is that more about the pinch seal on the edges or does heat level matter more?
Both play a role but the seal is where I’d focus first. I take an extra 30 seconds per patty to really work that pinch all the way around the edge. On the grill, medium heat helps too – too hot and the cheese melts before the patty can contain it.
Browned crust, molten cheddar pooling inside, 2.1 net carbs. The Juicy Lucy was the first thing I put on my ‘gone forever’ list when I went keto. Making this felt like getting it back.
Had a few people over for dinner on Friday and made these knowing at least two guests are not keto, so I was just curious how they’d land. Set them out without explaining anything about the cheese inside. Someone cut one in half to share and the filling just poured out. The whole table stopped. One friend kept pressing her patty to watch the cheese move, which is either weird or a sign that the seal is doing exactly what it’s supposed to. The 80/20 matters for this, by the way. I tried it once with leaner beef and the seam separated in the pan before it even hit a plate.
Was convinced the cheese would blow out the second it hit the pan. Pressed the seams tight like the recipe says and it actually held. That molten pull when you bite through? Real.
Grew up in Minneapolis eating these at Matt’s Bar and genuinely thought they were gone when I went keto. That cheese pull when you bite through the sealed patty? Exact same thing I remembered. Made these on a Tuesday night and sat there kind of stunned for a second. Four stars only because I need to work on my patty sealing technique, but that’s a me problem, not a recipe problem.
A Tuesday night stunned silence is basically the highest compliment a recipe can get. Matt’s Bar set the bar impossibly high and I’m still a little proud every time someone has that moment.
Tip that helped me as a first-timer: press the edges of the patty together really firmly before it goes in the pan. I ran my thumb around the seam twice and had zero cheese blowouts. The pull on the inside when you cut into it is so satisfying.
Was convinced the cheese would blow out the sides during cooking (it’s happened to me with thinner patties at higher heat). Went heavier on the seal and kept things at medium-high, and the sharp cheddar held. There’s something about biting into cheese that’s been sealed inside the whole time, it coats the beef in a way that melting on top just doesn’t. I’ve made a lot of burgers, and this is the first time the cheese felt built into the burger rather than just sitting on top.