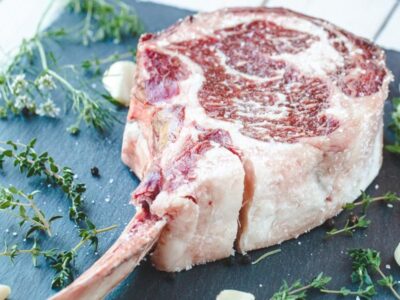
Sous vide steak gives me a tender, perfectly medium-rare center every time. It's the most reliable method I've found at home. 64g protein and 0g net carbs, plus three ways to finish the sear: grill, cast iron, or torch.
I started cooking steak in a water bath back in 2016 when I got my first Anova circulator, and I haven't gone back to grilling blind since. The whole idea is simple: you heat water to the exact temperature you want your steak to finish at, seal the meat in a bag, and let the water do the work. No guessing, no cutting into the meat to check, no dried-out edges with a raw center.
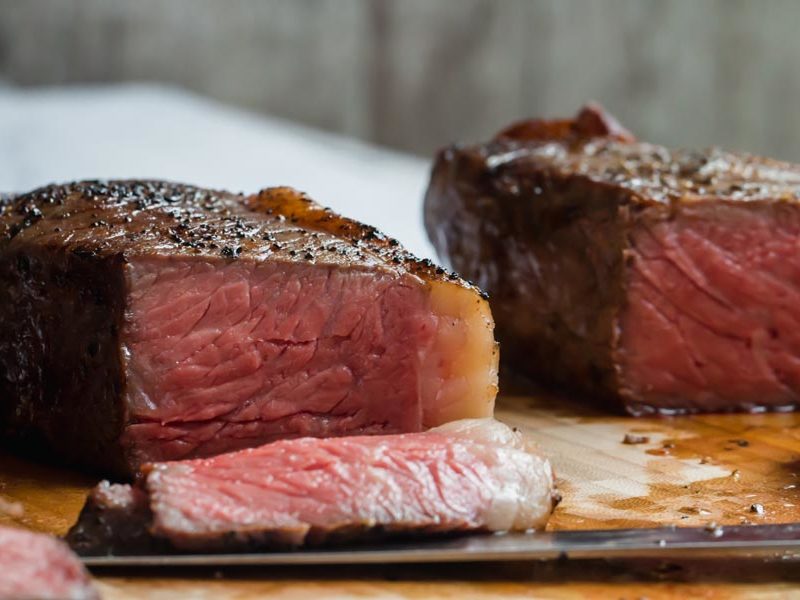
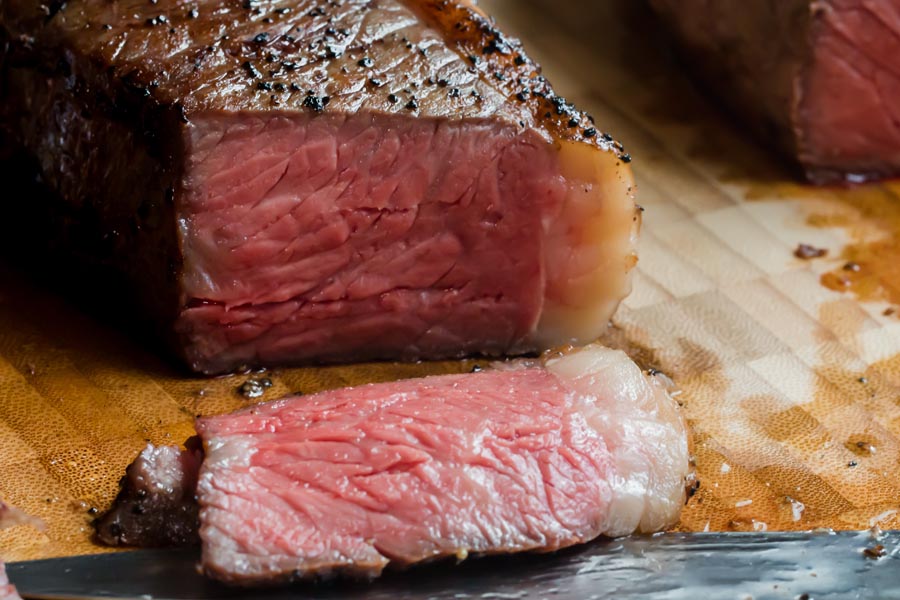
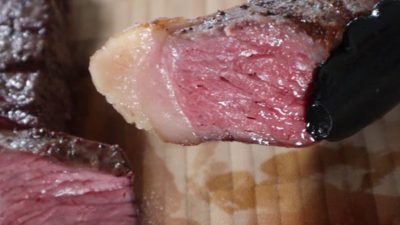
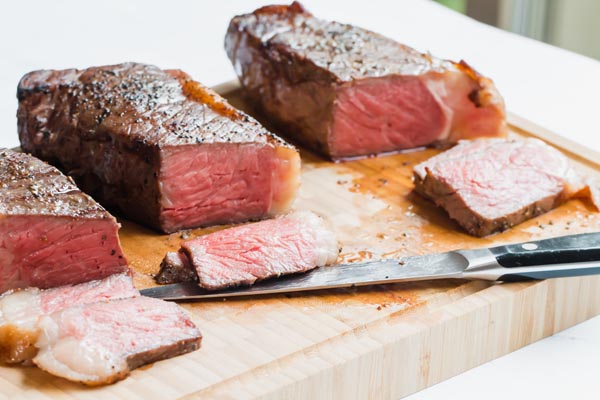
What sold me was the first time I pulled a ribeye out of the bath at 131 degrees. The entire steak, edge to edge, was the same blush pink. I'd never gotten that from a grill or cast iron alone. The grill gives you a great crust but the inside is always a gradient, medium rare in the middle fading to gray at the edges. With this method, every single bite is the doneness you chose.
The process fits naturally into a keto kitchen because there's nothing to add. It's beef, salt, pepper, and heat. I season my steaks before they go in the bag, sometimes with a sprig of rosemary or a couple of crushed garlic cloves, and that's it. After the bath, I pat the steak dry, let it cool for about 10 minutes in the fridge, then finish with a hard sear. That cooling step matters because it gives you a wider window to build a crust without pushing the interior past your target temp.
I've tested all three finishing methods dozens of times. The cast iron pan sear is my everyday go-to because the butter basting adds flavor you can't get from a grill. The grill finish is what I use when I'm already outside cooking for a crowd. And the torch is fun for a quick hit of char, though I'll be honest, if you hold it too long the steak picks up a faint gas taste.
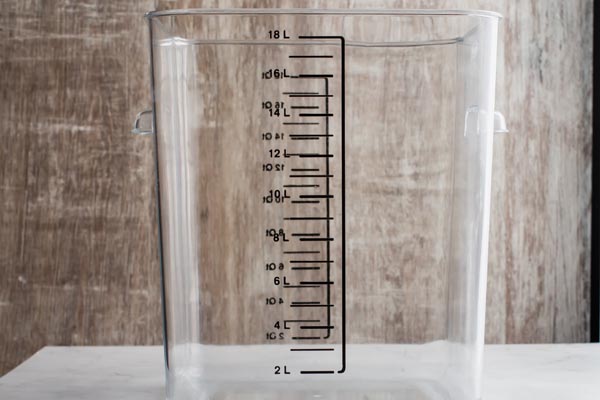
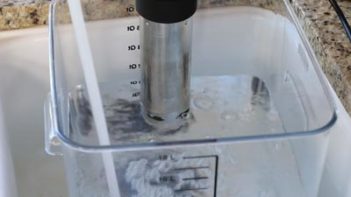
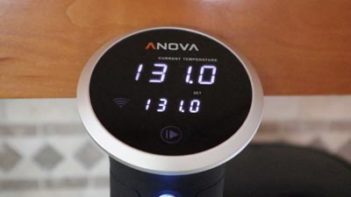
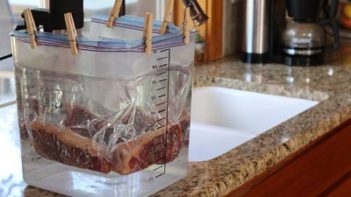
Setting up the water bath is the easiest part. I use a big stockpot for weeknight dinners when I’m cooking one or two steaks. If I’m cooking for a crowd, I switch to a sous vide circulator (I use the Anova with wi-fi) clipped to a larger plastic tub that lets me clip multiple bags to the sides and cook different cuts at the same temperature.
Fill the vessel with warm water before attaching the circulator. Starting with warm water cuts the preheat time in half. I set my circulator to 131 for medium rare, then let it come to temperature while I prep the steaks. The whole setup takes me about 5 minutes.
Bagging the Steak for Sous Vide
I’ve tried both vacuum-sealed bags and regular gallon Ziploc bags, and I reach for the Ziploc almost every time. It’s cheap, it doesn’t squeeze the meat out of shape, and you can fit two steaks in one bag if you position them vertically side by side (not stacked on top of each other, which blocks even cooking).
If you do vacuum seal, stick to one steak per pouch. The vacuum pressure can deform thinner cuts and press them together if you pack more than one.
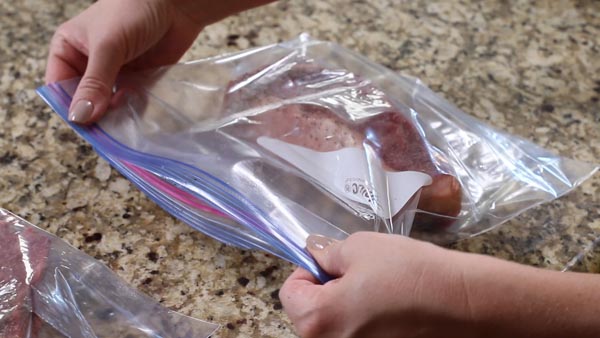
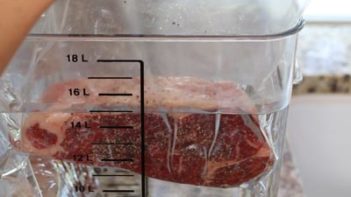
Getting the air out of a Ziploc is simple once you’ve done it a couple times. I partially seal the bag, dip it slowly into the water bath (seal side up), and let the water push the air out as the bag sinks. Once the waterline is just below the seal, I zip it the rest of the way. If the bag floats after sealing, there’s still air trapped inside and I start over. Trapped air means uneven cooking because the water can’t make contact with all sides of the steak.
Once the bag is sealed, I clip it to the side of the pot with a binder clip and make sure the entire steak is submerged. If the water level is low, I just add more.
Cook times by doneness and thickness
Here’s the temperature and time chart I reference for every cook. These times assume a steak between 1 and 2 inches thick.
Doneness
Temperature
1 inch
1.5 inches
2 inches
Rare
120-129°F
1 hour
1.5 hours
2 hours
Medium Rare
129-135°F
1 hour
1.5 hours
2 hours
Medium
135-144°F
1 hour
1.5 hours
2 hours
For most steaks in that range, I cook for 1 to 2 hours. A 1-inch steak is done in about 1 hour; a 1.5 to 2-inch cut needs closer to 2 hours. The water bath is forgiving since the temperature stays locked, so if dinner runs late and you go to 3 hours, the steak will still be fine.
Where I draw the line is 4 hours. Past that point, the texture starts to shift. The steak gets softer and loses moisture. I learned this the hard way when I forgot about a couple of strip steaks one afternoon. They were still medium rare in color but the bite was mushy, not what you want.
If you’re cooking from frozen (yes, you can), add about 1 extra hour to the bath time and plan on an extra minute per side when you sear. I do this regularly when I forget to thaw steaks and it works perfectly. The one thing I watch for is making sure the bag stays submerged, since frozen steaks tend to float more at the start.
Can you leave steak in the water bath too long?
The short answer is yes, but not in the way you’d think. The temperature won’t climb past what you set, so the interior stays at your target doneness. What changes is the texture. The longer the steak sits in the bath, the more the muscle fibers break down. At 1 to 2 hours, you get a pleasant, traditional chew. At 4 hours, the steak feels noticeably softer and starts losing juice.
I’ve pushed it to 5 hours once out of curiosity and the ribeye came out almost mushy. Still pink, still technically medium rare, but the eating experience was off. So I keep my window at 1 to 2 hours for standard cuts and never go past 4. One safety note: if you are cooking below 130 degrees for rare, keep the total time under 2.5 hours for food safety.
This is even more critical with seafood. I’ve overcooked shrimp in the bath by just 20 minutes and they turned to mush. Steak is more forgiving, but it’s not bulletproof.
Three ways to sear after the water bath
First you must cool the steak
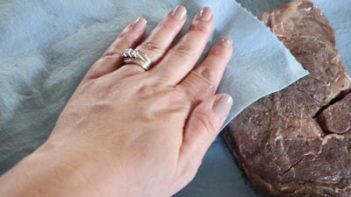
Once your steak comes out of the bath, pat it completely dry with paper towels. Moisture is what prevents a good sear. The steak will look gray and unappetizing at this stage, and that’s totally normal. The sear is what builds the brown crust and the Maillard flavor.
Here’s a step I never skip: I refrigerate the steak for about 10 minutes before searing. Straight out of the bath, the interior is sitting right at 131 degrees (or whatever you set). If you throw it directly onto a screaming hot pan, the sear pushes that interior temp higher and you lose the medium rare you worked for. Cooling it down first gives you a bigger buffer, so you can sear for a full 2 minutes per side and still keep that edge-to-edge pink.
What ways can you finish or sear your steak?
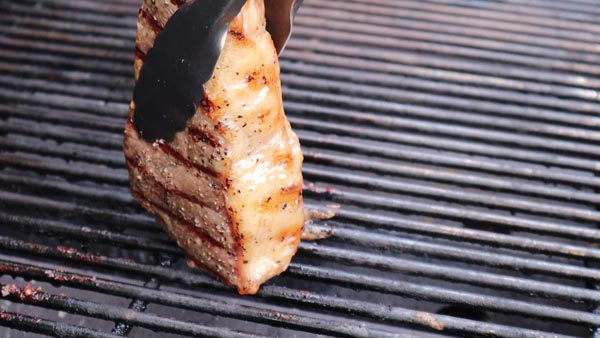
Seared on the grill
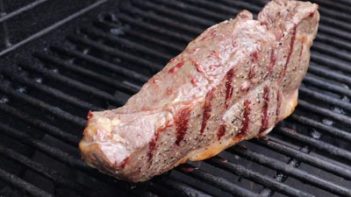
I preheat my grill to 500 degrees and oil the grates before the steak goes on. The whole sear takes about 1 to 2 minutes per side. I use this method when I’m already grilling something else or cooking for a group, because it’s fast and I can sear 4 steaks at once without crowding a pan.
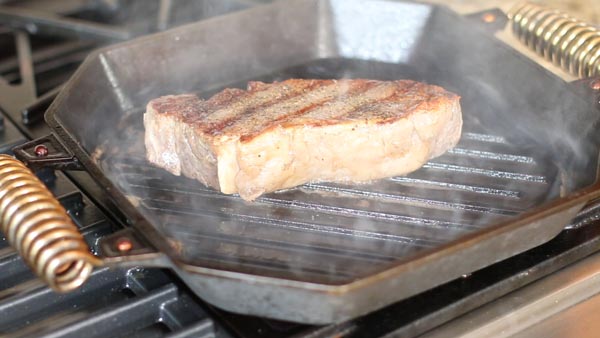
Pan seared (my everyday method)
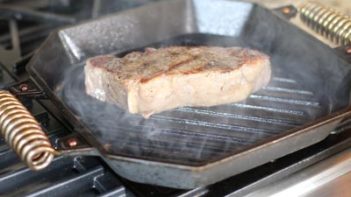
This is how I finish my steak 90% of the time. I preheat my cast iron (I use a Finex for even heat and cooler handles) over medium-high, add a couple tablespoons of avocado oil, then lay the steak in and drop a knob of butter alongside it. I sear for 1 to 2 minutes per side, spooning the melted butter over the top the entire time. I picked that up watching Gordon Ramsay years ago and now I can’t do it any other way. The butter basting builds a richer crust than oil alone.
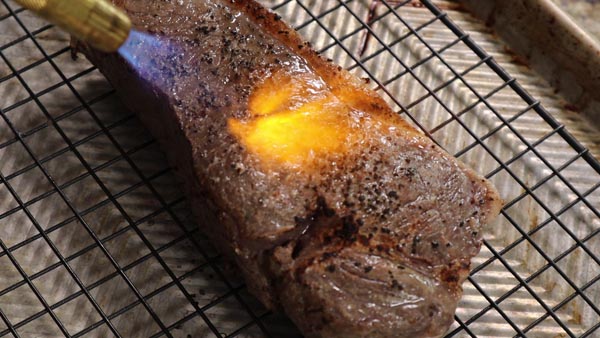
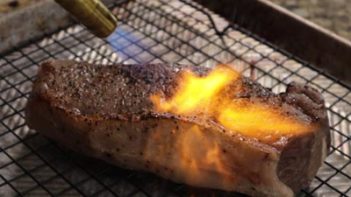
The torch gives you the fastest sear and crisps up fat caps beautifully. I hold it about 3 inches from the surface and move steadily across each side for about 2 minutes. The downside is that if you linger too long in one spot, the steak picks up a faint gas taste. I’ve found that pairing the torch with a quick pan sear on one side (torch the top while the bottom sears in cast iron) gives the best of both worlds without overdoing either.
How I meal prep steak for the week
One of the things I love most about this method is how well it works for meal prep. I cook 4 to 6 steaks on a Sunday afternoon, pull them from the bath, pat them dry, and store them in the fridge. When I’m ready to eat during the week, I drop the steak back in the water bath for 30 minutes to warm the interior, then give it a quick sear. The result is just as good as a freshly cooked steak.
Prepped steaks keep in the fridge for 4 days. I store mine in a clean Ziploc or airtight container once they’ve cooled to room temperature. You can also freeze them in the original bag for up to 3 months. When I want to reheat from frozen, I thaw overnight in the fridge and drop the bag back in the water bath the next day. The texture holds up well either way.
This is huge for a keto kitchen because protein is the meal and having it prepped ahead means I’m not scrambling at 6pm. I pair reheated steaks with a side salad or roasted broccoli and dinner is on the table in under 10 minutes. If you’re looking for more easy weeknight protein, my keto hamburger helper is another one I batch cook on Sundays.
Marinades and aromatics for the bag
I keep it simple most of the time (salt, pepper, done) but when I want to switch things up, I add aromatics directly to the bag before the cook. A sprig of fresh rosemary or thyme and 2 to 3 crushed garlic cloves are my go-to combination. The warm water gently infuses the flavors into the meat over the 1 to 2 hour cook.
You can also add a thin layer of marinade to the bag. I’ve used soy sauce and garlic, a simple herb butter, and a coffee-chili rub. The key is to keep it thin because too much liquid dilutes the sear later. Whatever you add to the bag, you’ll taste it in the finished steak, so I stick to flavors I know I want throughout.
What is sous vide steak and why does it work?
The sous vide method means sealing your cut in a bag and cooking it in temperature-controlled water until the interior reaches exactly the doneness you want. I know it sounds strange. When I first heard about it, I pictured a steak bobbing in a boiling pot, but the reality is completely different. The water stays at a low, precise temperature (I set mine to 131 for medium rare) and the bag keeps the meat protected from the water entirely.
The reason I switched to this method is control. When I cook a steak on my grill or in a skillet, I'm fighting temperature swings the entire time. Ovens can fluctuate 20 degrees in either direction. The circulator holds the water within one degree of your target, so the steak physically cannot overcook past that point. I've left steaks in the bath for 2 hours when dinner got delayed and they came out just as good as the ones I pulled at the 1-hour mark.
It's also naturally low carb. There's no breading, no marinade sugar, no flour. Just the steak, salt, pepper, and whatever aromatics you toss in the bag. After the bath, you finish with a quick reverse sear to build the crust. That combination of precise interior temperature plus a hard, fast sear is what gives you that edge-to-edge pink with a caramelized exterior. If you want another quick beef option for busy nights, try my slow cooker steak and peppers or my low carb smash burgers.
Add your immersion circulator to the water bath and turn on. Set the immersion circulator to your desired doneness. For rare, set to 120-129 F. For medium rare, set to 129-135 F. For medium, set to 135-144 F.
3
Season your beef
Season steaks with salt and pepper on all sides.
4
Sous vide
Place the seasoned steak in a gallon ziploc bag. Partly seal the bag. Don’t close all the way yet. Dip the bottom of the bag in the water bath and push it down. As the bag moves down the water bath, the water will push the air in the bag out. Once the opening of the bag is almost touching the water, seal the rest of the bag. Clip the bag to the side of the pot. If the bag floats, there is too much air in the bag. Unseal and dip down again to release the air.
5
Wait a couple hours
Let cook for 1 to 2 hours, depending on the thickness of your steak. Most one inch steaks will cook in 1 hour. Don’t worry, you can’t really overcook the steak. If it cooks for 3 to 4 hours, it will still be fine. See explanation below.
6
Pat dry
Once steak is finished cooking in the sous vide water bath, remove the bag and take out the steak. Pat dry with a paper towel. And refrigerate steak for about 10 minutes to allow it to cool.
7
Grill finish
To finish the steak on the grill, preheat grill to high heat, about 450-500 degrees. And sear both sides for 1-2 minutes on each side.
8
Torch finish
To finish the steak with a blow torch, turn on torch and sear all sides for 2 minutes each side.
9
Pan finish
To finish the steak in a cast iron pan or skillet, preheat pan to medium high, then add butter. Add steak and sear on all sides for 2 minutes each side. Spoon butter all over steak as it cooks.
Nutrition
Per serving: 1/2 of recipe
Calories
470
Fat
20.3g
Protein
64g
Total carbs
0g
Net carbs
0g
Nutrition is an estimate calculated from the ingredients listed. Brands vary, so check labels if you track closely.
Frequently Asked Questions
What type of steak works best for sous vide cooking?
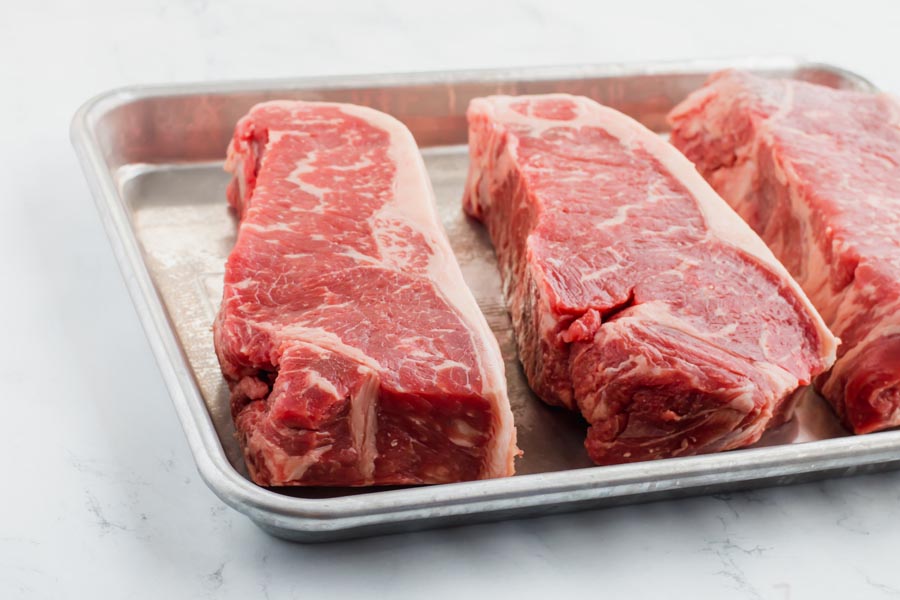
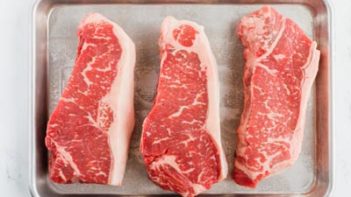
I reach for NY strip and ribeye more than anything else. The marbling keeps them juicy through the bath and the fat renders beautifully during the sear. I've also done filet mignon when I want something leaner, and it comes out incredibly tender. For tougher cuts like sirloin, I extend the cook time to 8 to 10 hours, which breaks down the connective tissue and turns it into something surprisingly tender.
What's the best steak thickness for the water bath?
I've found that 1.5 to 2 inches is the sweet spot. Anything thinner and the sear can push the interior past medium rare before you get a good crust. My local butcher cuts to order, so I always ask for 1.5 inches. If you're buying pre-cut from the store, look for the thicker packages near the back of the case.
Can I cook two steaks to different donenesses in the same water bath?
Yes. I set the bath to 131 for medium rare, which is where I land 95% of the time. My husband prefers his steak closer to medium, so I pull his out of the same bath and give it a longer, harder sear to push the edges up a bit. That way I'm not running two water baths.
Can I use olive oil instead of avocado oil for pan searing?
You can, but I prefer avocado oil because it handles high heat without smoking up my kitchen. Olive oil's smoke point is lower, so it starts to burn and smell before I get the crust I want. If olive oil is all you have, it'll work in a pinch. Just keep the heat at medium rather than medium-high and expect a lighter sear.
Sous vide is the one thing that finally got steak right for me at home, and this walked through the sear options without making it complicated. Your recipes are the ones I keep coming back to, Annie.
Sat down to eat this last night and realized I’d stopped comparing it to a birthday dinner from when I was a kid. I think that means the sous vide finally did what I could never pull off on a grill. Two hours in water gets the temp even in a way open flame just doesn’t. Four stars because my sear still needs work, but the cook itself landed.
I do smashed cloves, not minced. Minced goes a little harsh in the bath. Pull them out before the sear though, fresh garlic in screaming hot butter burns fast.
Hosting eight people for dinner next Saturday, and I’m trying not to be chained to the stove all evening. I’ve seen the method where you sous vide ahead, shock in ice water, refrigerate, and do the final sear just before service. Does that hold up with this recipe? My concern is the fat on the ribeyes. I want it to render properly on cast iron, but I’m not sure if coming out of the fridge changes how that goes. If I’m bagging them the day before, what’s a reasonable gap between the ice bath and the final sear?
Go heavier on the salt than the recipe lists, at least double what feels like enough before you seal the bag. After about five rounds I started seasoning more aggressively and the results were noticeably better. The technique is hard to argue with, but the steak can come out pretty bland if you’re too conservative with the surface. Everything else holds up.
Cast iron is the easier starting point and the sear is just as good. I use it most nights. The torch is faster but takes some practice with the distance and movement.
First time using my sous vide and I picked this recipe. Steak came out edge-to-edge medium rare, felt like cheating after years of guessing on the grill. Only complaint is the searing step. I burned my butter twice trying to nail the cast iron heat and never got a decent crust. Four stars, gonna try the torch method next.
Cooking steak in a ziploc bag in a pot of water sounded made up to me. My husband has been saying sous vide is the way to go for years and I just thought he was being a gadget person about it, but it hit 95 degrees out and I was not about to stand over a grill, so I finally tried it. Set the immersion circulator, seasoned the ribeye with just salt and pepper like the recipe says, and let it go for two hours. Finished it in the cast iron with the butter and avocado oil and the sear came on so fast because the outside was already dry from the bag. When I cut into it there was this even pink from edge to edge that I have never once gotten on the grill in 10 years of trying. My husband said nothing because he knew better than to say he told me so. I think I owe him an apology.
I’ve tried grilling, cast iron, even the reverse sear method (thought I had it all figured out). The ziploc bag trick looked way too simple to actually work but that medium rare came out SO consistent I actually laughed. Nothing else I’ve made even comes close.
My husband swore I couldn’t cook a steak at home worth eating. Made this Sunday with the cast iron sear and he cut into it, saw the pink all the way through, and didn’t say a word for a full minute. I think we’re done with steakhouse trips.
One thing I’d add: pull the steak from the bag and let it sit on a rack for about 5 minutes before the sear. All that surface moisture from the water bath is the enemy of a good crust. Cast iron screaming hot after that and the difference is noticeable every time.
Three hours is fine. Texture barely changes. I’ve gone to 3.5 on a ribeye and it came out the same as my standard 2-hour version. Past 4 you start to notice something off, softer bite than you’d want from a good steak. I actually left a pair of strips in for about 5 hours once when I got distracted, and while they weren’t ruined, something about the chew was just wrong. Two hours is best, three is still fine.
My husband orders steak at nice restaurants and mentally grades them on the drive home, so when he saw the edge-to-edge pink and asked what I did differently I felt like that actually meant something. Told him sous vide. Now he wants it every Sunday.
Three months into keto eating like I was doing penance, I pulled this out perfectly pink on my first try and just sat there before I could even cut into it.
My husband grades every steak on the char, so I knew the sous vide would be a hard sell. Pulled these out after two hours in the water bath and did a cast iron sear, and he cut in and paused. Said it was the most evenly cooked steak he had eaten at home. Coming from him, that is not small praise.
I’ve been hesitant to try sous vide for years, convinced it was more equipment drama than it was worth. Set the circulator to 130 for medium rare, pulled the ribeye after about 90 minutes, and then finished it in the cast iron with the butter. The sear took maybe two minutes and the edge-to-edge pink was something I’ve never pulled off consistently on a steak before. The circulator is coming out every Sunday now.
130 is fine – I cook at 131 but one degree doesn’t change anything you’d notice. The edge-to-edge pink still gets me every time and I’ve been doing this for years.
One thing worth knowing before you start: pat the steak completely dry after it comes out of the bag before you sear it. I skipped this the first time and got a lot of steaming instead of that hard crust. Now I pull it out, set it on a paper towel for a couple minutes, then hit the cast iron with avocado oil as hot as I can get it. The crust you get is genuinely something else, and the inside is still that perfect pink all the way through. Small step, big difference.