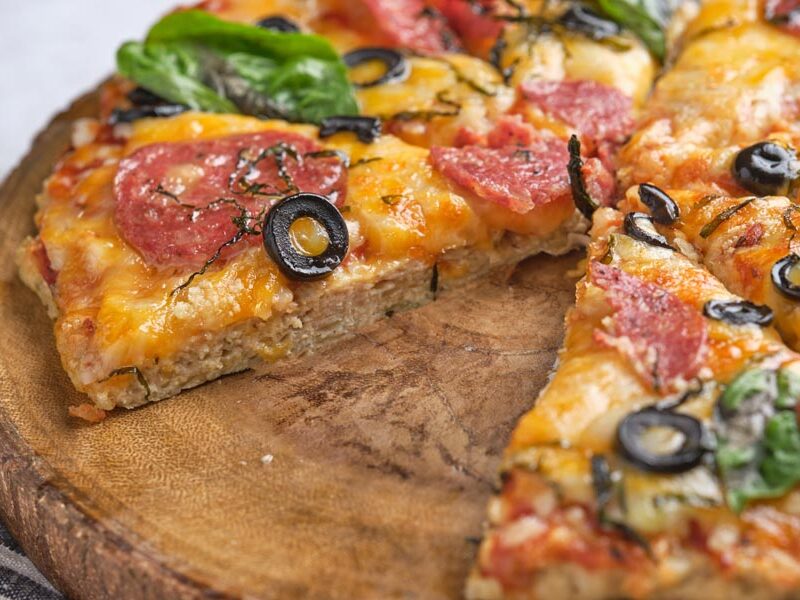
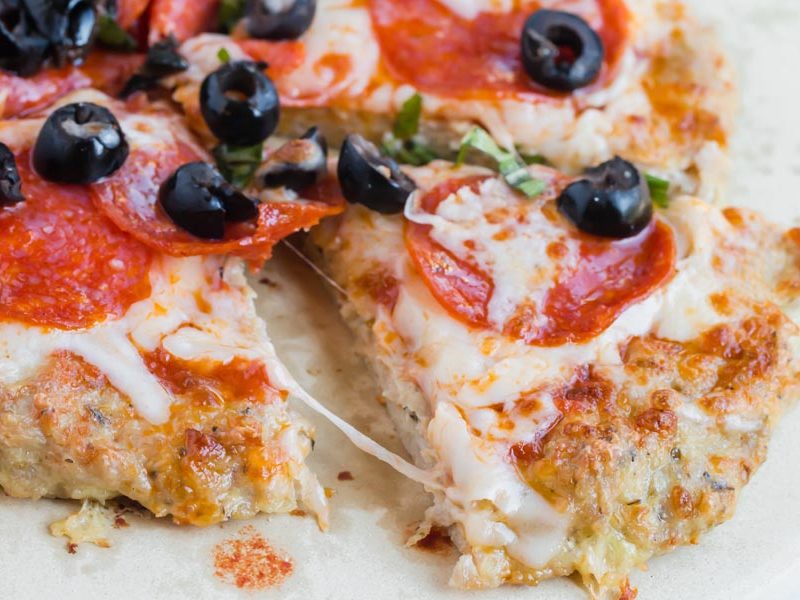
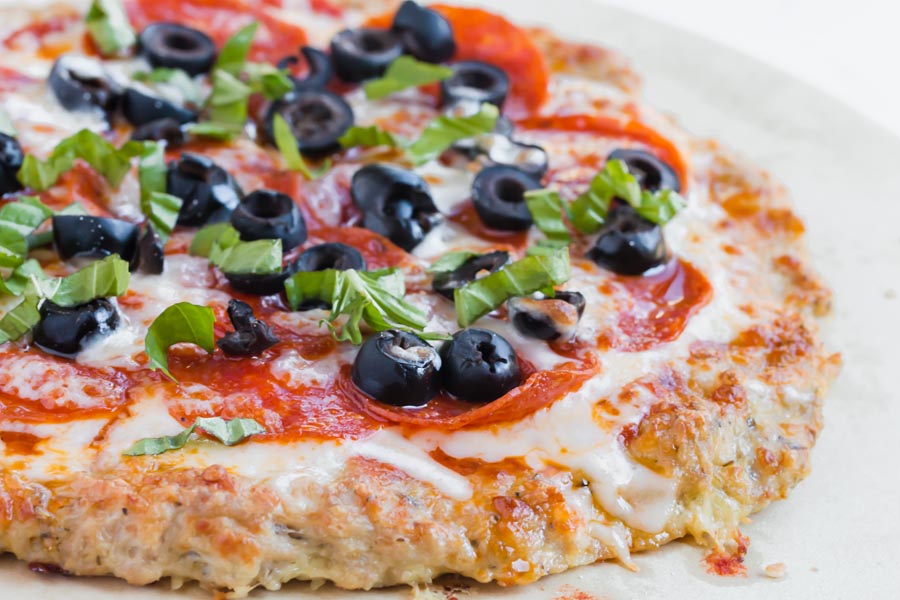
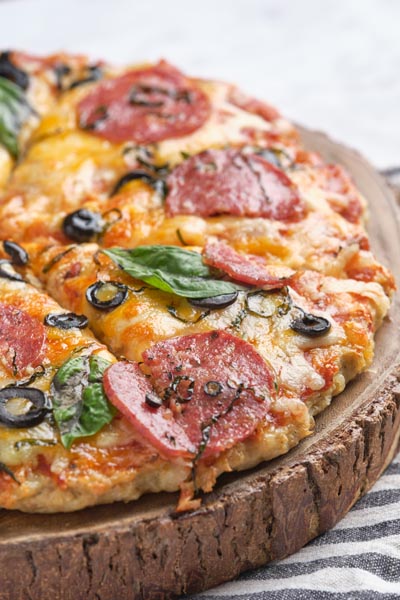
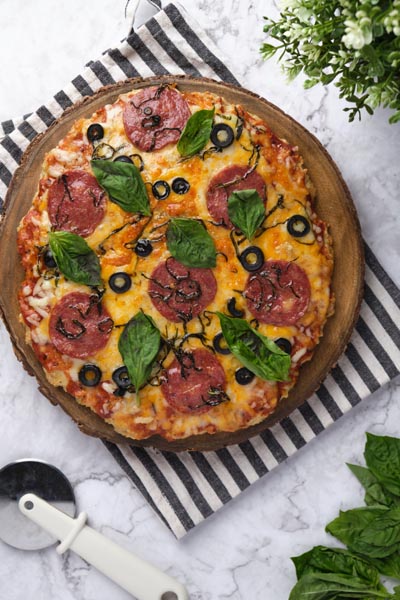
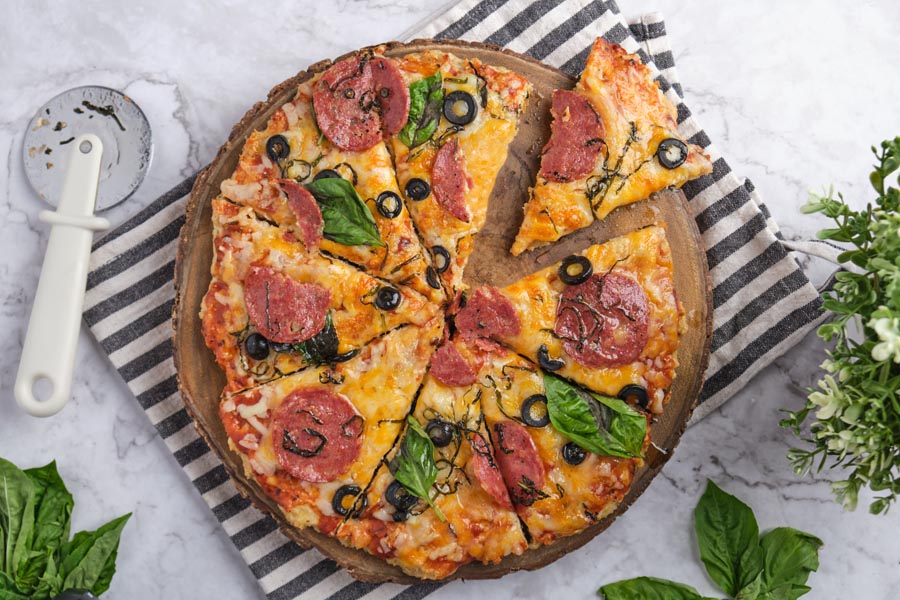
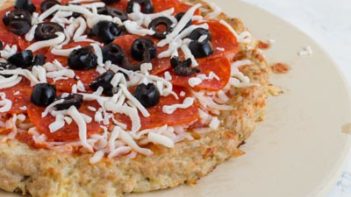
I usually go for pepperoni, olives, and plenty of mozzarella on my pizza. With this chicken crust, there is cheese in the base too: grated parmesan and mozzarella mixed into the chicken, so the flavor goes all the way to the edge.
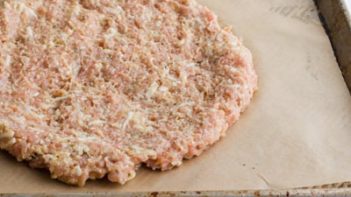
I like the combination of browned edges and a tender, meaty center. The ground chicken makes this a filling pizza, and the egg helps hold the crust together. Everything for the base goes into one bowl, then I press it into an even layer on the baking tray.
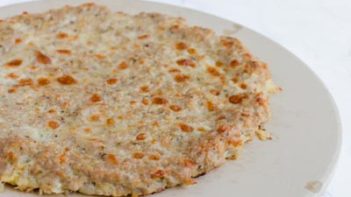
The crust gets its own time in the oven before I add anything on top. That gives the chicken time to cook through and the base a chance to firm up. Then come the sauce, cheese, and toppings, followed by a brief broil until the cheese bubbles. Those are the two parts to keep separate when making this pizza: cook the crust first, then finish the toppings.
Four main ingredients, plus seasoning
Ground chicken, egg, mozzarella, and parmesan make the base. The egg helps bind it, and both cheeses add flavor and help the crust hold together. Use grated parmesan for the small pieces that mix throughout the chicken. Salt is also in the card; the Italian seasoning and garlic powder are optional.
Start with raw ground chicken, also called chicken mince. It mixes easily and can be pressed into one even layer. The recipe below uses raw ground chicken. Cooked chicken has a different texture, so it needs different handling if you choose that variation.
The nutrition estimate is for one quarter of the crust, before sauce or toppings: 268 calories, 27.4g protein, and 1.8g net carbs. If you cut eight smaller slices, two slices make that serving. Add the nutrition for whatever you put on top.
Press evenly and bake the crust first
Wet your hands lightly and press the mixture from the center outward, keeping it about 1/2 inch thick across the whole crust. A thick mound in the middle needs longer to cook than the edges. Use a rimmed metal baking tray to catch any juices and parchment rated for the recipe’s 450°F oven.
Bake the plain crust for 15 minutes, then check the thickest part with a food thermometer. Ground chicken needs to reach 165°F; browned edges alone cannot tell you it is ready. Insert the probe from the side if needed, keeping its tip in the chicken and off the pan. Continue baking if it has not reached that temperature.
Remove the parchment before broiling. Transfer the cooked crust to an unlined metal pan rated for broiling, add your toppings, and watch closely while the cheese bubbles. Silicone mats also need to come out before the broiler goes on.
Toppings I like with this crust
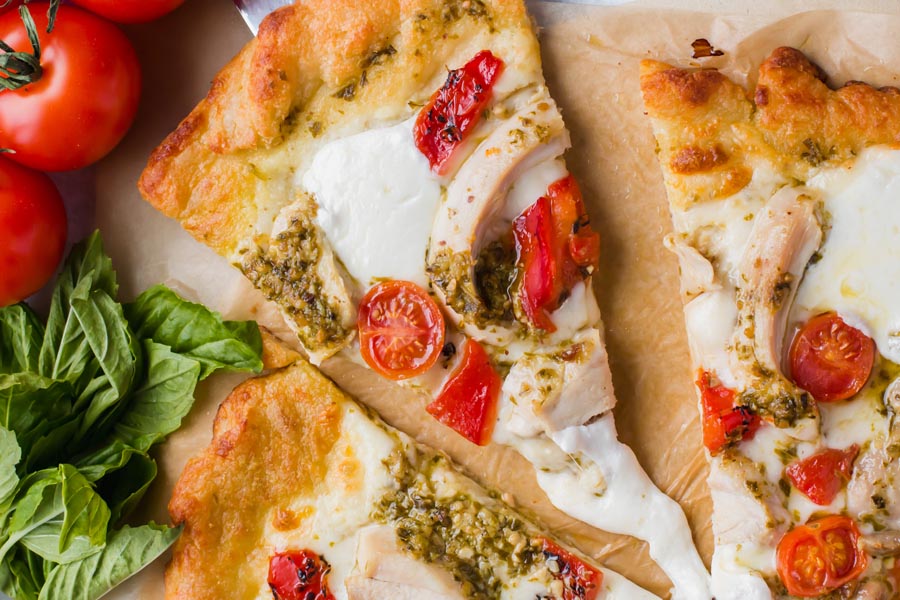
Pepperoni and olives are my usual choice, but I also like pesto with chicken. It brings basil and garlic into the toppings, with the parmesan already baked into the crust. My chicken pesto pizza has that combination.
For a different dinner, try the toppings from my BBQ pulled pork pizza. The chicken base makes a substantial meal with either combination.
Start with a light layer of sauce and leave a little crust showing around the edge. Drain watery toppings and cook meat toppings before adding them. The final broil is for melting cheese, so everything underneath should already be ready to eat.
Using canned or cooked chicken
I use raw ground chicken in the card because it mixes easily with the egg and cheeses and presses into an even layer. If you use canned chicken, drain it thoroughly and break up the pieces. Finely chop or pulse rotisserie chicken so long strands do not make the crust difficult to press.
Cooked chicken gives a different texture. I do not have a confirmed extra cheese measurement that makes it behave exactly like raw ground chicken, so keep the ground chicken version for the most predictable first batch. A crust made with cooked chicken should also reach 165°F when reheated.
Make ahead, refrigerate, and freeze
To make a crust ahead, cook it completely to 165°F before storing it. Do not partly bake chicken, cool it, and plan to finish cooking later. Put cooked crusts or leftover slices in shallow containers and refrigerate within 2 hours, or within 1 hour if the room or outdoor temperature is above 90°F.
Keep them covered at 40°F or below for 3-4 days. Add fresh toppings when you are ready to reheat a plain crust. An oven or toaster oven at 375°F is a useful starting point for warming it and restoring some crispness; check that the center reaches 165°F. Reheating time depends on the portion, toppings, and appliance.
For longer storage, freeze fully cooked, cooled crusts with parchment between them, or wrap individual slices. Use within 3 months for best quality. Thaw overnight in the refrigerator and reheat to 165°F before serving. The USDA’s leftover guidance explains the storage and reheating temperatures.
Before you start
Have a rimmed baking tray, parchment rated for 450°F, a food thermometer, and an unlined metal pan rated for broiling ready. Many parchment papers are rated only to 425°F, so check your package. Parchment and silicone mats must be removed before broiling.
The card makes one crust, divided into four servings. Its nutrition estimate covers the crust only. The listed 22 minutes is an estimate; allow more baking time if needed for the chicken to reach 165°F.
Preheat the oven to 450°F. Line a rimmed metal baking tray with parchment paper rated for 450°F.
2
Mix the crust ingredients
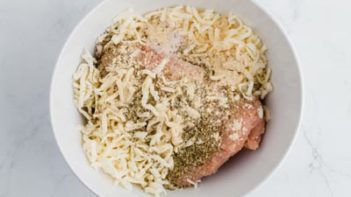
Combine the ground chicken, egg, mozzarella, parmesan, salt, and any optional seasonings in a medium bowl. Mix until combined and form into a ball. Do not taste the raw chicken mixture.
For this step
1 pound ground chicken
1 egg
1/2 cup shredded mozzarella cheese
1/4 cup grated parmesan cheese
1 teaspoon salt
1 teaspoon Italian seasoning (optional)
1/2 teaspoon garlic powder (optional)
3
Press into an even crust
Place the chicken mixture on the prepared tray. With lightly wet hands, press into a pizza crust about 1/2 inch thick, keeping the center and edges even.
4
Bake and check the temperature
Bake at 450°F for 15 minutes. Check the thickest part with a food thermometer; the chicken must reach 165°F. Continue baking if needed. Browned edges alone do not confirm that it is cooked.
5
Add toppings and broil
Remove the parchment and transfer the fully cooked crust to an unlined metal pan rated for broiling. Add your favorite sauce, cheese, and toppings, using cooked meat toppings. Broil on high until the cheese is bubbly, watching closely. Keep parchment and silicone mats out from under the broiler.
Nutrition
Per serving: 1/4 crust, before toppings
Calories
268
Fat
17.3g
Protein
27.4g
Total carbs
2g
Net carbs
1.8g
Nutrition is an estimate calculated from the ingredients listed. Brands vary, so check labels if you track closely.
Frequently Asked Questions
Does chicken crust pizza taste like chicken?
Not the way you would think. The center is tender and meaty, but the parmesan and mozzarella are mixed right into the chicken, so every bite tastes like cheese and browned edges before it tastes like chicken. Once the sauce and toppings are on, it eats like a thick, savory pizza. If you want a crust that eats more like bread, my fathead pizza crust is the one to make.
How many carbs are in chicken crust pizza?
1.8 grams net carbs, 2 grams total, and 27.4 grams of protein for one quarter of the crust before toppings. Cut it into eight small slices and a serving is two slices. Sauce, extra cheese, and toppings add to that, so count them on top.
Why is my chicken pizza crust soggy?
Three usual causes. The crust was pressed too thick in the middle, it went under the toppings before it was cooked through, or the toppings were wet. Press it an even 1/2 inch, bake the plain crust for 15 minutes at 450°F and check for 165°F in the thickest part, then top it. Drain watery toppings and go light on the sauce. Browned edges do not mean the middle is done; the thermometer does.
Is chicken mince the same as ground chicken?
Yes. Chicken mince is what ground chicken is called in the UK and Australia. Use it raw, straight from the package, mixed with the egg and both cheeses before it goes in the oven.
Can I use canned or rotisserie chicken?
Yes, with a different texture. Raw ground chicken sets into a crust as it bakes; cooked chicken is already set, so the crust comes out more crumbly and drier. Drain canned chicken well, or pulse rotisserie chicken in a food processor until it is finely chopped, then mix with the egg and cheeses. Add 1/4 cup more mozzarella to help it hold together. It still needs the full bake so it reaches 165°F throughout.
Can I freeze chicken pizza crust?
Yes. Bake the plain crust all the way to 165°F, cool it, and freeze it flat with parchment between crusts, wrapped well, for up to 3 months. Thaw it in the fridge, then top it and broil as usual, making sure the center is back up to 165°F. Do not freeze it half baked.
How do I reheat leftover chicken crust pizza?
In the oven at 375°F until the center reads 165°F, which brings the edges back to crisp. The microwave works for a quick slice, but the crust comes out soft. Leftovers keep in the fridge for 3 to 4 days.
Can I use a silicone mat or an air fryer?
A silicone mat, yes, if the manufacturer rates it for 450°F, and it comes out before the broiler just like the parchment does. An air fryer works for the first bake if the crust fits flat in the basket: 400°F for about 12 minutes, then check for 165°F. Top it and finish under the oven broiler, since most air fryer baskets cannot take a sauced pizza without the toppings blowing around.
Can I make this crust without the egg or cheese?
The egg is what holds the crust together and the cheeses are what make it a crust instead of a chicken patty. Without the egg it falls apart when you lift it. Without the cheese, add a second egg and expect a softer, wetter crust you eat with a fork. For a crust that is dairy free by design, a different base recipe is the better answer.
Annie, you brought pizza night back when I’d genuinely stopped expecting it. Fourteen months keto and I’d accepted the crust problem was basically unsolvable. The protein in the chicken at 450 actually grips the toppings differently than any flour-based sub I’ve tried (the edges firm up, not just brown), and 27g per serving meant I wasn’t still hunting for something after. One thing though: my first batch needed more salt than the recipe calls for, at least for my palate, so taste the mix before pressing. Otherwise it held up fine.
I need to correct my earlier reply: do not taste the raw chicken mixture. If you want to check the seasoning, cook a small separate tester portion all the way to 165°F before tasting it. Cook the main crust to 165°F too; the color of the edges is not a safety check.
Not sure how to explain ‘it’s ground chicken pressed flat and baked’ to people who just want Friday pizza, so I just set it out without saying anything. Two friends thought it was a deli crust. Four stars because I still need to figure out the thin-and-even press, but I’m doing this again.
Deli crust. That’s the best reaction I’ve heard. For the even press, lay a sheet of parchment on top and push down with a pie dish for consistent thickness.
Fat head is the default keto pizza comparison, and almond flour always softens once toppings sit. Made this on a weeknight. Crust stayed crisp through leftovers. 27g protein, but the structure is what sold me.
I am glad this base held up well for you, Denise. Baking the plain crust first and going lightly with sauce are useful starting points. Topping moisture and thickness still affect the result, so I should not have promised that the crust cannot absorb sauce.
Let it cool a minute before slicing or the whole thing falls apart. My daughter called it ‘fancy meat pizza’ and that was that. Solid weeknight dinner. Would go heavier on the garlic next time though.
Was fully prepared for disaster (ground chicken as pizza crust, what?) but 15 minutes at 450 and it actually holds a slice without flopping. Still kind of in shock. Four stars only because I need to make it two more times before I fully believe it.
I am glad you enjoyed it. The card calls for an even 1/2 inch crust. My earlier 1/4 inch maximum was too definite: a thinner crust is a reader variation for more browned edges, with an earlier temperature check to avoid overcooking.
Wet your hands first. Keeps the chicken from sticking and you can actually press it to 1/4 inch without fighting it. Wish I’d known that before batch one.
Wet hands help keep the mixture from sticking while you press it. The card uses an even 1/2 inch thickness; I gave the wrong measurement in my earlier reply. Readers who prefer a thinner crust should check it earlier and still cook it to 165°F.
Six batches is a good run. I am glad the thinner crust suits you. For anyone starting with the card, it calls for an even 1/2 inch layer; thinner variations need an earlier temperature check, with the chicken still reaching 165°F.
Swapped in some provolone for half the mozzarella because it’s what I had, and it gives the cheese a different pull when you bite in. More stretch than melt, which I liked. Pressed mine to 1/4 inch and it came out crispy all the way through. First time I left it thicker and the center stayed soft, so if you’re new to this, go thinner than feels right.
If you want the edges crispy, press it thinner than feels right. I left mine too thick the first batch and the center stayed soft all the way through. Second try I went closer to 1/4 inch and those outer edges turned almost crackery. Didn’t expect that from ground chicken. Also swapped mozzarella for pepper jack and the mild heat goes really well with the garlic powder already in the crust.
My son is the kid who inspects every plate before touching anything. He poked at the crust, squinted at it, then ate two slices without a word. He doesn’t know it’s ground chicken. Not telling him. This is going into heavy rotation.
I used shredded Parmesan cheese and 93% ground turkey as substitutes. It resulted in a pool of moisture around the crust after initial cooking. Most likely grease. Transferred the crust to a new sheet with additional parchment paper and cooked for a few more minutes to help firm things up. It is looking more like the pictures now. Hopefully it tastes good.
Thanks for describing the turkey batch and the liquid on the pan. I cannot tell from the comment how much was fat or other moisture. Keep the crust on a rimmed pan and check that it reaches 165°F. Move it to an unlined metal pan rated for broiling before the final broil.
I do Sunday meal prep and this crust is calling my name. If I bake a few ahead and refrigerate, can I add toppings and reheat on a weeknight, or will the chicken base dry out? Really hoping this works as a shortcut.
Fully bake the plain crusts first, starting with 15 minutes at 450°F and checking that the chicken reaches 165°F. Refrigerate promptly and use within 3-4 days. Add toppings when you reheat; an oven or toaster oven at 375°F works for warming, but check for 165°F in the center instead of relying on a fixed time.
I press mine out on a silicone baking mat instead of parchment (easier to peel off after) and bake it on the lowest oven rack so the bottom gets crispier. Also found that patting the chicken mixture dry with a paper towel before pressing helps it crisp up faster.
Thanks for sharing your silicone-mat version. Check that your mat is rated for 450°F for the first bake, and remove it before broiling. The cooked crust can go onto an unlined metal pan rated for broiling for the toppings.
I just finished eating this. I have a huge appetite and half the pizza was plenty. I use gloves to help shape the crust. It held together great. Thanks so much for this.
Gloves are a useful shaping tip, Ben. I also need to correct my earlier portion figure: 27.4g protein is the estimate for one quarter of the crust. Half the crust is about 54.8g, before toppings. No wonder you found it filling.
I am sorry it was disappointing. This crust does have a meaty center, and that texture will not suit everyone. Garlic powder and Italian seasoning add flavor, but they will not change it into a bread dough. Thank you for giving it a try.
I use cooked chicken and I just cut it up and then I mix everything in the food processor so it gets ground up, but it may affect the texture, as I have never made it with raw chicken to know the difference.
The card starts with raw ground chicken. Readers have also made versions with canned or rotisserie chicken, so cooked chicken can work, but its texture is different. Finely chopping or pulsing it makes it easier to mix and press.
Delicious! Satisfies the pizza craving 100%! I didn’t have parchment paper so I used foil with olive oil – the crust did stick a little but I was able to carefully peel it away (it can be done!) I cooked mine for 17 min at 450 and it was perfect. So happy to find a delicious and protein packed alternative to my favorite meal!
Thanks for explaining the foil and olive oil, Ashley. The card starts with 15 minutes at 450°F; your 17 minutes is a useful reminder that ovens vary. Check the center for 165°F before topping, and keep parchment out of the broiler.
Thank you so much for this recipe. I only did a 3 cheese topping, no tomato base and it was a hit with my 3 very fussy grandchildren and my daughter, who was in fact planning a backup of carbage if it didn’t go down well. So pleased the backup stayed in the freezer.