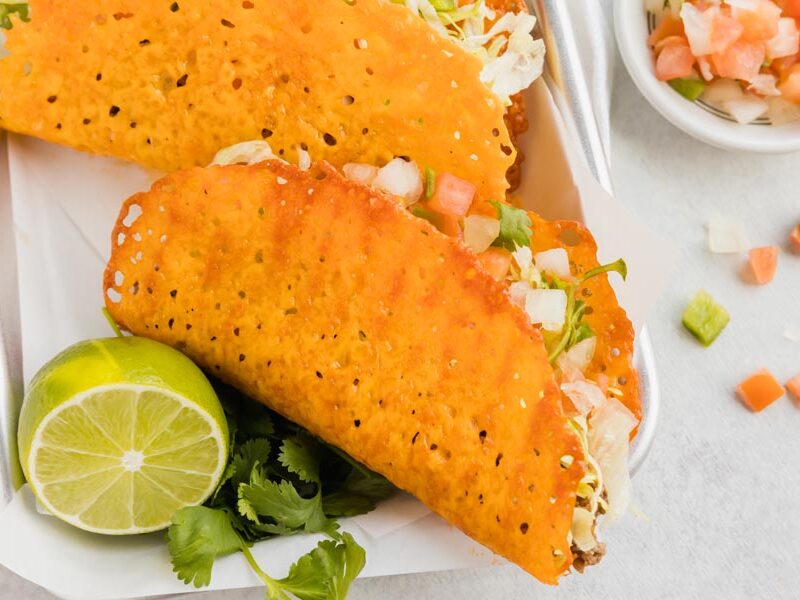
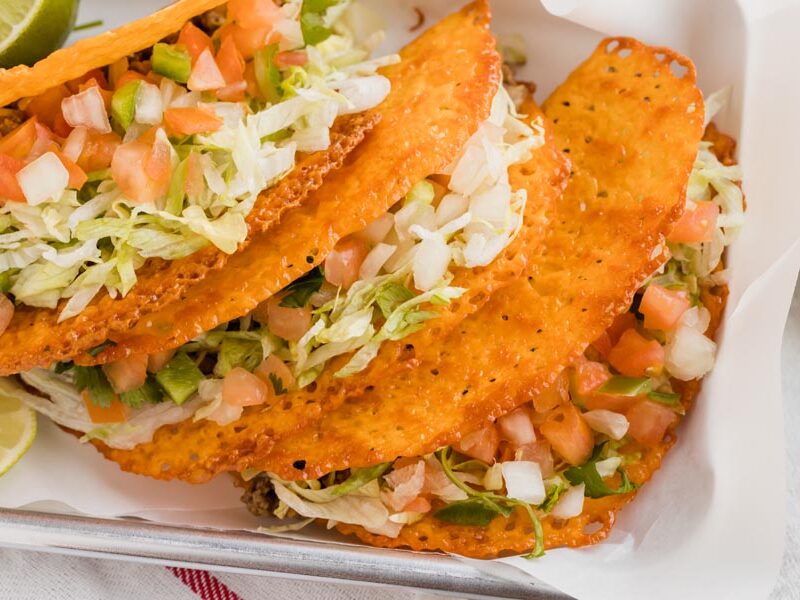
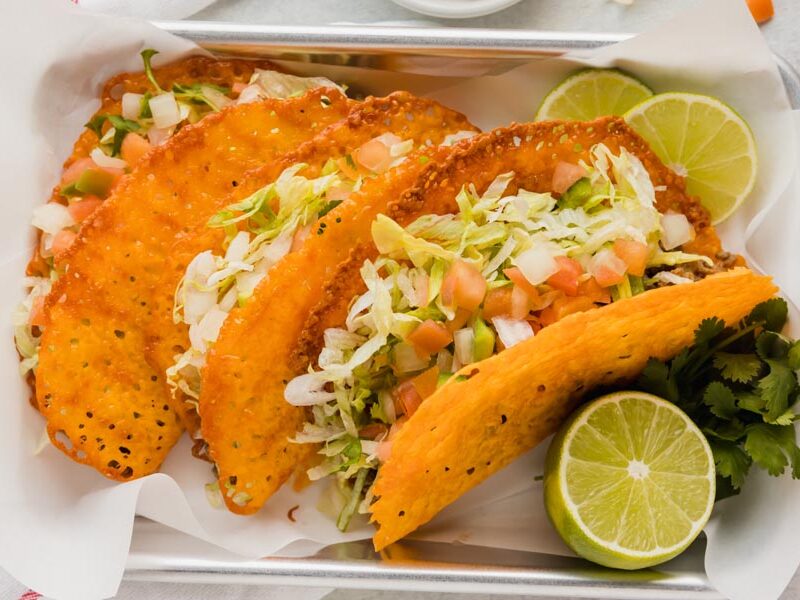
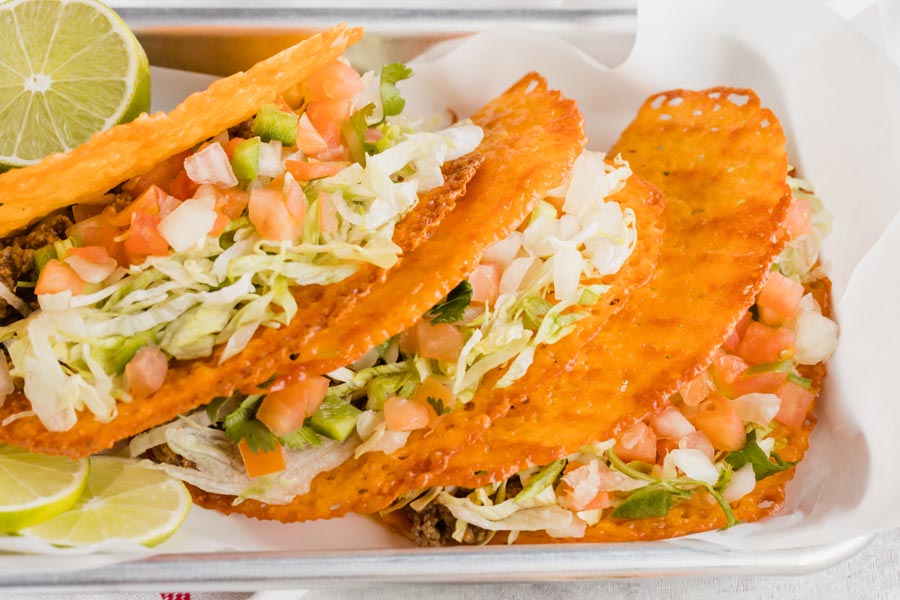
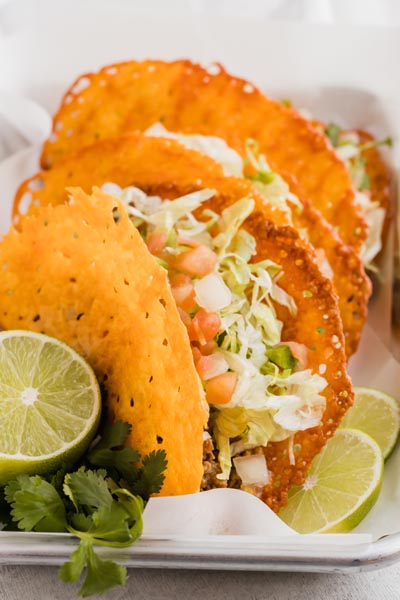
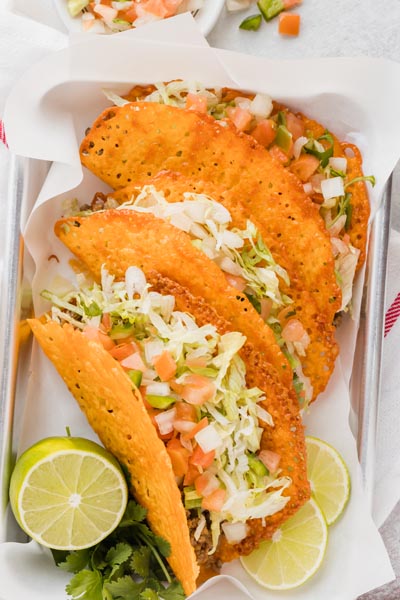
Crispy cheese taco shells made from quarter-cup piles of shredded cheese. Bake at 350°F until the edges are golden, then cool briefly and shape while still pliable. Makes four shells; carbs vary with the cheese and optional seasoning.
Cheese taco shells start with an even layer of shredded cheese. Bake it until the edges turn golden, then lift and drape the warm circle over a spoon or spatula handle. Once it cools, it holds a taco shape with a crisp edge.
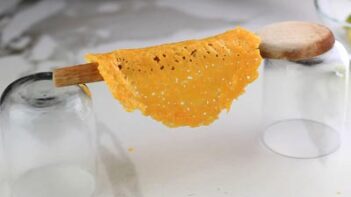
The part to watch is the short shaping window. Let each circle sit for about 1–2 minutes: it needs enough structure to lift, with enough flexibility to bend. Set up the handles before baking so you can shape the shells while they are ready.
Use one quarter of the cup of cheese for each of four shells. Fill just before eating, since warm, wet fillings soften the cheese. The carb amount depends on the cheese and any seasoning; the card’s 0g estimate is not a promise that every cheese shell has no carbohydrates.
Which cheeses work best (and which don't)
The card lists cheddar, Pepper Jack, Colby Jack and Monterey Jack. Choose a cheese whose flavor you enjoy and check its label. Moisture, thickness and brand affect how it melts and firms up; no single baking time guarantees the same result with every cheese.
Shredded cheese vs sliced cheese
Shredded cheese is easy to spread into an even circle. If using slices, arrange them into a circle as described in the step tip. Keep the layer even so the edges do not burn before the middle sets. Blot excess grease with a paper towel after shaping if needed.
Keto taco fillings
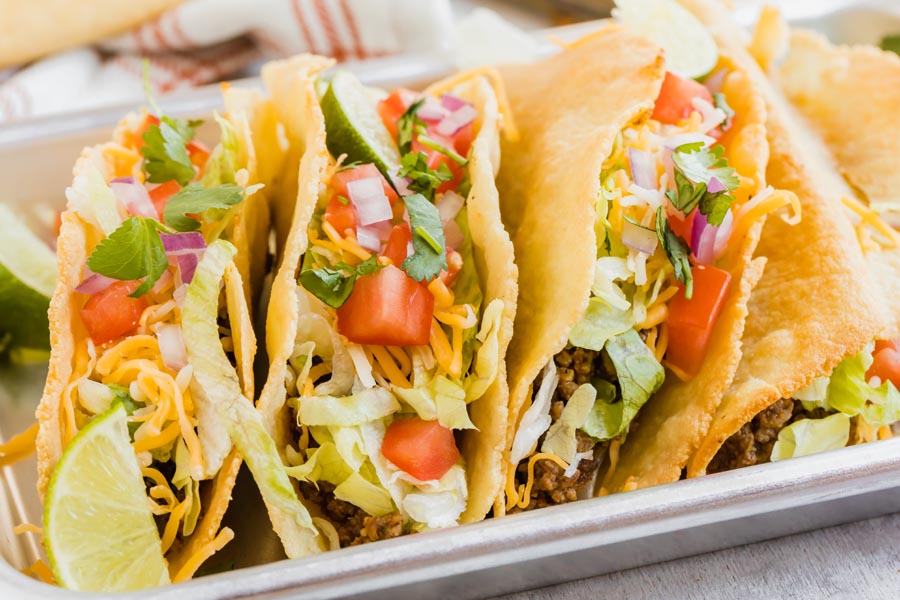
Try cooked seasoned beef, salsa chicken or carnitas, with shredded lettuce, sour cream, pico de gallo or guacamole. Drain wet fillings and add them just before serving. Count the fillings and toppings separately from the shell’s nutrition.
Storage and make-ahead tips
These are best shaped, cooled and eaten fresh. Refrigerate leftover shells in a covered container and use within two days for best texture; they may soften. A fixed countertop storage time has not been established for every cheese and kitchen. Once filled, follow the storage needs of the filling and refrigerate promptly.
Reheating can soften or melt the taco shape, so making a small fresh batch is the more reliable way to get a crisp shell.
How to make cheese taco shells
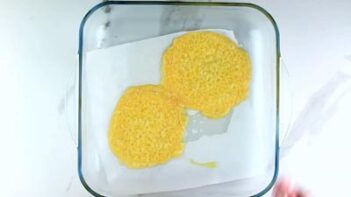
Pile cheese on parchment paper. Shredded cheese is easiest because you can shape it into a circle. If you’re using sliced cheese, overlap two slices and trim the corners to round it out. I prefer shredded for even melting.
Bake at 350 degrees for 5-7 minutes. You want the edges golden brown. If the edges are still pale, give it another minute. I’ve learned that under-baked cheese won’t crisp up into a proper shell.
Mold during the 1-2 minute window. Let the melted cheese sit on the tray for 1-2 minutes after pulling from the oven. It needs to be firm enough to lift but still pliable enough to drape. I use a spatula balanced across two cups, but a taco holder works even better. For taco salad bowls, drape the cheese over an upside-down bowl instead.
Blot off excess grease. A quick pat with a paper towel keeps your hands clean when you’re eating.
Fill with your favorite low-carb toppings and serve right away for maximum crunch.
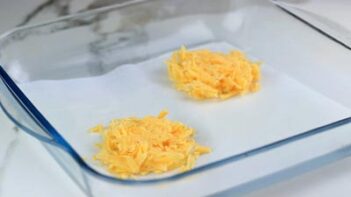
Preheat oven to 350 degrees Fahrenheit. Place four 1/4 cup piles of cheese, spacing 2-inches apart on a parchment lined baking sheet. Press or sprinkle cheese around so it makes an even layer in a circular shape. Can sprinkle seasonings like garlic powder on top if desired.
2
Bake
Bake at 350 degrees for 5-7 minutes or until the edges are golden brown.
3
Cool and mold
Let the cheese cool on the baking tray for 1-2 minutes or until it is firm enough to lift and hold its circular shape but still pliable. Lift up the cheese circle and place it over the handle of a spatula or spoon balanced on two cups or upside down, over a taco holder. Let cool completely to harden into this taco shell shape.
Nutrition
Per serving: 1 taco shell
Calories
110
Fat
9g
Protein
7g
Total carbs
0g
Net carbs
0g
Nutrition is an estimate calculated from the ingredients listed. Brands vary, so check labels if you track closely.
Frequently Asked Questions
Which cheese should I use?
The card lists cheddar, Pepper Jack, Colby Jack and Monterey Jack. Use a cheese you enjoy and spread it evenly. Different brands and moisture levels can change the timing and firmness.
How do I prevent sticking?
Use parchment paper or a suitable silicone baking mat as directed in the card. Let the cheese firm briefly before lifting with a spatula; it should hold together while still bending easily.
Why did my shell crack when I shaped it?
It may have cooled too far to bend. Have your shaping handles ready, then lift each circle when it is firm enough to hold together but still pliable, usually after about 1–2 minutes. Let it finish cooling in the taco shape.
Why is my shell still soft?
Let it cool completely in its shape. If it remains soft, the cheese may need more baking time or have a different moisture content. Look for golden edges during baking, and keep the cheese layer even. Hot or wet fillings also soften a finished shell.
Are cheese taco shells zero carb?
Check the cheese label and optional seasoning. The card’s 0g figure is an estimate for the base shell; it does not mean every cheese or finished taco contains no carbs. Fillings add their own nutrients.
Can I make these ahead?
Fresh shells give the best crunch. Refrigerate leftover unfilled shells, use within two days for best texture and expect some softening. Fill only when ready to eat. A reliable long countertop storage period has not been established for this recipe.
I’m the only keto person in the house so I figured most of a full batch would sit there. My youngest snagged a broken shell off the tray before I’d filled anything and said it beat the ones from a bag. Now I bake a second tray because they’re gone before the meat is done.
Non-keto approval is the harder test. My nephew does the same thing, broken shell off the tray before I’ve filled anything, and now I just plan for it. Two trays, always. One goes to snackers and the second one is what actually becomes tacos. A kid saying it beats the bag kind is legitimately high praise.
Add the garlic powder even if it says optional. I skipped it once and the shells were flat in a way I couldn’t name. One small shake is the difference between a cheese crisp and something that actually tastes like a taco shell.
Garlic powder disappears into melted cheese in a way that makes the shell taste like a taco shell instead of just a cheese crisp. I mark it optional for people who want plain cheese crisps, but that’s the difference right there.
Just got an air fryer and I’m dying to try these in it. The recipe says 350° for 5-7 minutes, do I need to adjust for the basket? And will parchment paper actually stay down, or is the cheese just going to drip through the holes?
I run mine at 370 and check at 3 minutes since the edges crisp up faster in the basket. Parchment is fine, but cut it to fit inside the basket walls. If it extends up the sides, the air will catch it and flip it over before the cheese melts enough to hold it down.
The five-minute check is worth doing but you almost always need seven. I pull mine when the edges are visibly golden, not just melted, they look done before they actually are.
Hard-shell Tuesdays were a whole routine before keto. Crunch is half the point. Just cheddar, four circles on parchment, and these come close enough. Not exactly the same, but I keep making them most Tuesdays.
Thought about giving up on tacos entirely when I started keto. A taco without a shell is just a sad meat situation and I kept skipping taco night. Then I found this and I genuinely didn’t get how four little piles of cheddar turn into something you can fold around a filling. Watched the edges go golden at six minutes and pulled them right as they firmed up on the parchment. Zero carbs. Been making these every week and I feel like I got my taco nights back. Hot sauce, sour cream, whatever I want.
‘A sad meat situation’ is the right term for it. You timed those right, Chris – there’s a short window where they’re firm enough to fold but not so rigid they crack, and six minutes is usually where I land too.
Used pepper jack instead of cheddar and let them cool an extra minute before molding. Held their shape way better – first time I made them, the cheddar ones kept cracking when I tried to bend them over the tray.
Aisha, that extra cooling minute is the part I should mention more prominently in the post. I’ve also found pepper jack holds the bend a little better than cheddar once it sets, something about how it firms up differently.
Made these probably a dozen times now. Pepper jack at 350 for exactly 6 minutes gives you that lacy, caramelized edge without going brittle. They hold a full taco load without folding.
Dozen times in, you’ve got it dialed. That lacy edge is exactly what I’m going for. And yeah, pepper jack sets firmer than cheddar once it cools, which is why it holds a full load.
Used half cheddar and half pepper jack and let them sit a full two minutes before molding over a spoon handle, and they held their curve all the way through the taco build without cracking once.
Two minutes is right. I used to pull them too early and they’d crack the second I pressed them to the spoon handle. Pepper jack adds a little flex that helps with that too.
Made these again last night and I’m still thinking about them. Pulled at exactly 6 minutes in my oven and the edges had this caramelized, almost lacy crunch that I can’t get anywhere else. I’ve switched to pepper jack lately and the extra heat is so good for tacos. One thing though: the cooling window is real. Wait too long and they crack when you fold, so it’s 90 seconds off the tray and then move fast.
Pepper jack for tacos is the right call. The heat layers with whatever spiced meat you’re using in a way cheddar doesn’t. Six minutes sounds short but that lacy edge needs high-heat caramelization, not a slow melt. I usually say ‘about two minutes’ when I’m explaining the cooling window, but 90 seconds is probably closer to what I actually do. Past that you’re just eating flat cheese.
Made these last night, first time, wasn’t sure one ingredient could hold up as a shell. They did. Golden edges, held a fully loaded taco without cracking once. Do you need the full two minutes before molding, or can you move sooner if they feel firm?
Tried basically every keto taco shell before this. The grain-free store-bought ones taste like cardboard. Almond flour versions crack the second you load them. Even did jicama wraps because a friend wouldn’t shut up about them. This one actually works. Made mine with pepper jack, and the edges get this golden, almost caramelized crunch that none of the others come close to. Molded them warm, maybe 30 seconds per shell, and they held their shape through a full plate of carnitas without buckling. Four stars only because I torched my first batch not realizing how fast they go at 350, but that’s a me problem.
350 goes fast, especially with pepper jack. I check mine at 5 minutes now and pull the second I see the edges browning. Carnitas is a serious load test, so if they held through that you did everything right.
I make a double batch every Sunday, but what actually changed my routine was the parchment paper timing. Pull the shells off while they’re still slightly warm (not fully cooled) and they lift clean without tearing. Wait until they’re completely cool and one or two always crack. Took me three batches to figure that out. Four stars because the learning curve is real, but once you’ve got it down, they’re easy to keep stocked.
The cracking thing is real. I give mine about a minute and a half on the pan, then peel while there’s still a little flex in them. Once they’re fully stiff you’ve waited too long.
My husband burned his fingers pulling one right off the parchment paper before they even cooled and ate it plain before I could get the toppings together.
Tried these with half sharp cheddar and half cotija and the salt level hits completely different. Cotija crisps a little slower so watch it past the 6-minute mark, but the edges get this lacy char that stays firm even after cooling.
Cotija changes the salt completely. I’ve only done straight cheddar but the char you’re describing (still firm after cooling) is better than what I usually get. Adding this to my next batch.
Taco night with a few friends last week and I swapped in these instead of store-bought shells without mentioning it. One of them asked which brand I’d used because he wanted to grab some for his house, and the look on his face when I said it was just cheddar baked on parchment was probably the best part of the evening.