

Skip to content
KETOFOCUS.

Sweater weather calls for keto comfort food. Get Cozy →

Keto Peanut Butter Cups

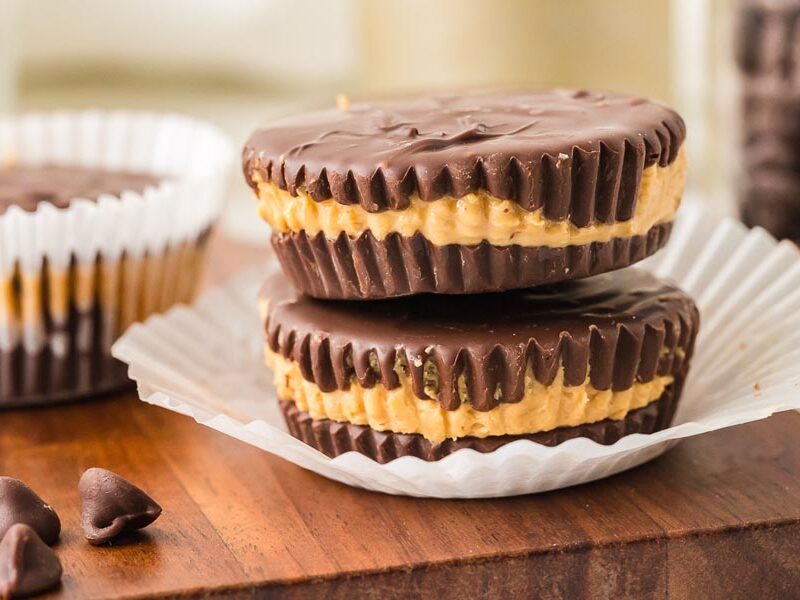
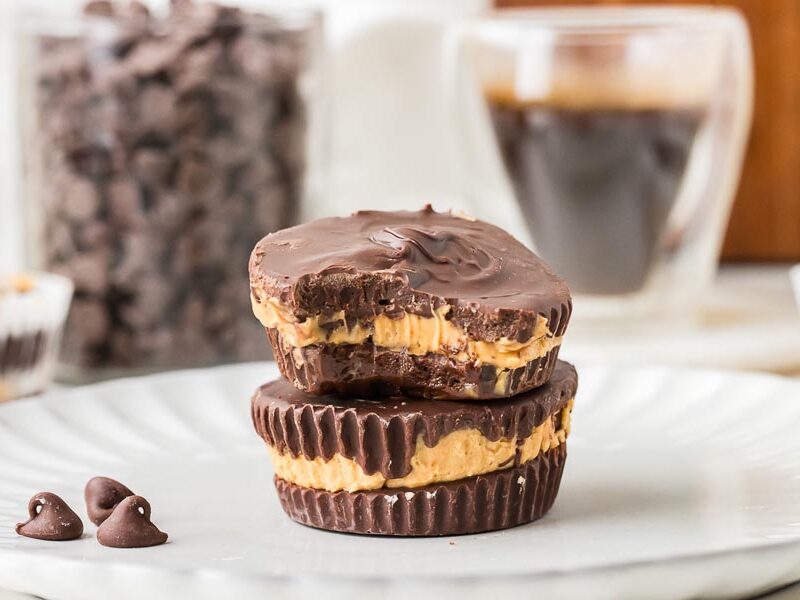
My 4-ingredient Reese's copycat: keto peanut butter cups with a creamy peanut butter center and a snappy sugar-free chocolate shell — 4.5g net carbs each. They come together fast when that sweet, chocolatey craving hits.
  • 4.5gnet carbs
  • 3.6gprotein
  • 15minutes
  • 18servings

This post may contain affiliate links. See my disclosure policy.

If you love Reese’s peanut butter cups but don’t love the sugar, this is the recipe I keep coming back to. These are my go-to keto dupe, and they honestly don’t take much time at all to make. I’ll usually make a big batch, stash them in the freezer, and just grab one whenever that chocolate-peanut butter craving hits. They hold up great frozen and taste just as good, maybe even better straight from the freezer.

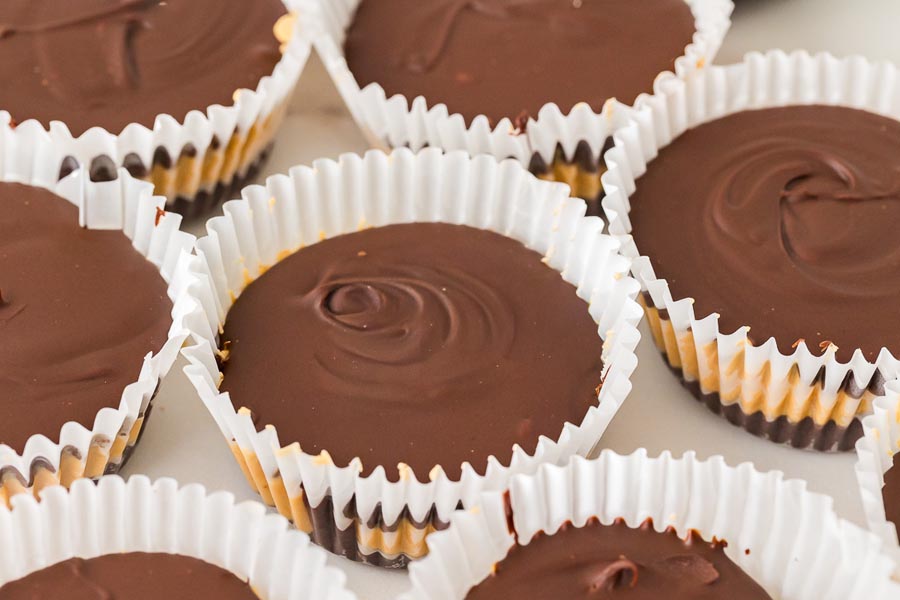
Batch of homemade keto peanut butter cups in white liners with glossy chocolate tops.

I actually came up with this recipe for my son because he went through a serious peanut butter cup phase… like, would eat the whole bag if I let him. I didn’t love the idea of all that sugar, so I started testing a homemade version that would still feel like a treat but fit into the way we eat. It took a little tweaking to get that classic balance of a firm chocolate shell with a creamy peanut butter center, but once I nailed it, these became a regular in our house.

What I love most...

  • Just a handful of ingredients and minimal prep.
  • No complicated steps, no special equipment, just melt, mix, and layer.
  • The peanut butter filling is smooth and rich without being overly sweet.
  • The sugar-free chocolate coating gives you that snap you expect from a peanut butter cup.
  • You can also control the sweetness level, which I prefer since a lot of store-bought versions lean way too sweet.
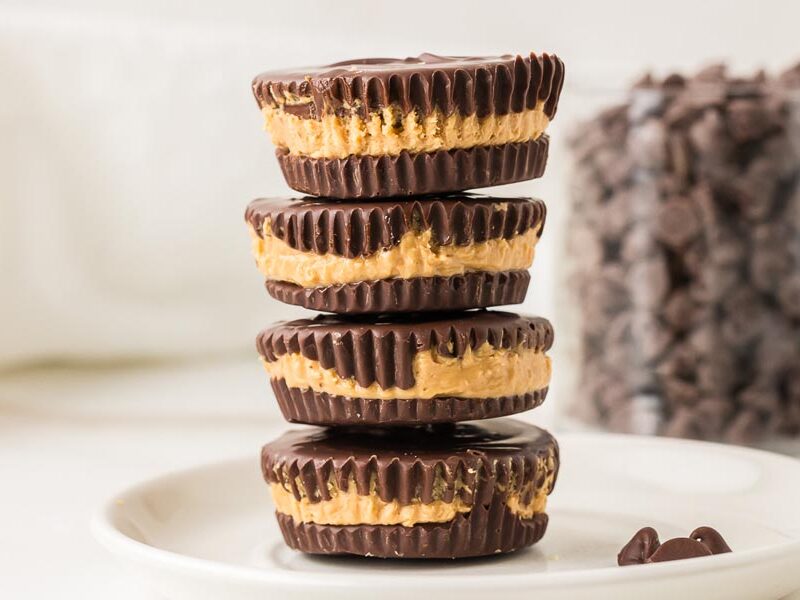
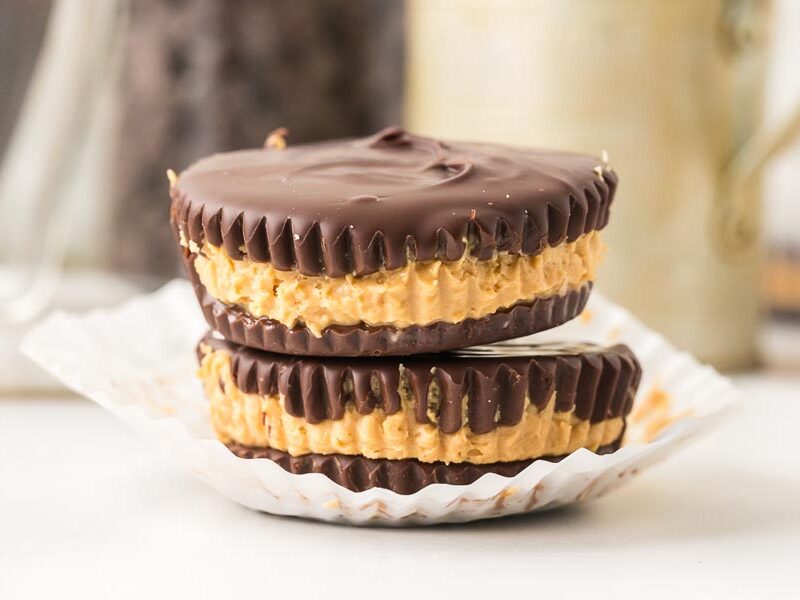
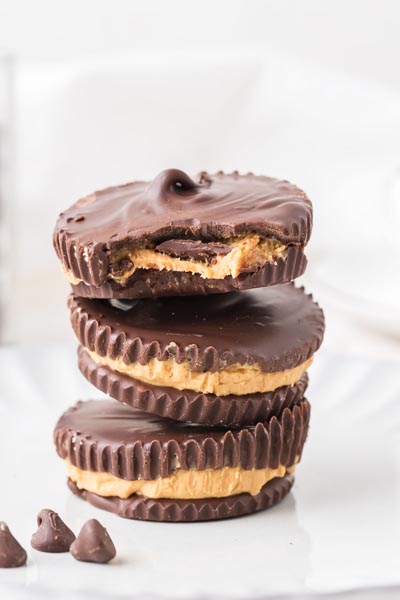
Brown cups with tan centers stacked on a white surface; the top cup has a bite missing.

Tips for the best texture (Don’t Skip This)

  • Use a creamy, no sugar added peanut butter… the kind with just peanuts and salt. If it’s too oily or runny, your filling won’t set right.
  • If your peanut butter is on the thinner side, add a little extra powdered sweetener to thicken it up so you get that classic firm but creamy center.
  • Don’t overheat the chocolate. Melt it slowly in short intervals and stir often, otherwise it can seize and turn grainy.
  • Tap the pan on the counter after each layer. This helps everything spread evenly so you don’t end up with lopsided cups.
  • Let each layer fully set before adding the next. Rushing this is how you get messy layers instead of clean, defined ones.
  • Keep the peanut butter layer cold before adding the top chocolate. This helps the chocolate set quickly and gives you that nice “snap” on top.
  • Store them in the freezer if you want that firm, Reese’s-style texture. The fridge will keep them softer.

Storage information

You’ve got a couple options here depending on how you like the texture:

  • Fridge: Store in an airtight container in the refrigerator for up to 1 week. They’ll be softer and more creamy, especially the peanut butter center.
  • Freezer (my preference): Keep them in the freezer for up to 2–3 months. This gives you that firmer, classic peanut butter cup texture, and honestly… they’re perfect straight from the freezer.
  • Room temp: I don’t recommend leaving them out for long, especially if your kitchen is warm. The chocolate can soften and the layers won’t hold as well.

If you’re stacking them, place a piece of parchment paper between layers so they don’t stick together. And if you’re like me, just keep a stash in the freezer so there’s always one ready when the craving hits.

Discover more keto recipes on our channel Hundreds of keto recipe videos, with step by step instructions and the tips that make keto easy.
KetoFocus
The recipe

Keto Peanut Butter Cups

Print Pin
Prep 10 min Cook 5 min Total 15 min Serves 18

Ingredients

Servings 18

Keto Peanut Butter Cups Ingredients

Step by Step Instructions

  1. Line a muffin pan

    Line an 18-cup muffin tin (or work in batches using a standard 12-cup pan) with paper cupcake liners.
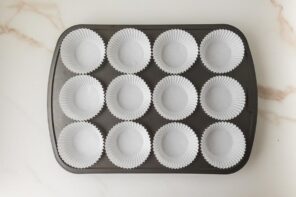
    Muffin tin lined with white paper cupcake liners arranged in rows for making peanut butter cups.
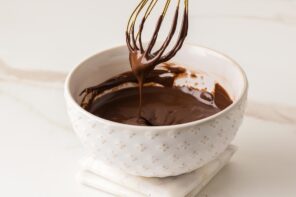
  2. Melt chocolate

    Melt half of the chocolate using a double boiler for more control or the microwave for speed. If using the microwave, add the chocolate to a microwave-safe bowl and heat in 20-second intervals, stirring between each, until smooth, about 3–4 rounds.

    For this step

    • 8 oz sugar-free dark chocolate
    Bowl of melted chocolate with a whisk lifting glossy chocolate to show smooth consistency.
  3. Chocolate bottom

    Spoon the melted chocolate into each liner, just enough to cover the bottom of all 18 cups. If needed, tap the pan firmly on the counter to spread the chocolate into an even layer. Place in the freezer for about 15 minutes, or until set.
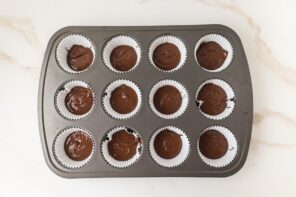
    Muffin tin with 12 paper liners filled with melted chocolate.
  4. Peanut butter center

    While that layer chills, beat together the peanut butter, butter, and powdered sweetener with a hand mixer for about 1 minute, until smooth and creamy. Taste and adjust sweetness if needed. Divide the peanut butter mixture evenly between the 18 cups, then tap the pan on the counter again to smooth it out. Freeze for another 15 minutes until firm.

    For this step

    • 1/2 cup creamy peanut butter
    • 2 tablespoons butter, softened
    • 1/4 cup + 2 tablespoons powdered sugar-free sweetener
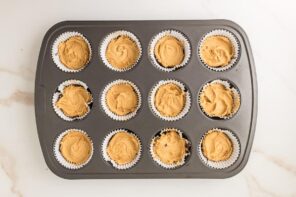
    Muffin tin with peanut butter filling scooped evenly into each chocolate-lined cup.
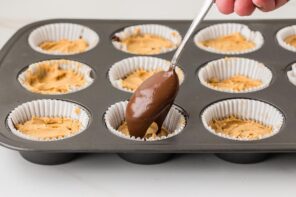
  5. Final chocolate shell

    Melt the remaining chocolate and spoon a small amount over each cup to cover the peanut butter layer.  Tap the pan after each addition to level the tops. Return to the freezer for a final 15 minutes, or until fully set.

    For this step

    • 8 oz sugar-free dark chocolate
    Spoon adding a final layer of melted chocolate over the peanut butter filling in each cup.

Nutrition

Per serving: 1 peanut butter cup

Calories
144
Fat
13g
Protein
3.6g
Total carbs
15.8g
Net carbs
4.5g

Nutrition is an estimate calculated from the ingredients listed. Brands vary, so check labels if you track closely.
Frequently Asked Questions

What kind of peanut butter can I use?

Use a creamy, no sugar added peanut butter, ideally one where the only ingredients are peanuts and salt. This gives you the best texture and keeps the flavor clean without any added sugars or fillers.

Can I make these dairy-free?

Yes, just use dairy-free sugar-free chocolate and skip any butter if your recipe includes it, or swap in coconut oil.

Browse by ingredient
Similar recipes

People who cooked Keto Peanut Butter Cups also made

Reviews

Tap to rate

4.6 from 23 ratings, 20 written

Made this recipe?

Replying to Yuki

Your rating

Joanne X.

Honestly, I gave up on peanut butter cups when I started keto and just figured that was gone. I ate one straight out of the fridge and got a little emotional over candy. Under 5 net carbs too! 👍

Reply

Ashley

These taste like Reese’s and I cannot be trusted alone with them!!

Reply

Annie Lampella

Ashley, this is exactly why mine live in the freezer! They take a lot longer to eat frozen.

Reply

Rachel

Use a small cookie scoop for the chocolate layers if it’s your first time. I eyeballed it and the first few came out lopsided. The peanut butter mixture is way denser than I expected, kind of play-dough, which actually makes it easier to press. First keto dessert I’ve pulled off that looks like a real thing.

Reply

Annie Lampella

Thanks Rachel! The filling is supposed to come out that thick, which is why I press mine in flat with my fingers instead of trying to spread it.

Reply

Jasmine

Made these last night, gone by morning. My husband thought they were store-bought.

Reply

Annie Lampella

I’m so glad they went that fast, Jasmine! Your husband isn’t wrong about that snappy chocolate shell.

Reply

Tara Thomas

Good tip: use foil liners, not paper. My first batch fused to the paper and I basically tore the shell apart getting them out. Foil lifted right out.

Reply

Annie Lampella

I made that mistake too. Foil pulls off clean, paper tears the shell.

Reply

Tricia

I wasn’t sure the chocolate layers would set fast enough. Wrong. You need full chill time between each pour or the filling slides. Rushed the first batch and ended up with flat cups. Batch two I followed it exactly and got clean shells, firm center, snap on the bite. First time making anything like this. I’d given up Reese’s six months ago and stopped expecting a substitute to actually work. The four ingredients are Annie’s call, and she’s been right about everything I’ve tried here.

Reply

Taylor I.

the filling ratio is what other versions always get wrong.

Reply

Annie Lampella

The filling is the cup, Taylor. Other versions treat the peanut butter layer like an afterthought, and you end up with basically a chocolate shell. I kept mine thick enough that the peanut butter hits you in every bite.

Reply

Rebecca

Been making double batches since I figured out the freezer thing. Line all 18 liners before you touch the chocolate, otherwise the first layer sets while you’re still filling the pan. The peanut butter center needs to go in thicker than it looks or the ratio’s off when you bite through. Single layer into the freezer for an hour, then they stack clean and hold for at least three weeks. Two a day is 9 net carbs. Barely have to think about chocolate cravings for two weeks per run. That’s the whole system.

Reply

Riley

Top layer went thin on mine.

Reply

Elizabeth

Ran out of powdered sweetener mid-batch and accidentally found out a tablespoon less works fine for the filling. Batch seven and still figuring stuff out. Do it that way on purpose now.

Reply

Annie Lampella

Seven batches in and it’s not the recipe anymore, it’s yours.

Reply

Tanya

Sugar-free chocolate gets this weird smell when it sets, like sweetener overload. These don’t. The butter ratio is right and the filling shows it, closest I’ve gotten to the real thing. Four stars because the sweetener hits right at the finish.

Reply

Annie Lampella

Tanya, the filling sweetener gets me too. I cut back a tablespoon and eat them cold, like actually cold, not just fridge-temp. Something about the cold takes the edge off.

Reply

Donna

Somewhere around batch six I started laying down a thicker chocolate bottom than the recipe calls for, because the filling needs something solid underneath and mine kept shifting to one side. That fixed everything. The filling holds, they look like actual peanut butter cups when you unwrap them. I’ve also been nudging the powdered sweetener up by about a teaspoon in the filling, just because the dark chocolate is intense and I want that sweetness cutting through more. With those two tweaks these are about as close to a Reese’s as I’ve gotten on keto, which is not a small claim. The original base layer is a hair thin for how the filling sits. That’s the one-star gap for me, but after a few batches you’ll know exactly where to stop pouring.

Reply

Annie Lampella

Donna, batch six is where the real recipe starts. The sweetener bump I actually do now too, the dark chocolate in these is aggressive enough that the filling needs the extra.

Reply

Sarah

kids found my stash

Reply

Annie Lampella

Mine go in a container labeled ‘meal prep’ at the back of the freezer. Bought me about a week before they caught on.

Reply

Drew

Lining all 18 cups was worth it. Do you use Lily’s?

Reply

Annie Lampella

Lily’s for the shell, yes. I use the 55% dark. They melt clean and don’t get that sweetener-heavy finish some of the other brands have.

Reply

Maria

Pool day last weekend, put these out with everything else. A friend picked one up and spent a second looking around for the Reese’s bag. The chocolate shell gets people every time.

Reply

Annie Lampella

That Reese’s bag scan is the best review it’ll ever get. Four ingredients and it fools people at a pool party.

Reply

Nicole

Used crunchy peanut butter instead of creamy and it completely changed the center, little bits throughout that give you something to actually chew into. Worth knowing: go lighter on the chocolate bottom layer than feels right, or the shell cracks when you pop them out of the liner.

Reply

Annie Lampella

The crunchy peanut butter thing is going in the notes. And that bottom layer tip is real – I’ve cracked a few shells going too thick on that first pour.

Reply

Jess

Wasn’t sure 4 ingredients could actually pull this off, but after the first one came out of the freezer I stopped being skeptical. The chocolate shell snaps clean and the peanut butter center is somehow exactly right. Making a double batch next week.

Reply

Annie Lampella

That snap is everything. For the double batch, line both tins at once if you have them so you’re not waiting around between rounds.

Reply

Tamara

Okay I have to tell someone about the coconut oil trick. I stirred a teaspoon into each 8 oz of Lily’s dark chocolate while melting and the whole thing went completely smooth and actually pourable, which made getting an even layer in the liners so much easier. The shell sets up glossy and has this satisfying snap when you bite through it instead of cracking or bending weird. I also added a pinch of flaky salt right before the final chocolate layer set, and that contrast against the sweetened peanut butter filling is kind of hard to stop thinking about. I’d been making these for a few weeks without either tweak and this batch honestly feels like a different recipe. Starting every future batch with both from the jump.

Reply

Annie Lampella

The coconut oil pour is way easier to control for that even first layer. Flaky salt right before the top sets – I’ve been doing it so long I forgot it wasn’t in the original notes.

Reply

Yuki

Every keto peanut butter cup I’d made before tasted like chalk. The filling here actually has that dense, salty-sweet thing, and with Lily’s dark chips the chocolate snaps clean. Closest thing to the real Reese’s ratio I’ve found.

Reply

Annie Lampella

The ratio took the most testing. Most recipes dump in too much sweetener and it kills the peanut butter flavor entirely. Yuki, that snap from Lily’s dark is honestly the only reason I use them over other sugar-free chips.

Reply

Steve

One thing that completely changed how mine turned out: let the melted chocolate cool a minute or two before spooning it over the peanut butter layer. First time I made these, I went straight from the double boiler and the filling basically dissolved into the chocolate, peanut butter swirling everywhere. Second batch I waited, and they came out looking like actual store-bought cups. That cooldown is not optional.

Reply

Annie Lampella

That temperature window matters. Two to three minutes off the double boiler, I test it with a spoon, if it falls slowly it’s ready to pour. Go in too hot and you’re making swirl bark, not cups.

Reply

Keep going

More Dessert Recipes

See all 176 Dessert recipes

Get new recipes from Annie

One email a week. Unsubscribe whenever you like.