Easy Homemade Grass-Fed Butter Using a Mason Jar

Published March 25, 2020 • Updated March 10, 2026
This post may contain affiliate links. See my disclosure policy.
I make my own grass fed butter with just heavy cream, a mason jar, and about ten minutes of shaking. It's the one keto staple I never buy from the store anymore because fresh churned is that much better.
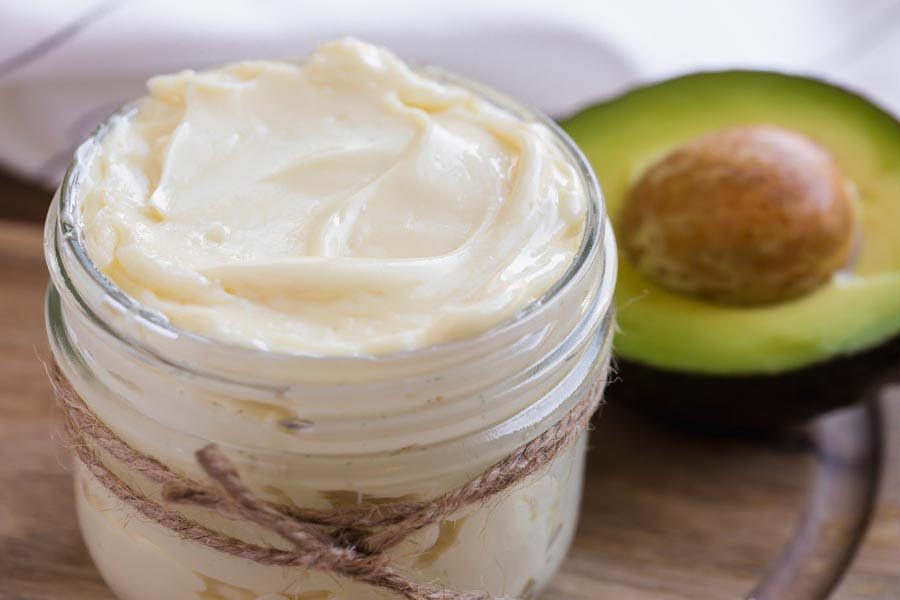
I started making my own butter about four years ago because I wanted to know exactly what was going into it. Store-bought is fine, but once I churned my first batch in a jar, I realized how different fresh butter actually tastes. The flavor is sweeter, the texture is creamier, and the color from pastured cream is this deep, almost golden yellow that store butter can’t touch.
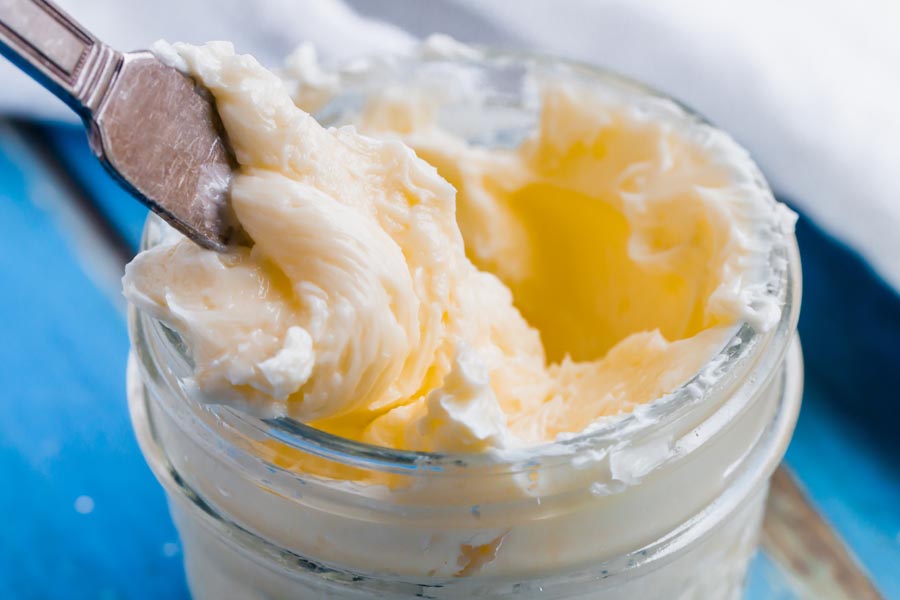
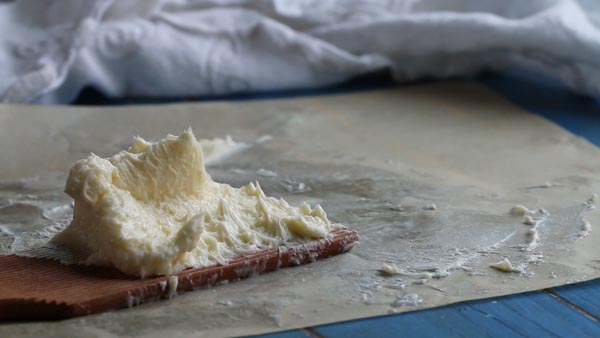
The whole process is just shaking heavy cream until the fat separates from the liquid. Here’s what actually happens inside the jar: for the first 2-3 minutes, the cream thickens into whipped cream and the jar goes quiet. Around 5-6 minutes, that whipped cream starts breaking into grainy clumps. Somewhere between 8-10 minutes, those clumps pull together into a solid ball floating in liquid. That liquid is real buttermilk (not the cultured kind from the store), and I save every drop for baking.
I use heavy whipping cream from pastured cows because the fat content is higher and the butter comes out noticeably richer. Spring and summer cream, when the cows are eating fresh grass, produces the most golden butter I’ve ever made. Regular cream works too, but the result is paler and milder. For a low-carb kitchen, this is one of the simplest upgrades I’ve made.
Room temperature cream is the key. I pull it from the fridge and let it sit on the counter for at least an hour before I start. Cold cream will eventually churn, but it takes twice as long and my arms were not happy the one time I tried it. Reader Priya shared a technique in the comments that I’ve used ever since: shake hard for the first 3 minutes, then ease up when you feel it start to thicken. It genuinely saves your arms.
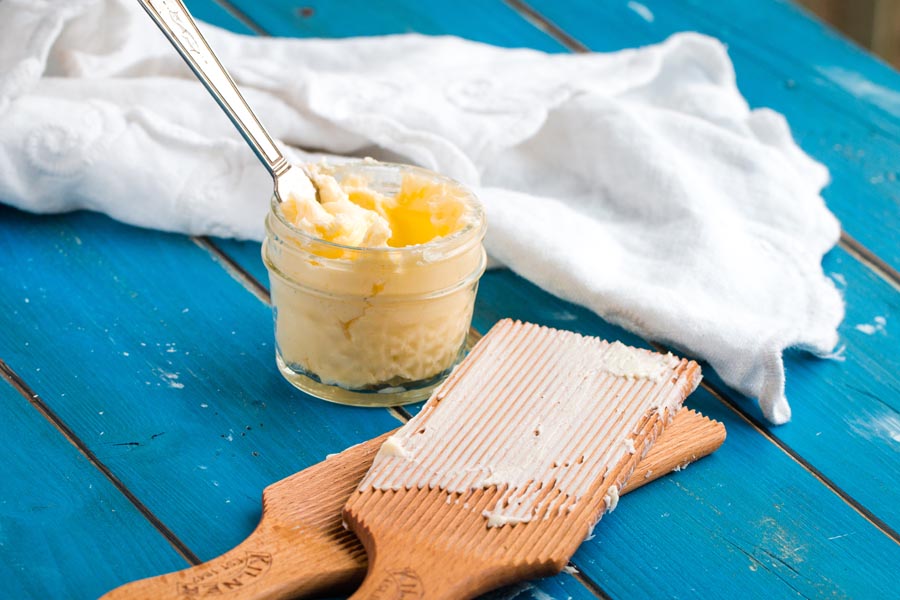
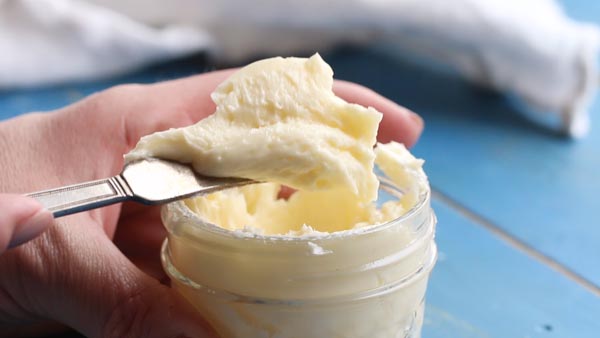
Once everything separates, I knead under cold water to wash out the remaining buttermilk. This step is what keeps the butter smooth instead of crumbly. I knead until the water runs completely clear, then pat dry and shape. If you skip it or rush through, you’ll end up with butter that falls apart and goes off within days.
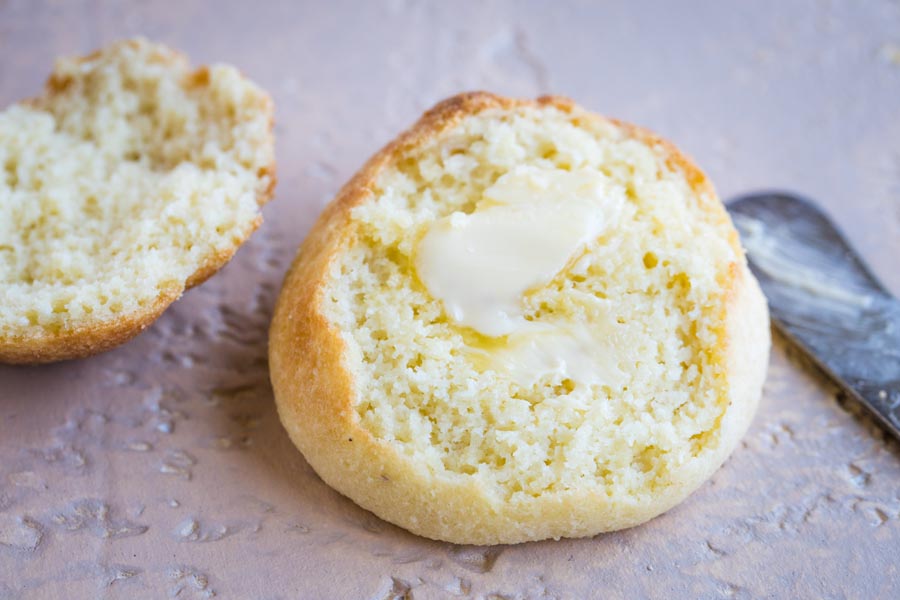
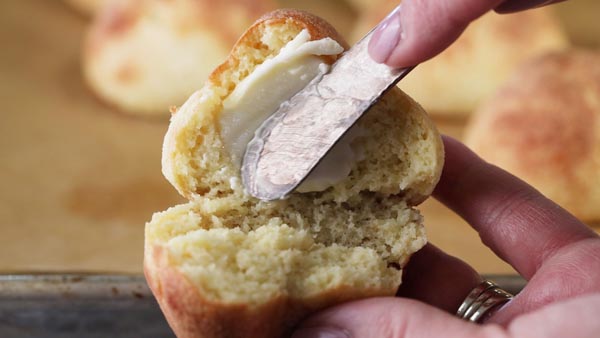
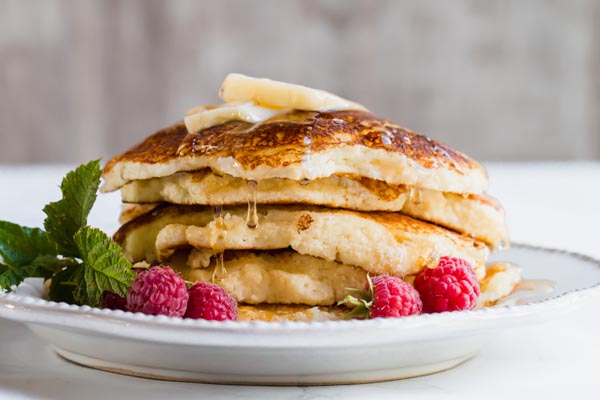
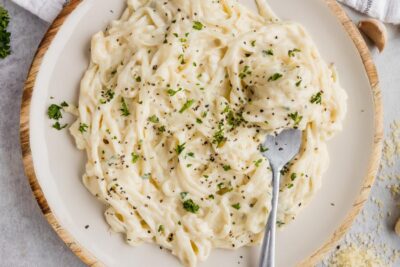
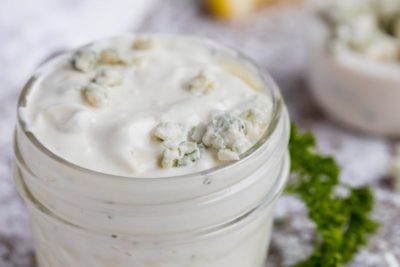
Plain is what I make most often, but compound butters are worth the extra minute. Garlic and fresh rosemary is my go-to. I’ve also mixed in everything bagel seasoning, which pairs surprisingly well on toast or alongside chimichurri sauce on a steak. For cooking, fresh butter makes a real difference in recipes like keto alfredo sauce where the cream flavor actually comes through. I’ve stirred a spoonful into chicken bone broth for extra richness, and it’s great for browning keto bread crumbs in a skillet.
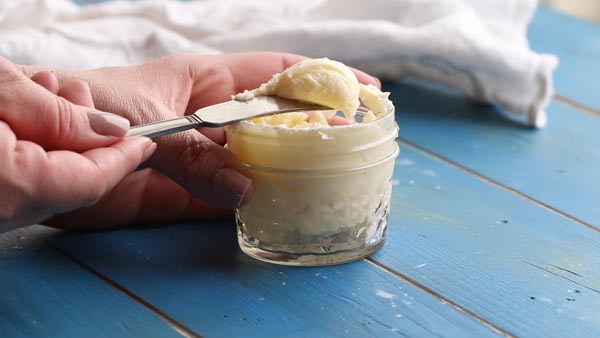
For storage, I wrap individual portions in parchment paper and keep them in the fridge for up to two weeks. I also freeze regularly. I roll into 4-ounce logs, wrap in parchment then foil, and they hold for about three months in the freezer without any change in flavor or texture. Having a stash means I always have fresh butter on hand, even when I don’t feel like shaking a jar.
Explore 683+ keto recipe videos with step-by-step instructions, tips, and tricks to make keto easy.
Ingredients
 1 pint grass-fed heavy whipping cream, room temperature
 -
1/4 teaspoon salt (omit, if making unsalted butter)
Step by Step Instructions
Step by Step Instructions
Heavy cream
Let the heavy cream sit out at room temperature for 1-2 hours. If you try to churn it cold, it will take longer to turn into butter. Pour heavy cream into a 16 oz mason jar. Sprinkle in salt if making salted butter.

Shake it
Tighten the lid and shake for 5-10 minutes until the liquid separates from the butter. The liquid part is grass-fed buttermilk. The solid part is grass-fed butter.

Strain it
Once the liquid has separated, strain the buttermilk using a fine mesh strainer to catch the butter. Save the buttermilk for recipes shown below.

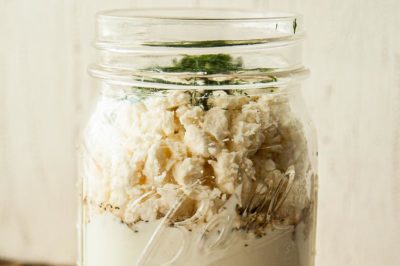
Knead the butter
In a small bowl, pour 1/2 cup water to the butter and knead the butter with your hands, butter paddles or a spoon to clean the butter and remove excess buttermilk.

Remove the butter
Remove butter from water bath and place on a sheet of parchment paper. Continue to knead butter with hands or butter paddles to catch excess buttermilk.


Nutrition disclaimer
The nutrition information provided is an estimate and is for informational purposes only. I am a Doctor of Pharmacy (Pharm.D.); however, this content is not intended to be a substitute for professional medical advice, diagnosis, or treatment. Always consult your physician or other qualified health provider before making any lifestyle changes or beginning a new nutrition program.
Your Macros. Your Recipes. Calculated in 60 Seconds.
Get personalized keto macros and instantly see which recipes fit your targets. No more guessing what to eat.
Get My Macros + Recipes →Frequently Asked Questions
Can I use a stand mixer or blender instead of shaking by hand?
I've done it both ways. A stand mixer with the whisk attachment works great for larger batches, and I use it when I'm doubling the recipe. A blender also works but it's harder to control the separation point, so for a single pint I still prefer shaking by hand. The jar gives me the most consistent results with the least cleanup.
How much butter does one pint of cream make?
I consistently get about half a cup of butter and a full cup of real buttermilk from one pint of heavy whipping cream. The exact amount depends on the fat content of your cream, but that ratio has been reliable for me across different brands.
Should I use pasteurized or ultra-pasteurized cream?
I always go with pasteurized. Ultra-pasteurized cream has been heated to a higher temperature, which changes the protein structure and makes it harder to churn. I tried both side by side once, and the ultra-pasteurized took me almost 20 minutes of shaking with a noticeably softer result. Pasteurized cream churns faster and the butter texture is firmer.
Can I freeze homemade butter and how long does it last?
I freeze it all the time. I roll it into 4-ounce logs, wrap in parchment paper, then a layer of foil, and it keeps for about three months without any change in flavor or texture. I pull a log out the night before and let it thaw in the fridge. I always keep at least two logs in the freezer so I never run out.
Why is my homemade butter crumbly and how do I fix it?
I've had this happen twice, and both times it was because I didn't knead out enough buttermilk. When buttermilk stays trapped in the butter, the texture goes grainy and crumbly instead of smooth. The fix is kneading under cold running water until the water runs completely clear. I also make sure my cream is at room temperature before I start shaking. Cold cream produces a stiffer, less pliable butter that's harder to work smooth. If your butter is already crumbly, you can re-knead it under cold water and press it back together.
How do I know when the butter is done separating?
I go by sound and feel. For the first few minutes, the jar is heavy and quiet because the cream has thickened into whipped cream. Around 5-6 minutes, the whipped cream breaks apart and the jar suddenly gets louder as liquid sloshes around grainy clumps. When I see a solid yellow ball floating in thin white liquid, separation is complete. I switched to a quart-size jar after a reader tip, and the extra room lets the cream move more freely, which shaved a couple minutes off the process.
Can I add flavors to the butter?
I do this constantly. My go-to is garlic with fresh rosemary, mixed in right after churning while the butter is still soft. Everything bagel seasoning is another one I keep coming back to. I've made a batch with keto taco seasoning stirred in for topping grilled chicken, and garlic herb butter is great on a board next to bacon jam and cheese.
What can I do with the leftover buttermilk?
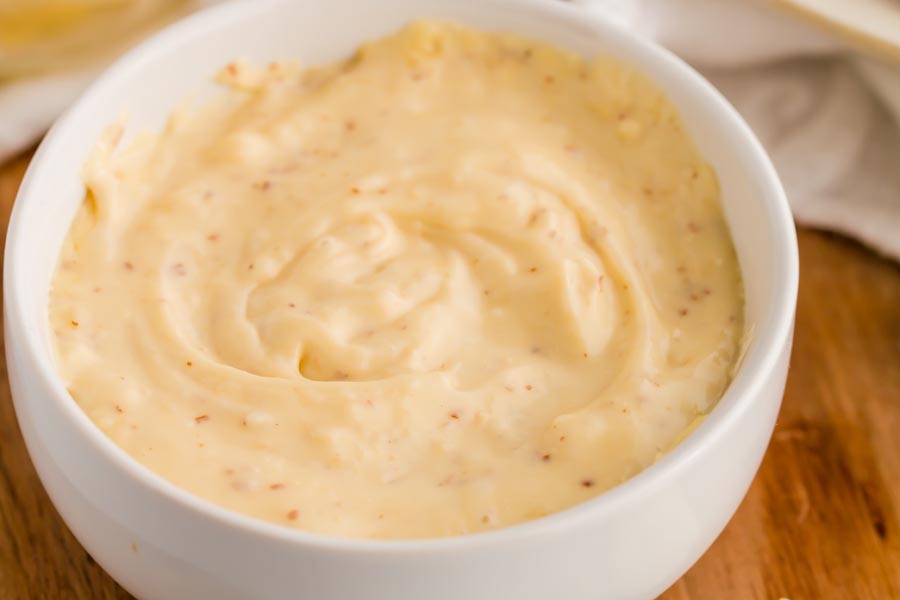
I save every drop. The buttermilk you get from churning is different from the cultured kind at the store, and I think it tastes better. I use it in pancake batter, biscuit dough, and it makes a great base for keto ranch dressing. Between this and recipes like keto avocado mayo, I barely buy condiments from the store anymore. The buttermilk keeps in the fridge for about a week.
 Grass-fed butter is a healthier alternative to regular butter since it comes from cows that eat a grass-based diet. Because of this, the grass-fed alternative is known to have stronger nutritional values, offering better health benefits.
Also known as pastured butter, grass-fed can be recognized easily by its distinguished, deep-yellow color and thicker texture. However, another standout quality is its rich, wholesome flavor.
If you are serious about consuming foods with the most nutritional value, you should consider grass-fed butter over commercial butter. Grass-fed butter can be pricy if purchased in the store. Often, a pint of grass-fed heavy cream is less expensive than a brick of grass-fed butter, like Kerrygold or Vital Farms.
Grass-fed butter is a healthier alternative to regular butter since it comes from cows that eat a grass-based diet. Because of this, the grass-fed alternative is known to have stronger nutritional values, offering better health benefits.
Also known as pastured butter, grass-fed can be recognized easily by its distinguished, deep-yellow color and thicker texture. However, another standout quality is its rich, wholesome flavor.
If you are serious about consuming foods with the most nutritional value, you should consider grass-fed butter over commercial butter. Grass-fed butter can be pricy if purchased in the store. Often, a pint of grass-fed heavy cream is less expensive than a brick of grass-fed butter, like Kerrygold or Vital Farms.
 Your best bet to ensure the best of price, taste and quality is to churn it at home and make mason jar butter. It allows you to adjust the quantity of buttermilk and salt according to your own preference. Churning homemade butter also means 100% preservative-free produce.
To learn more about grass-fed butter, its benefits, making it at home, and homemade butter benefits, read on.
Note that grass-fed butter is different from organic butter. While it comes organically from the cows, those cows are not necessarily grass-fed. On the other hand, Irish butter is mostly grass-fed butter because it is made from grass-fed cow’s milk. Kerrygold butter is from Irish cows.
Your best bet to ensure the best of price, taste and quality is to churn it at home and make mason jar butter. It allows you to adjust the quantity of buttermilk and salt according to your own preference. Churning homemade butter also means 100% preservative-free produce.
To learn more about grass-fed butter, its benefits, making it at home, and homemade butter benefits, read on.
Note that grass-fed butter is different from organic butter. While it comes organically from the cows, those cows are not necessarily grass-fed. On the other hand, Irish butter is mostly grass-fed butter because it is made from grass-fed cow’s milk. Kerrygold butter is from Irish cows.
 The best way to get access to healthy, 100% organic and preservative-free grass-fed butter is to make it at home. Homemade butter is not just healthier – it ends up being cheaper too. Above all, by making the mason jar butter at home, you get to decide exactly how it tastes – salted, unsalted, or flavored however you like.
 Also, remember to store homemade buttermilk in the refrigerator for up to 7 days.
 You can speed up the churning process by adding a marble to the mason jar. The stone will act as an agitator and allow the butter to churn faster.
Who said healthy means giving up the taste? The best advantage of making homemade butter is that you can make it taste as simple or flavorsome as you want. You can also add seasonings like basil, garlic powder, and thyme. It adds great flavor and makes it easier to stick with keto.
You can speed up the churning process by adding a marble to the mason jar. The stone will act as an agitator and allow the butter to churn faster.
Who said healthy means giving up the taste? The best advantage of making homemade butter is that you can make it taste as simple or flavorsome as you want. You can also add seasonings like basil, garlic powder, and thyme. It adds great flavor and makes it easier to stick with keto.
 The homemade butter that’s made with grass-fed milk has a shelf life of 3-5 days when stored at room temperature. The life extends to 7-10 days when it is stored in the refrigerator.


Tried the stand mixer, the blender, even a food processor before landing on the mason jar. The difference is the kneading step. Everything else just churns but doesn't work the buttermilk fully out, and you end up with butter that goes off faster.
Yeah, the kneading is what most people rush. Buttermilk left in and it goes rancid fast. Cold running water til the water runs completely clear, that's my tell it's done.
Brought a little ramekin of this to a dinner party last weekend (along with some almond flour crackers for myself), and two people stopped mid-bite to ask what butter that was. When I said I made it from grass-fed heavy cream and a mason jar, they looked at me like I'd said I spun gold. The color alone is a dead giveaway -- that deep yellow you just don't see in stores. Making a double batch next time so I actually have some left for myself.
That color is always the tell. Store butter looks almost white next to it. Double batch was the right call.
I've made homemade butter in a stand mixer a few times and always went back to Kerrygold because the effort wasn't worth it. This changed that. The shaking takes more arm strength than the recipe lets on, but the butter comes out noticeably richer than store-bought. Four stars, small gripe aside.
Pro tip: shake hard for the first 3 minutes then ease up when it starts to thicken. Saves your arms and you'll hit separation faster. I use a 32oz jar instead of a pint so there's room for the cream to really slosh around.
The bigger jar is a good call. More room to slosh means it thickens faster. I've always used a pint but I'm trying the 32oz next time.