Stained Glass Cake

Published July 6, 2025 • Updated March 13, 2026
This post may contain affiliate links. See my disclosure policy.
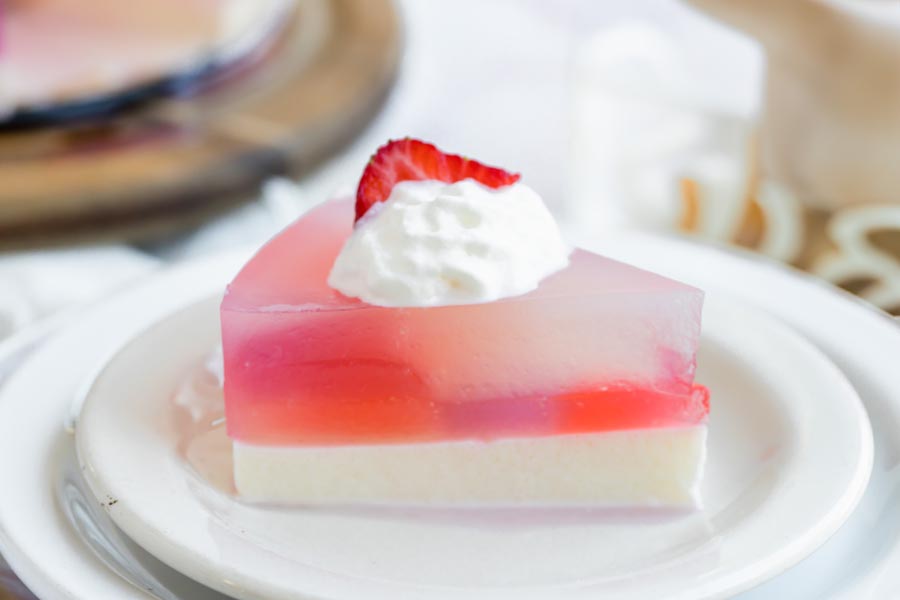
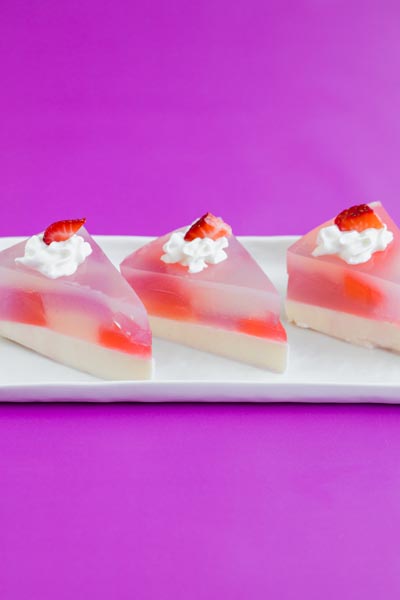
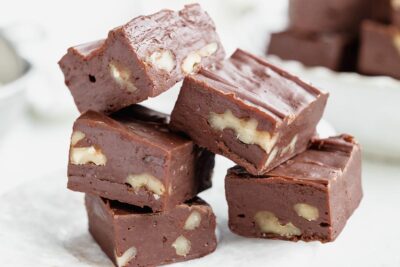
This stained glass cake is a nearly zero-carb, sugar-free dessert that looks like a slice of art. Made with agar instead of gelatin, it's a colorful, no-bake treat with cubes of broken glass suspended in a creamy vanilla base.

I originally made this as my keto version of the classic broken glass Jello cake, but I didn’t use Jello here (save that for my Jello whip recipe). Instead, I used agar agar powder, which gives that same gelatin-like set without the sugar, carbs, or animal products. If you’ve made my raindrop cakes before, this is a similar concept, just with a lot more color and flair. I wanted a dessert that looked impressive but stayed completely clean on macros, and this is what I came up with.
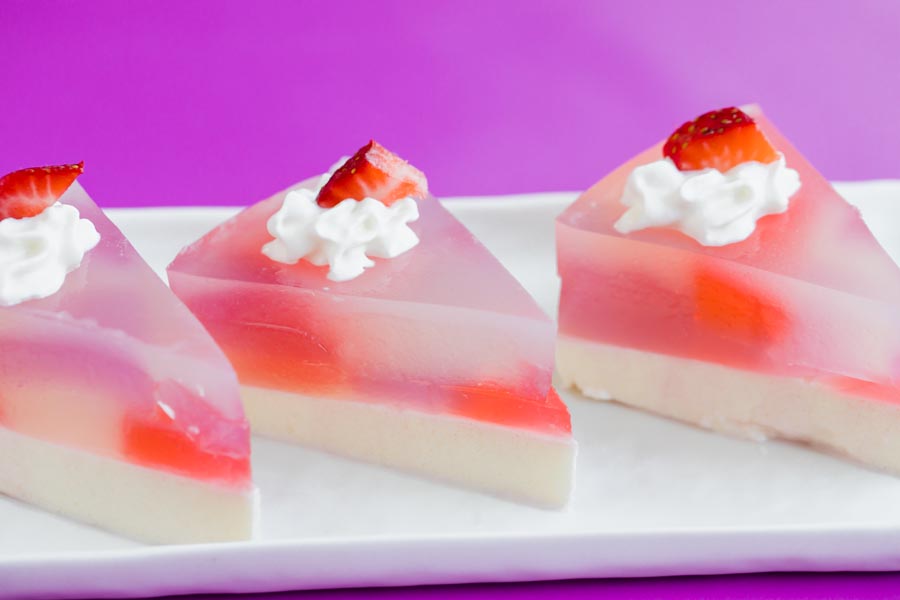
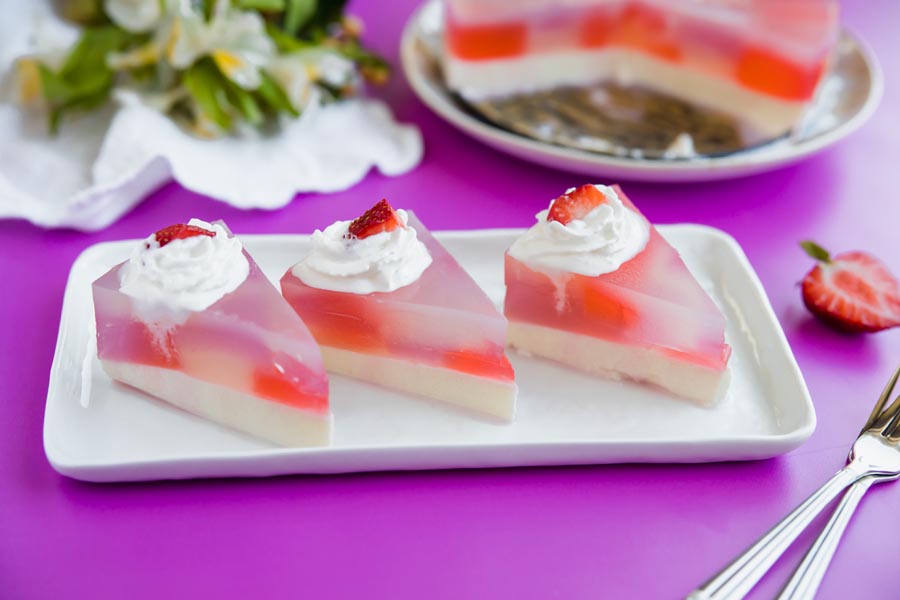
The colored cubes are made with water, agar, and a powdered sugar-free sweetener. Once set and cut, they get layered over a creamy vanilla base (also agar and heavy cream) to create that broken prism effect. A final clear agar pour seals everything so it slices cleanly into wedges or squares. I use a 6-inch springform pan because the taller cross-section really shows off the color pattern. Each piece looks completely different depending on where the cubes landed.
I’ve made this at least a dozen times now, and the thing I keep coming back to is how agar works better than gelatin here. Agar sets at room temperature in about 15 minutes, no waiting around for hours with your fingers crossed. The cubes hold their shape when you slice, and the whole thing stays firm even sitting out at a party for a couple hours. Gelatin would go soft and saggy in that same situation. If you like my keto panna cotta, you’ll recognize that same clean, smooth set that agar gives you.
The whole dessert is no-bake, zero-carb, and basically zero calorie, which makes it perfect for warm weather when I don’t want the oven on. I’ve brought this to summer get-togethers and holiday parties, and people genuinely don’t believe it’s low-carb. It looks too fancy for something that takes 30 minutes of active work and zero baking. For holidays, I swap the food coloring to match (red and green for Christmas, red and blue for July 4th). For more no-bake ideas, try my keto cheesecake fluff or raspberry no-bake cheesecake.
The first time I sliced into this, I just stared at it. Every piece had a different pattern of color cubes running through it, like looking through a kaleidoscope. You don’t need any decorating skills for that. No piping, no fondant, no tempering. You pour, chill, and slice, and the art happens inside the cake on its own.
Tips for working with agar
The biggest thing to know about agar is that it sets at room temperature, fast. Once your colored mixture comes off the heat, you have maybe 10-15 minutes before it starts firming up. I pour into bowls and add food coloring right away. If you try to do it slowly, you’ll end up with uneven distribution in your finished slices. Have your bowls, food coloring, and extracts all ready before you start heating. If the mixture starts getting thick in the pan, put it back on low heat for 30 seconds to re-melt.
For colors that actually taste like something, match your extracts to your colors: raspberry for red, lemon for yellow, and leave the third batch clear with vanilla. Agar has zero flavor on its own, so without the extract you’re just eating pretty shapes. I’ve also done orange extract with orange coloring for a fall version, and peppermint with green for Christmas.
You can make the colored cubes and cream base up to 2 days ahead. Keep them covered in the fridge, then assemble and pour the clear seal when you’re ready. I do this for parties so the day-of work takes about 10 minutes. If you like colorful no-bake projects, my bomb pops have a similar vibe in popsicle form.
Explore 683+ keto recipe videos with step-by-step instructions, tips, and tricks to make keto easy.
Ingredients
 4 ⅓ cups water, divided
 -
4 teaspoons agar agar powder, divided
-
3/4 cup powdered sugar-free sweetener, divided
-
1 ⅓ cup nut milk or heavy cream
-
1 teaspoon vanilla extract
-
food coloring
-
6-inch springform pan
Step by Step Instructions
Step by Step Instructions
Make agar solution
Combine 2/3 cup water, 1 ¼ teaspoons agar powder and 1/4 cup powdered sugar-free sweetener into a small saucepan. Heat over medium high heat until boiling. Remove from heat.

- 2/3 cup water
- 1 ¼ teaspoons agar powder
- 1/4 cup powdered sugar-free sweetener
Cream base
Stir in nut milk or heavy cream into the agar mixture. Pour into a parchment lined 6 inch springform pan and refrigerate for 30 minutes or until set.

- 1 ⅓ cup nut milk or heavy cream
Make more agar solution
In a clean saucepan, combine 1 ⅓ cup water, 2 ½ teaspoons agar powder and 1/2 cup powdered sugar-free sweetener. Heat over medium high heat until boiling. Remove from heat.

- 1 ⅓ cup water
- 2 ½ teaspoons agar powder
- 1/2 cup powdered sugar-free sweetener
Make the stained glass
Stir in vanilla extract and 1 ⅓ cup water. Separate mixture equally into three bowls. Add two different colors of food coloring to only two bowls and mix to combine. Pour each bowl into a small baking dish or plastic container. Refrigerate for 30 minutes or until set.

- 1 teaspoon vanilla extract
- 1 ⅓ cup water
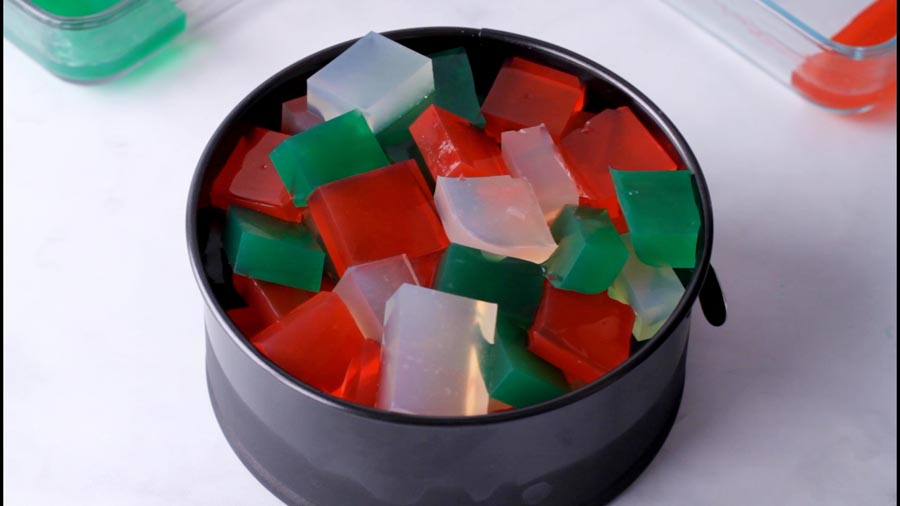
Layering the stained glass
Once hardened, cut the three colored mixtures into small squares and place on top of the cream layer, alternating the colors as you cover the entire surface.

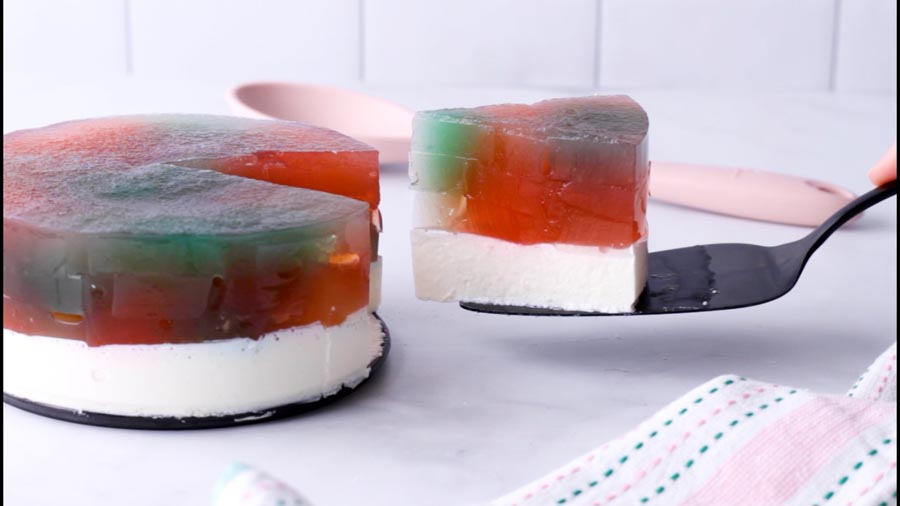
Seal the cake
To create an even cake and to help seal the layers together, prepare one final mixture of agar solution. Heat 1/3 cup water and 1 ¼ teaspoon agar powder in a saucepan until boiling. Remove from heat, add in 1 cup water. Let cool for a couple of minutes. Pour agar mixture over the cake until it covers the entire cake. Refrigerate for 30 minutes or until set.

- 1/3 cup water
- 1 ¼ teaspoon agar powder
- 1 cup water
Nutrition disclaimer
The nutrition information provided is an estimate and is for informational purposes only. I am a Doctor of Pharmacy (Pharm.D.); however, this content is not intended to be a substitute for professional medical advice, diagnosis, or treatment. Always consult your physician or other qualified health provider before making any lifestyle changes or beginning a new nutrition program.
Your Macros. Your Recipes. Calculated in 60 Seconds.
Get personalized keto macros and instantly see which recipes fit your targets. No more guessing what to eat.
Get My Macros + Recipes →Frequently Asked Questions
Can I use gelatin instead of agar agar powder?
I've tried both, and they're different experiences. Gelatin sets softer, needs hours in the fridge, and the cubes come out jigglier. Agar sets firm at room temperature in about 15 minutes, and the cubes hold their edges when you slice. If you go with gelatin, you'll need roughly 3 times the amount by weight to get similar firmness, and the whole recipe takes much longer. I prefer agar here because the cubes stay crisp and the slices look clean. The result also won't be vegan or as low-carb as the original.
Can I use different flavors and colors?
I mix and match all the time. My go-to is raspberry extract for red, lemon for yellow, and plain vanilla for the clear batch. Agar has zero flavor on its own, so without extract you're just eating colored shapes. I've also used orange extract with orange coloring for a fall version, and peppermint with green for Christmas. Pick flavors you actually want to taste and match the colors to them. You can also use sugar-free drink mixes or flavored water if you don't have extracts on hand.
How far in advance can I make this?
I prep the colored cubes and the cream base layer up to 2 days ahead. They keep their shape in the fridge with no issues. Then on the day I'm serving, I assemble the cubes on the cream base and pour the clear seal, which takes about 10 minutes. The fully assembled cake lasts 3-4 days in the fridge, so you could also make the whole thing the day before and it'll hold up perfectly.
Can I make this dairy-free?
I've made this with full-fat coconut cream instead of heavy cream for the base layer, and it works well. The coconut adds a slight flavor that I actually like with the fruit extracts. Use canned coconut cream (the thick stuff), not the carton coconut milk, or your base won't set firm enough. With coconut cream and agar, the whole dessert is fully vegan too. If you like coconut-based keto desserts, my dairy free ice cream uses a similar swap.
Why did my agar start setting before I finished pouring?
This is the most common issue I hear about, and it happened to me the first time too. Agar sets at room temperature, so it starts firming up the second it comes off the heat. I've learned to have my bowls, food coloring, and extracts all ready before I even start heating. Once it's off the stove, I pour into bowls and stir in color immediately. The whole pour-and-color process should take under 2 minutes. If you notice it getting thick in the saucepan, put it back on low heat for 30 seconds to re-melt.
Can I double this for a larger pan?
I've doubled it using a 9-inch springform pan and it works, but the slices won't be as tall so the prism effect is less dramatic. If you want that tall, impressive cross-section, I'd make two separate 6-inch cakes instead of one big one. The proportions stay the same either way. I've also made half batches in a small loaf pan for just my husband and me, and that works fine too.
Is this vegan?
The agar version is plant-based since agar comes from seaweed. If you also swap the heavy cream for full-fat coconut cream in the base layer, the whole thing is completely vegan. I've done this a few times for friends who are dairy-free and they couldn't tell the difference in texture. The set is the same, and the coconut flavor is subtle enough that it doesn't take over.


Never worked with agar before so I was watching those colored layers like a hawk while they set, and honestly the texture came out cleaner than any gelatin I've used (no wobble, just sharp clean cuts when I sliced into the springform). Is there a trick to keeping the glass cubes evenly distributed in the cream base, or is some settling toward the bottom just part of it?
The presentation on this is honestly beautiful, and mine came out looking almost exactly like the photos, which almost never happens for me with fancy no-bake projects. The agar was more temperature-sensitive than I expected though, and that's where I ran into trouble. My colored pieces started setting before I finished pouring them into separate bowls, so the distribution in my final slice was a little uneven compared to what I was going for. The cream base is lighter than you'd expect for something with zero sugar. Four stars because the concept is perfect and the flavor is there, but a note about working fast once the colored agar comes off the heat would have saved me a lot of scrambling. Next time I'm doing smaller batches so I can stay ahead of it.
Matched the extracts to the colors (raspberry for red, lemon for yellow) and it finally made sense. Agar is so neutral that without them you're just eating pretty shapes.
Raspberry for red, lemon for yellow is exactly what I do. Agar has zero flavor by itself, so without extract you've got nothing but color.
Do I need to use agar powder specifically or would gelatin work the same way? I've never used agar before and not sure if it's worth ordering online or if I can just grab gelatin at the grocery store.
You can use gelatin but it sets softer and takes longer to firm up. Agar sets at room temp in like 15 minutes, gelatin needs fridge time. The cubes won't be as firm either, more jiggly. I like agar for this one because the cubes hold their shape when you slice it.