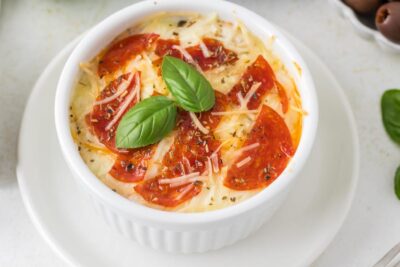
Keto Bread Bowl

Published April 3, 2020 • Updated March 13, 2026
This post may contain affiliate links. See my disclosure policy.
I developed this recipe so I could eat soup the way I used to before going keto. The fathead dough bakes up golden and sturdy enough to hold chili, chowder, or any thick soup without falling apart.
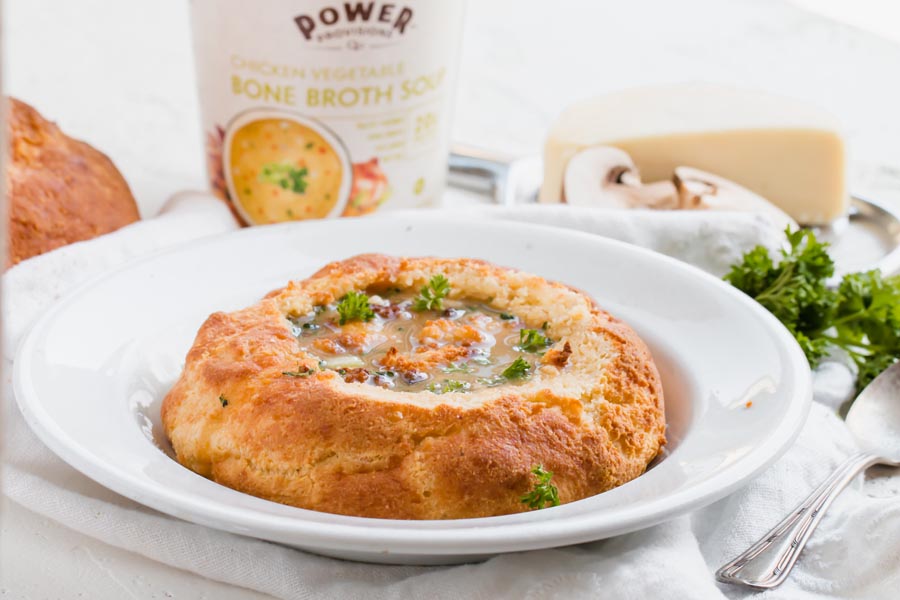

I used to order bread bowls at Panera all the time. Sourdough filled with broccoli cheddar was my go-to for years. When I went keto in 2012, I figured that was done for good. Turns out fathead dough makes one that actually holds up to hot soup. It took me a while to get the formula right, but once I nailed it, this became a regular in my kitchen.
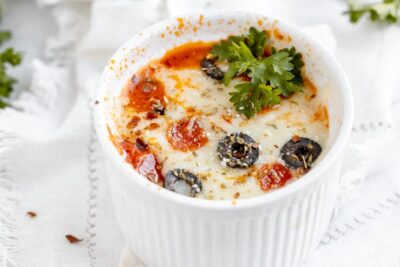
How I Make This Fathead Dough Recipe

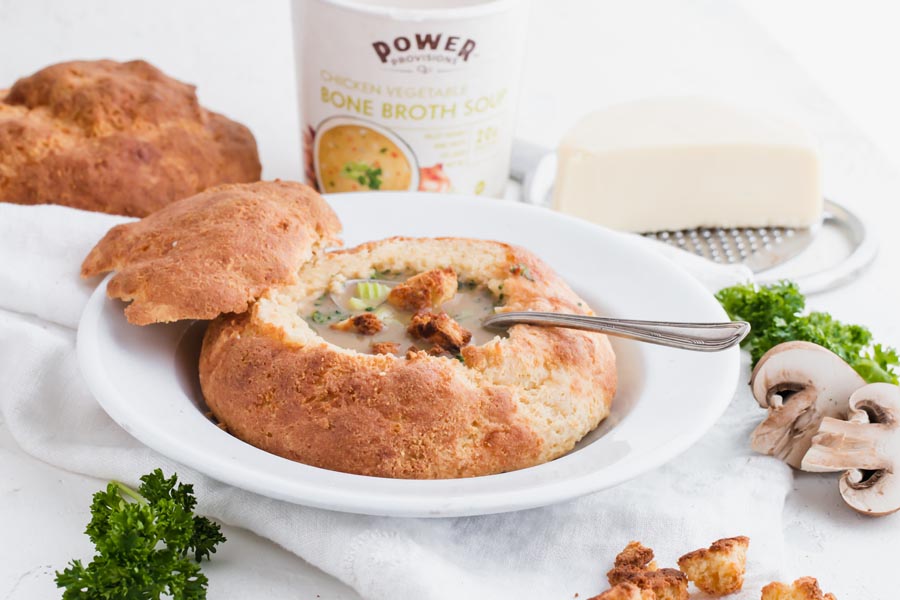
I’ve made these dozens of times now, and the biggest lesson I learned is getting the dough thick enough to scoop without cracking. The combo of mozzarella, cream cheese, and almond flour creates a shell that’s sturdy on the outside but soft enough to tear off and dip. That’s what you want. Rip a piece from the edge and drag it through your soup. The texture reminds me of a soft pretzel roll more than traditional bread, and I think that’s actually better for holding soup.
The leavening combo matters more than most people realize. I use both baking powder and baking soda, and the buttermilk reacts with the baking soda to give you the air pockets that keep the bread light instead of dense. I also throw ice cubes into the oven while they bake, which creates steam that helps the dough rise even more. Two tricks that took me a while to figure out, and I go over both in detail below.
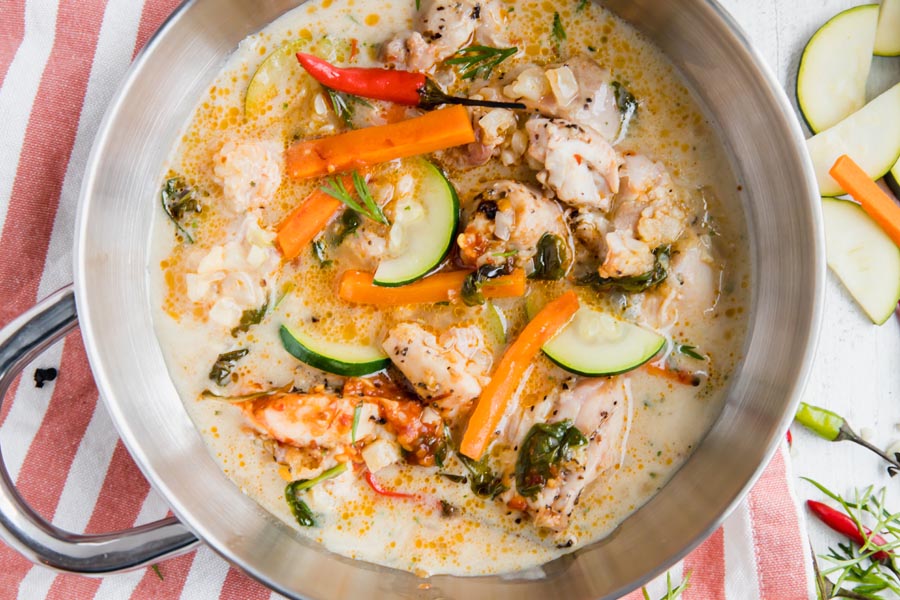
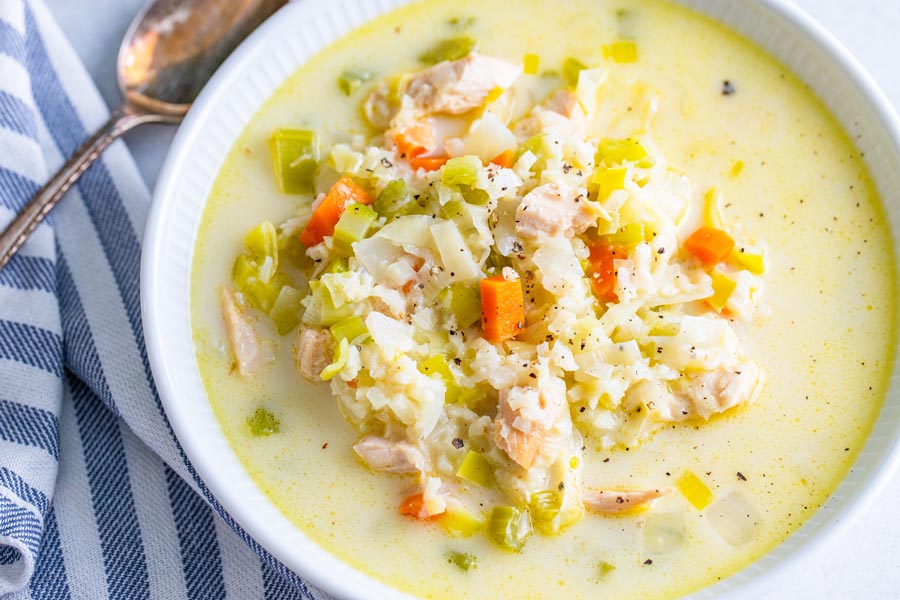
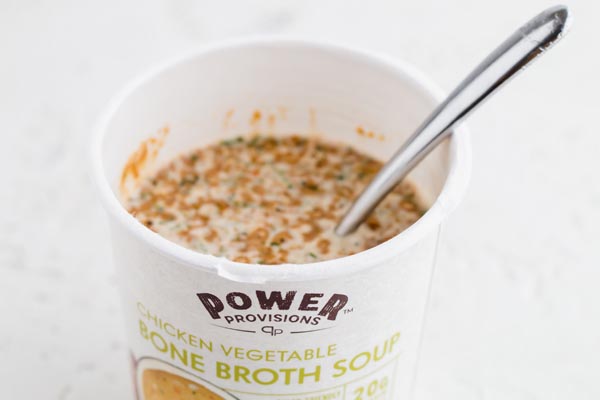
For soups, I go with thick ones that won’t soak through too fast. My spicy Thai chicken soup pairs really well here, and so does any thick chili or stew you already have in the fridge. If you’re into bowl-style meals, my pizza bowl and chicken alfredo lasagna bowls use the same eat-the-container concept.
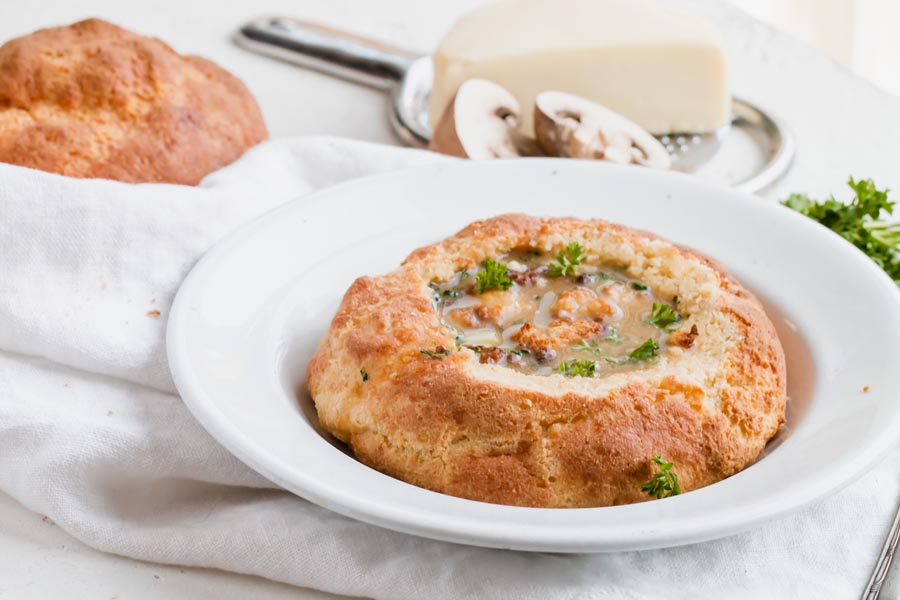
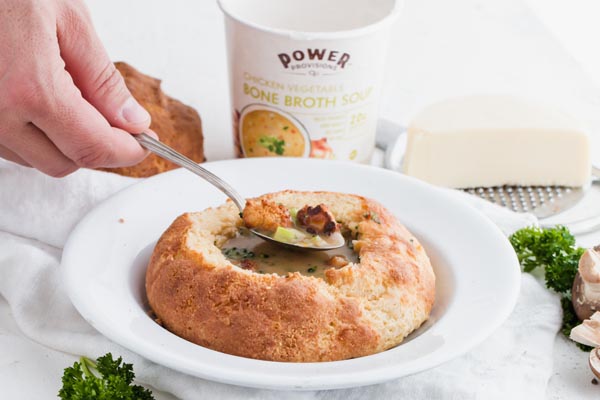
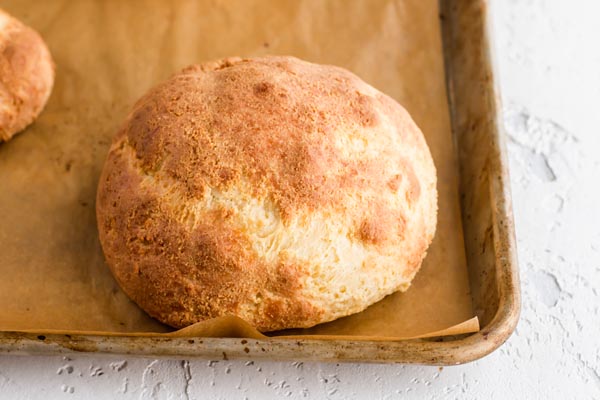
What I love about this dough is how forgiving it is. If your balls aren’t perfectly round, they still bake up fine. I’ve also pressed dough over upside-down oven-safe ramekins for a more uniform shape, and that works well if you want something closer to a Panera look. The outside gets this golden crust that’s firm enough to hold 8-10 ounces of soup without leaking. I’ve tested it with everything from thin broths to thick chili. One thing I started doing: after I scoop out the center, I put the hollow shells back in the oven at 375 for about 5 minutes. That second bake dries out the inside and gives you a crispier surface that resists moisture longer.
These also pair great with a grilled cheese for a low carb lunch combo. Half-filled soup in one hand, grilled cheese in the other. That’s a solid lunch. I’ve served these at a weekend get-together too. I let everyone pick their soup and scoop their own. My family requests these when soup season hits.
Explore hundreds of keto recipe videos with step-by-step instructions, tips, and tricks to make keto easy.
Ingredients
 3 cups shredded mozzarella cheese
 -
4 ounces cream cheese
-
2 1/4 cups almond flour
-
1/4 cup coconut flour
-
2 eggs
-
1/4 cup buttermilk or plain low-carb yogurt
-
1 teaspoon baking soda
-
1/2 teaspoon baking powder
-
1/2 teaspoon salt
Step by Step Instructions
Step by Step Instructions
Preheat oven
Preheat oven to 400 degrees.

Melt cheeses
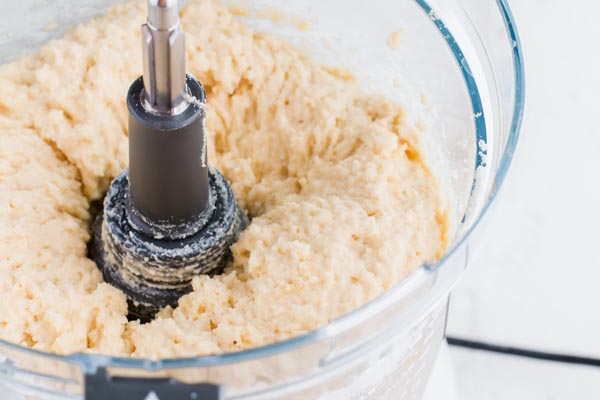
Add shredded mozzarella cheese and cream cheese to a small glass bowl. Microwave at 1 minute intervals until the cheese is melted and cream cheese has softened. If you don’t want to use a microwave, melt the shredded cheese over the stovetop using a non-stick skillet and use softened cream cheese.

Make dough
Add all ingredients, including melted cheese to a food processor. Pulse until combined. You can also combine the ingredients using an electric mixer, but the food processor works better.

Form balls
Wet your hands with water or oil so the dough doesn’t stick. Form four even sized dough balls and place, evenly apart, on a parchment lined baking tray.

Bake them
Bake at 400 degrees Fahrenheit for 15-20 minutes or until hardened on the outside and slightly firm on the inside. Let cool for 3-5 minutes before eating.

Scoop out
Cut off the top of the bread bowl and carve out some of the bread inside to make room for the soup.

Fill your bowls
Pour soup into bread bowl.

Nutrition disclaimer
The nutrition information provided is an estimate and is for informational purposes only. I am a Doctor of Pharmacy (Pharm.D.); however, this content is not intended to be a substitute for professional medical advice, diagnosis, or treatment. Always consult your physician or other qualified health provider before making any lifestyle changes or beginning a new nutrition program.
Your Macros. Your Recipes. Calculated in 60 Seconds.
Get personalized keto macros and instantly see which recipes fit your targets. No more guessing what to eat.
Get My Macros + Recipes →Frequently Asked Questions
Can I substitute almond flour with another type of flour?
I've tested this with sunflower seed flour and it works, though the color comes out slightly greener (that's normal with sunflower seed flour and baking soda). The texture was close enough that my family didn't notice. I haven't tried coconut flour as a full swap because it absorbs way too much liquid, but blending half almond flour with half sunflower seed flour gave me good results when I needed a nut-free version.
What can I use instead of cream cheese?
I've made these with vegan cream cheese when a friend with a dairy sensitivity came over, and they held together fine. The key is making sure your substitute has a thick consistency, not runny. I've also used the solid part from a refrigerated can of coconut cream. Just scoop out the firm layer on top and skip the liquid at the bottom. If it's too thin, the dough gets sticky and won't shape into balls.
How do I prevent the bowl from getting soggy?
I've learned a few things from making these over and over. First, let the rolls cool completely before scooping out the center. If they're still warm inside, the bread is too soft to resist moisture. Second, I put the scooped-out shells back in the oven at 375 for 5 minutes. That second bake dries the inside surface and buys you more time before soup soaks through. Third, thick soups are your friend. I avoid thin broths because they soak through in minutes. And I never pour the soup in until I'm about to eat. If you're meal prepping, keep the soup and the rolls separate until it's time.
Can I freeze these after baking?
I freeze these all the time. Let them cool completely, wrap each one tightly in plastic wrap, then put them in a freezer bag. They keep for about a month. When I want one, I pull it out the night before and let it thaw in the fridge, then reheat in the oven at 350 for 5-7 minutes. I skip the microwave for reheating because it makes them rubbery.
Can I use coconut milk instead of buttermilk?
I haven't tested coconut milk as a straight swap, and my concern is that it's not acidic enough to react with the baking soda. The whole point of buttermilk here is the acid, which gives you lift. If you want to try it, I'd add 1/4 teaspoon of apple cider vinegar to get that reaction going. My go-to buttermilk substitute is 1/4 cup heavy whipping cream mixed with 1/4 teaspoon apple cider vinegar. I've recommended this to readers who asked in the comments and they've had good results. Plain yogurt works too (I use about the same amount).
Can I make these without a food processor?
I've done it with an electric hand mixer and it works, just takes a little longer. The cheese clumps more and you'll probably need to stop and scrape the sides a few times. I've also seen readers knead it by hand after microwaving the cheese, and that works if you move fast before the cheese cools and stiffens up. The dough is more forgiving than it looks.
How long do these last at room temperature vs in the fridge?
I keep mine on the counter in a sealed container for 2-3 days. After that I move them to the fridge where they last about 5 days. The texture firms up a bit when refrigerated, so I pop them in the oven at 350 for a few minutes to warm through before scooping and filling. My cottage cheese pizza bowl reheats the same way if you're looking for another make-ahead option.
Can I shape these using a bowl mold instead of hand-rolling?
I've done it both ways. For the mold method, I press the dough over the outside of an upside-down oven-safe ramekin or small bowl, then bake it that way. You get a more uniform shape and a deeper cavity for soup. The trick is greasing the outside of the mold really well so the dough releases cleanly after baking. I still prefer hand-rolling most of the time because it's faster and I like the rustic look, but the mold method is worth trying if you want a more polished result.
Can I use this dough for dinner rolls instead?
Same dough, just skip the scooping step. I shape them into smaller balls (about half the size) and bake for 12-14 minutes instead of the full 15-20. They come out like soft fathead dinner rolls. I've served these alongside soup in regular bowls when I didn't feel like doing the whole scoop-and-fill routine.


The coconut flour is doing more work than you'd think here. Every other fathead bread bowl I've tried goes soft once you add anything hot, but this held up through an entire bowl of chili. That quarter cup is the whole difference.
I tested this without it once when I ran low, and the bowl completely lost its shape midway through the soup. The almond flour handles the bulk but coconut flour is what keeps the walls stiff against moisture.
Makes sense now, thanks. Good to know before I run out.
I had basically given up on soup night since going keto. This brought it back.
That glossy, almost stretchy pull when you lift the dough out tells you it came together right. Let the melted cheese cool about 2 minutes before adding to the processor. Keeps the fat from separating. Warmer dough was a mess, I was constantly rewetting my hands and the walls came out uneven. Let it settle first and shaping takes maybe a minute. The bowl holds without cracking when you hollow it.
The cheese cooling is the step I skip when I'm rushing and I always regret it, Morgan. The fat separates and the dough feels wrong before you've even started shaping. You can feel it.
7.9 net carbs and that's WITH clam chowder in it. Brushed it with garlic butter and flaky salt the last 5 minutes. Annie's base is built for exactly this kind of thing. Crust went from good to something you eat around the rim before the soup's even gone.
Garlic butter and flaky salt in the last 5 minutes. I'm doing this to the next batch and adding it to the notes. And 7.9g with actual chowder is still the number I use when someone tells me keto can't do real comfort food.
Made these last weekend to go with chili and honestly they were so good, but mine got a little soft on the bottom once I ladled in the soup. I cooled them for a good 20 minutes before filling. Would pre-baking on a wire rack help or do I just need to go longer than that 20-minute mark? Trying to fix it before I make them for a crowd.
20 minutes is not long enough. I wait until they are fully room temp, closer to 45 minutes to an hour. After you scoop out the center, put them back in at 350 for 5 minutes, that dries out the inside and the soggy bottom problem goes away.
Had no idea you could put them back in after scooping. Trying that this weekend before I make a whole batch for the crowd.
34g protein in a bread bowl. checked the numbers twice.
Three cups of mozzarella will do that. The almond flour adds more than most people expect too.
My son critiques every keto substitute I put in front of him. He ate the whole bread bowl, crust and all, without a word. In this house, that's the highest praise.
I tested this dough so many times. Nobody can tell it's not real.
My son kept poking at it before dinner like he was suspicious, but once I filled it with chili he just quietly ate the whole thing. That's basically a rave review from a 10-year-old. I was worried the dough would get soggy fast but it held together all the way to the bottom.
Suspicious first, then clean bowl.
Made these for a soup night a few weeks ago and watched two guests who don't do keto scrape the insides clean once the chili was gone.
Chili is the worst-case scenario for a bread bowl (hot liquid sitting there the whole meal). And yours held. Non-keto guests scraping the inside is kind of the highest bar.
I was skeptical the fathead dough would hold up under chili without going soggy, but after 18 minutes at 400 it came out dense enough to use as an actual bowl and I ate the whole thing, dough included.
Chili is the worst-case scenario, hot liquid sitting there the entire meal. And you ate the whole bowl including the dough. That's exactly what I was going for with this one.
I've tried making bread bowls with other fathead recipes before and they always collapsed the second I added anything warm to them, which is why I put this one off for probably six months. Finally made it on a rainy Sunday with a batch of chili. The dough comes out of the food processor actually stiff, not sticky, and it bakes up with a solid golden shell that didn't soften even after the chili sat in it for 20 minutes. I think it's the buttermilk (I used plain yogurt) and the coconut flour combination that makes it hold its shape. Every other version I've made was more of a 'bowl adjacent' situation where you eat the soup first and then kind of have a soggy pile left. This one you can actually eat the bread with the soup together the way you're supposed to. The 34g of protein per serving caught me off guard too. Solid lunch.
'Bowl adjacent' is exactly right. That's every other fathead version I've tried too. And the yogurt swap works, sometimes I actually prefer it because you get a little more tang in the crust.
Tip if you struggled with the hollowing: cool them completely first. Did it warm on my first batch and the bread just compressed. Fully cooled, scooped clean, no soggy bottom.
Yes, completely. Warm fathead compresses instead of scoops. I wait at least 30 minutes before I go near them.
My son grabbed his and started eating it like a dinner roll before I even ladled the chili in. That pretty much says everything. Ours got a little soft at the bottom after the soup sat for a few minutes, which is why I'm giving it 4 stars. But my kid didn't think twice about the bread, so I'll keep making it.
Ha, your son eating it before the chili even went in is the best review. For the soft bottom - did you let them cool completely before hollowing them out? That's usually the culprit. Warm bread doesn't hold up to moisture.
My husband, who has complained about every keto substitute I have ever put in front of him, asked me to make these bread bowls again before we even finished dinner.
Ha, that's the one. The husband who complains about every keto substitute asking for more before dinner's done. Nothing tops that.
Made the full batch Sunday and used them all week with chili. They held their shape for four days without going soggy, which I wasn't expecting, and now I can't imagine meal prepping without them.
The mozzarella is what keeps them from collapsing. Mine hold about 5 days in the fridge. Chili was a good call.